My littlest one (a twenty-two-month-old boy) is into touching and exploring everything these days. And what toddler isn’t? His favorite books are all of the Usborne “touchy-feely” books from the That’s Not My… series. I’ve seen many DIY sensory boards floating around Pinterest, so I decided to make one that I thought seemed especially fun, except I decided to add a little twist of my own. I really liked the design I saw on Motherhood and Other Adventures because I loved the idea of using the flip-top lids from baby wipes containers—genius! I always give him the package of wipes to keep him entertained when I’m changing him, so I knew he’d love it.


I decided to create my own version of this sensory toy to make it a little more unique. I mounted the flip-top lids and textures to individual pieces of birch plywood and then put them all into a wooden box I purchased at a craft store. And I was right—this type of sensory experience proved to be a hit for my little man! It was much more interactive, and he had a blast searching to find his favorite textures and pictures, putting them all in the box, dumping them out and putting them all back again. Those of you who have toddlers know that filling up a box and dumping it out provides endless entertainment for them!


The best part about this project is that you can probably find most of the items you need just lying around your house! Here are the simple steps I took to make this DIY sensory box.
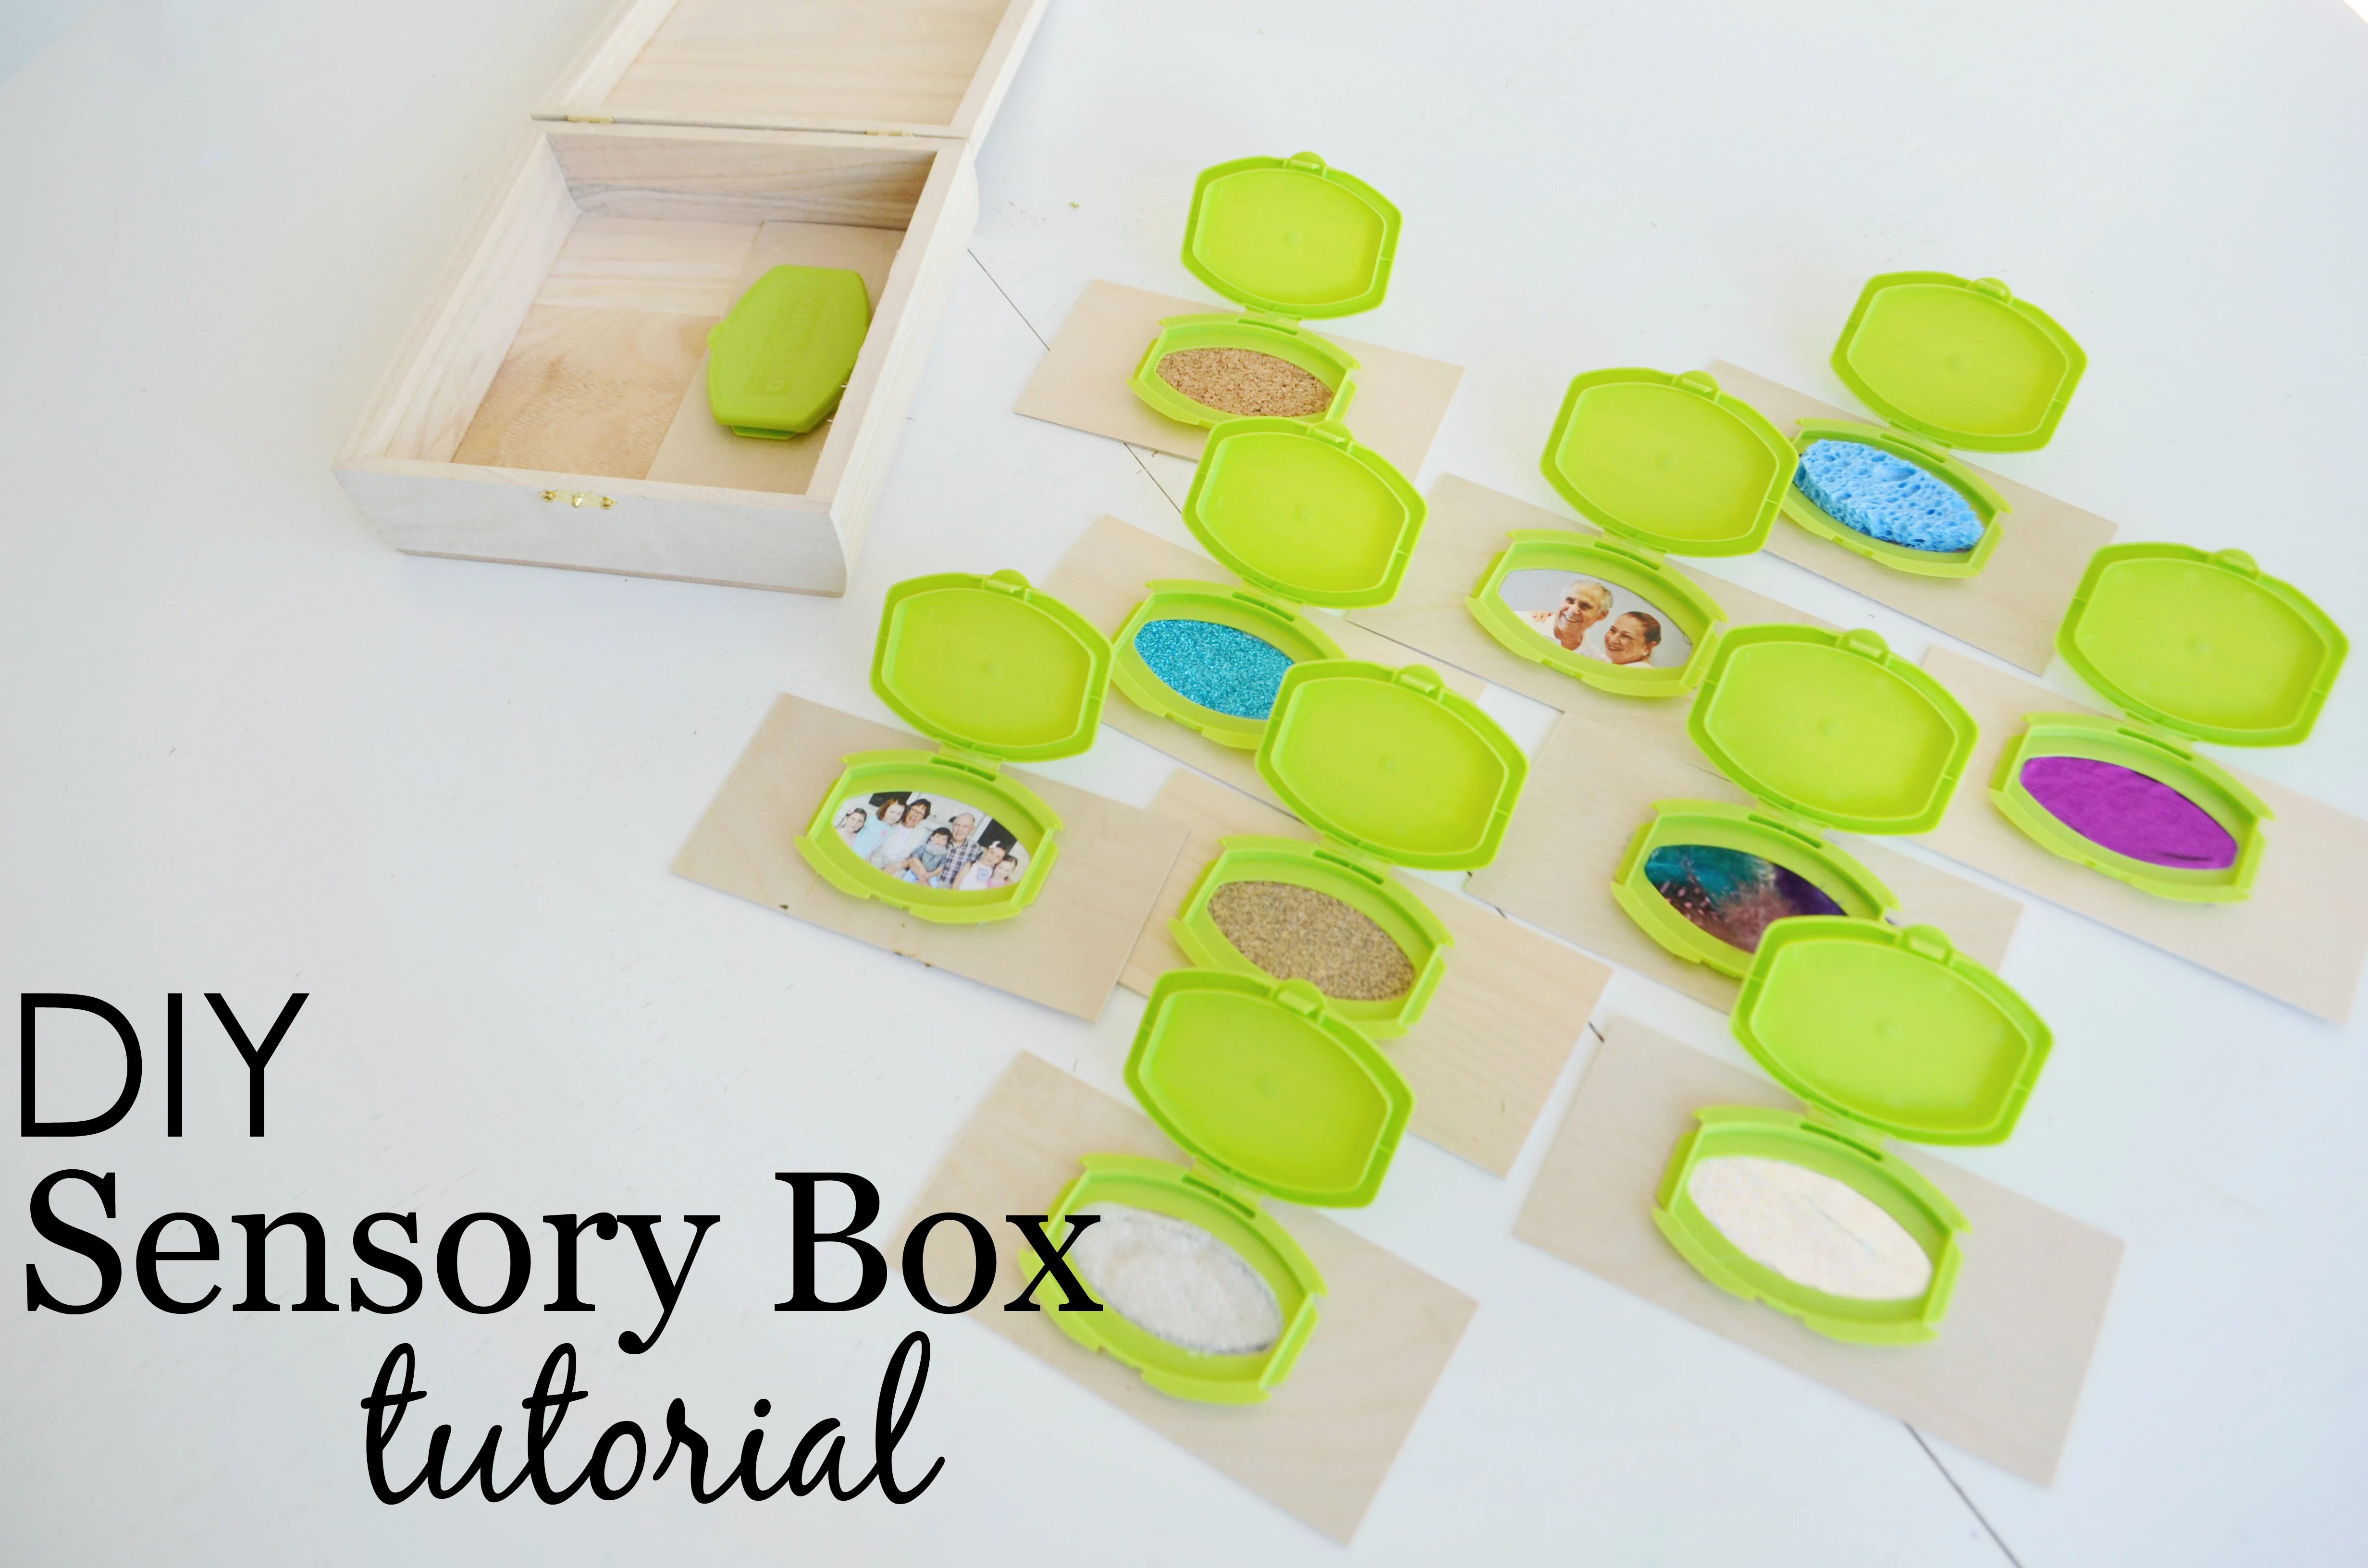
Materials: flip-top lids from wipes containers, craft pieces of birch plywood (found in the wood project section of the craft store), wooden box, sharpie, scissors, hot glue gun, velcro
Gather all of your materials that you’ll need to make your sensory box, including all of the textures. I searched my house from top to bottom and found a bunch of awesome textures to use! Some of my favorites are bubble wrap, shiny fabric, iridescent wrapping paper, dried moss, burlap, sandpaper, artificial grass, feathers, glittered cardstock, felt, cork and a sponge, just to name a few. I also printed out some of my favorite family photos because I wanted to incorporate both textures and pictures into my sensory box.


Trace the shape of the opening of the lid (I used Kirkland’s brand, but any will do) on the back side of each texture/photo. Then cut around the outside of the line you drew.


Glue (or velcro) your texture or picture onto the center of a piece of your birch plywood.


Apply hot glue to the back side of the flip-top lid from the wipes container.


Glue the lid to the piece of birch plywood so that your texture fits inside the hole of the lid.


Repeat this process with all of your remaining textures and pictures until you have a nice variety.

Present this box of fun to your baby, and enjoy watching him discover the textures and pictures inside!

Have you made a sensory toy for your little one? What are your favorite household items to use as textures?
Editor’s Note: This project is best for kids who have stopped putting things in their mouths, but please make sure all items are secure to prevent choking hazards. The toy should always be used with adult supervision.