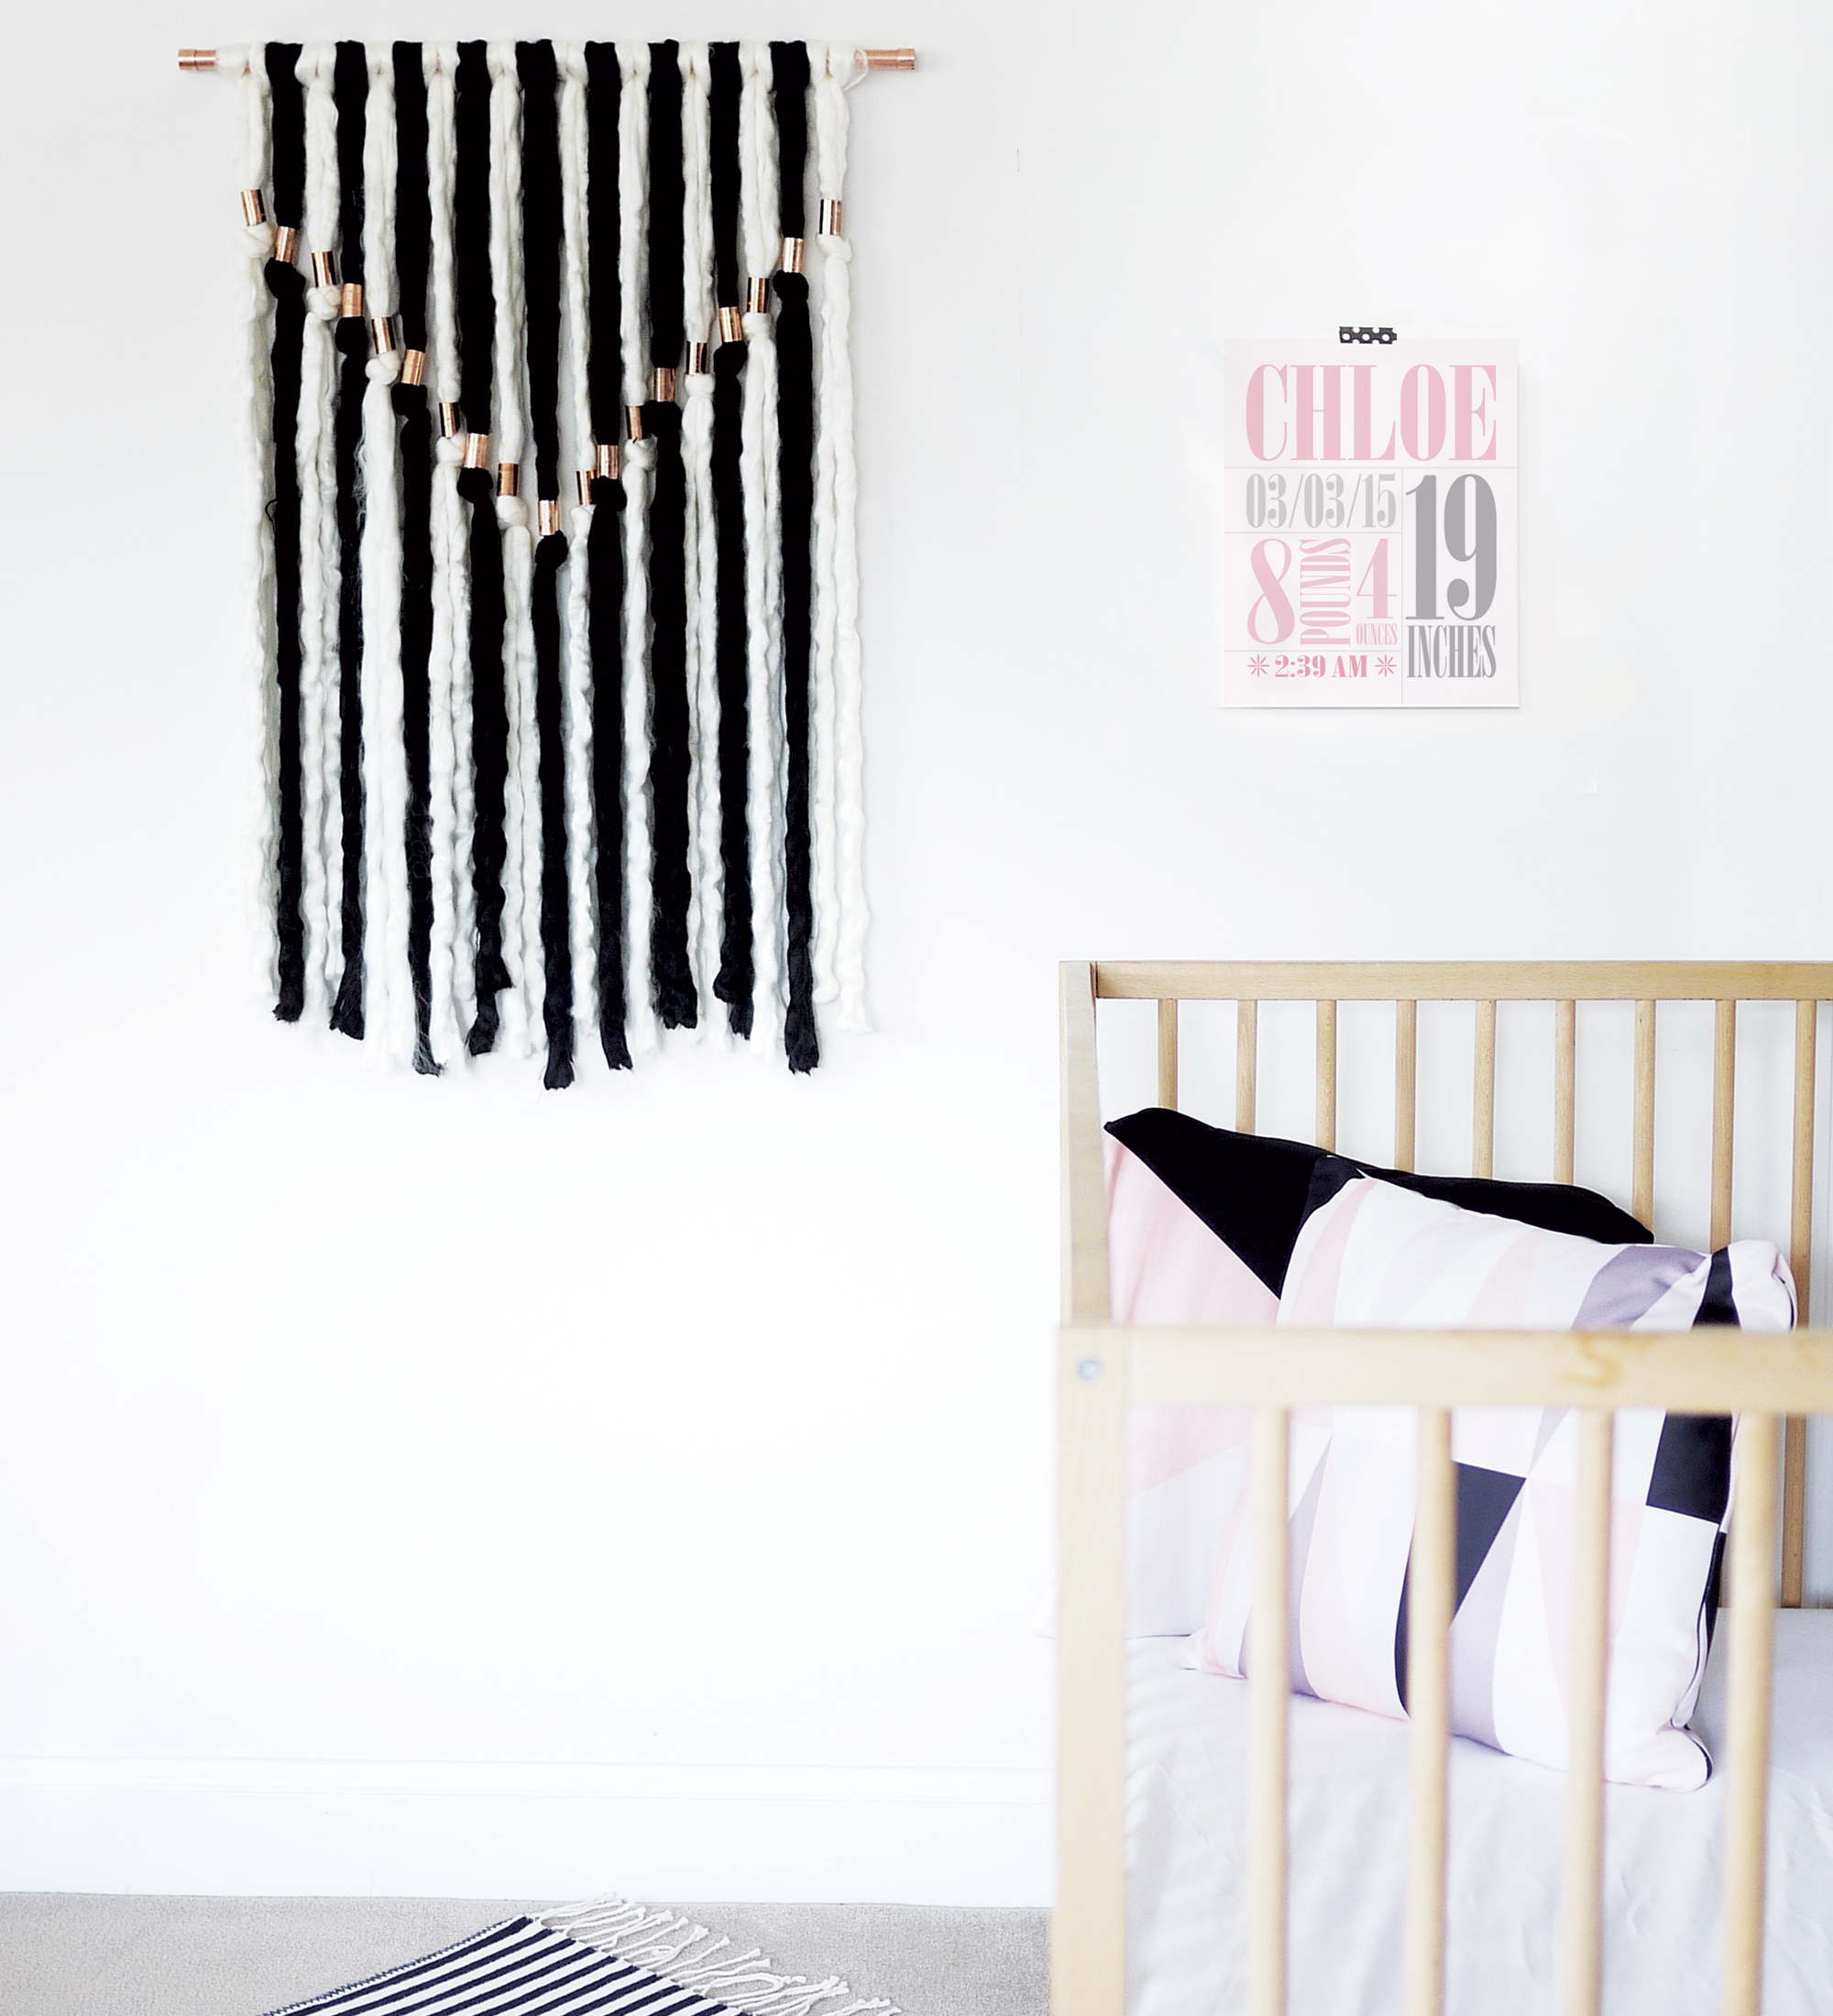
I believe spring cleaning should come in January. Once you put away all of your holiday decorations, the house usually feels a little empty, less cozy and just a tad boring. So why not use this time of year to not only clean up but also change some of your home decor as well? Maybe adding new pillowcases to the couch is the solution. Or perhaps, moving a couple of vases around the house will do the trick. But how about the nursery? To help you change things up in baby’s space, we put together a very simple and easy DIY wall hanging using some copper hardware and chunky yarn in the colors black and white.

Materials: copper pipe, copper couplings, copper plugs, chunky yarn in two colors and scissors

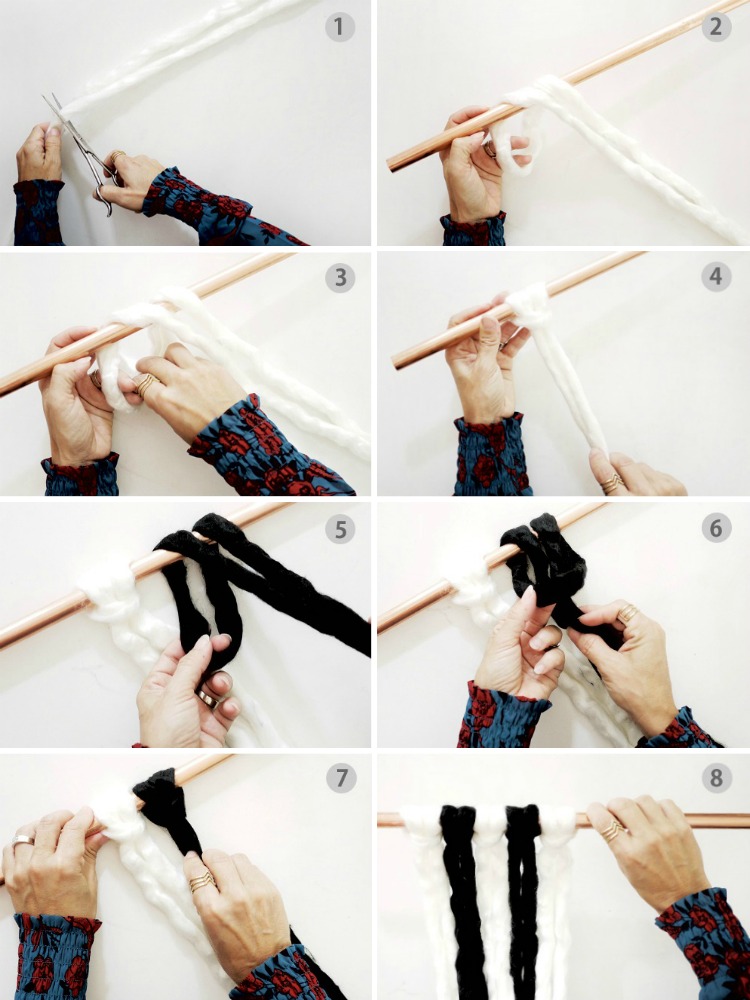
Start by cutting your yarn pieces all the same length—cut ten pieces of the white yarn and nine pieces of the black yarn. Tie the first piece of white yarn to the copper pipe by following steps 2-4 pictured below. Continue to add pieces of yarn—alternating between black and white—following steps 5-8.
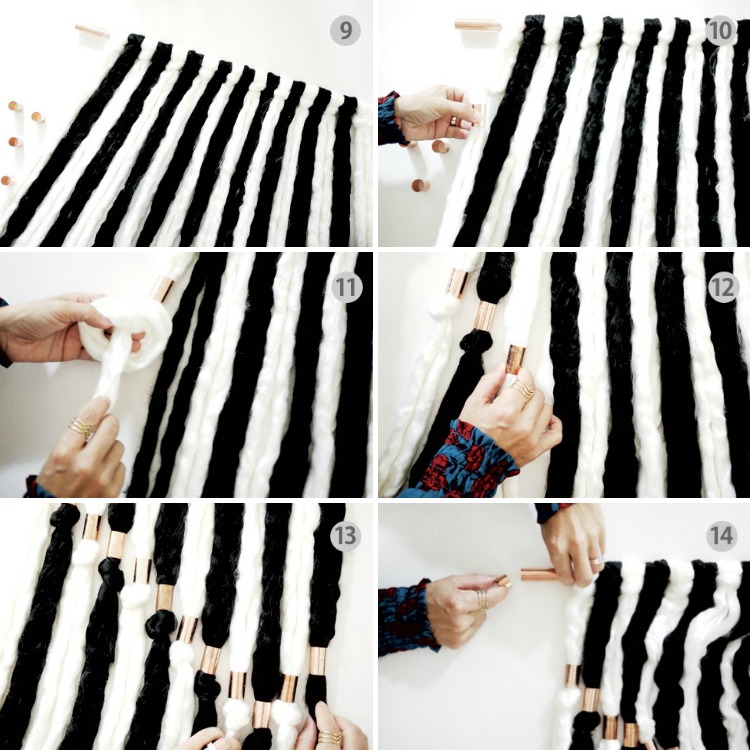
Once you’ve tied all the pieces of yarn to the copper pipe, thread the first copper coupling onto the first yarn piece. Tie a knot after each copper coupling to secure it in place as shown in step 11. Make sure to line up each copper coupling about half an inch below the previous one to create the V-shaped pattern.
Once you’ve added the copper coupling to the tenth piece of yarn, start lining up the couplings moving upwards. To finish, insert the two copper plugs to the ends of the copper pipe, and voila! Hang your DIY wall hanging up in the nursery and enjoy!
Do you find yourself rearranging decor and DIYing once the holiday season is over? Have you ever made a DIY wall hanging?






Comments