How often has this happened to you…you spot something you love, but it’s just more than you want to spend or it has one feature that you just don’t think will work in your decor. Project Nursery reader Holly had just such a moment, but she and her husband actually recreated the item themselves to fit their needs and their budget. Thanks, Holly, for sharing!
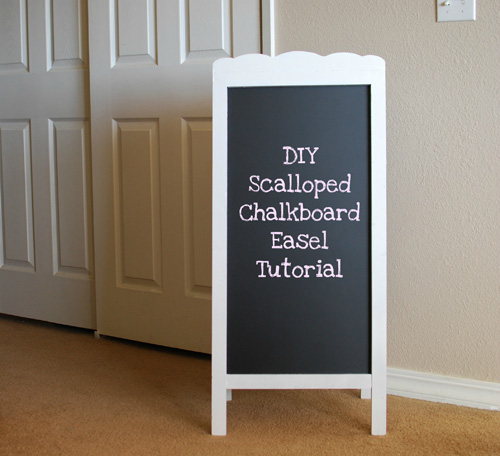
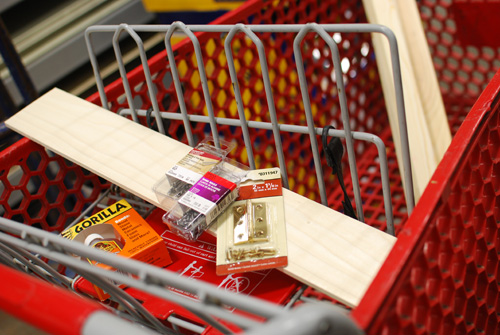
As I shopped around for the perfect easel for my little girls, I found just one that truly caught my eye. It was from Restoration Hardware Baby & Child, and it was gorgeous. It was different, and it was expensive! Once I saw the price, I knew it might not be the best option for us, but I really wanted it (okay, so I needed it!). But I didn’t think their distressed finish was going to work for our room, and I knew the price tag wasn’t going to work either, so there began the project!
My husband and I have resanded, repainted and refinished plenty of things, but truly building something was going to be a first for us. Or should I say him, because he did all the hard work. Here is my husband’s take on a Scalloped Chalkboard Easel that cost us just $40 out of pocket (assuming you have the tools). Enjoy!
Supplies:
– (4) 1”x2”x8′ wood boards
– (1) 1/4”x4”x2′ poplar craft board (for scalloped trim)
– (1) 4’x8’ sheet of 1/8 tempered hardboard, masonite (this will serve as the chalkboard)
– box 2” 6D sized finishing nails
– box 5/8”x18 wire nails
– pack of two 2” x 1 3/8” brass hinges
– Gorilla Glue (or your choice of wood glue)
– Your choice of paint, primers, brushes—just don’t forget the chalkboard paint!
Tools:
– Band Saw
– Hammer
1. You can begin by collecting the supplies; we went to Lowe’s, but any hardware store would do. While you’re there, you can have them cut the tempered hardboard (masonite) for you. The chalkboard’s surface when finished is 15”x30”, so the masonite itself needs to be cut to 16”x31” so you have some overlap to nail it to the frames when they are finished.
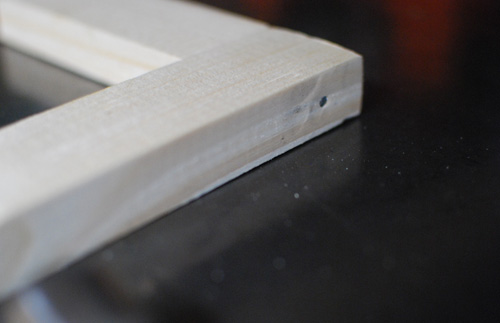
2. Next, cut all the 1”x2” boards to the proper lengths. These will serve as the frame of the easel. You’ll need four long legs cut to 38”, and four short pieces cut to 15”. Now start assembling the frames. I used one nail per joint and Gorilla glue. The nails will keep everything in place while the glue sets. Gorilla glue is sandable when dry so be sure to sand off any excess when it is dry. Make sure you build the frames identical to each other and that they are built with the 15” x 30” chalkboard surface in mind. The gorilla glue works best when left to cure for 24 hours or more, so while you’re waiting, you can work on some of the other steps.
3. Paint the two pieces of 16” x 31” masonite you had pre-cut at the hardware store with chalkboard paint. We chose to use masonite for the chalkboard portion so that it would have a smooth surface instead of the grain of wood.
4. Next, complete the scalloped piece for the top. I drew this onto some thick poster board and used that as a template to trace it onto the wood. Don’t cut any wood until your template is exactly the way you want it! Then, use a band saw to cut out the trim. You could also check the hardware store and see what pre-made trim they have available to use in place of the scallops if you prefer. If your frames have been curing for 24 hours, go ahead and use a little gorilla glue to secure the trim piece to your frame. Use a couple of smaller nails to hold it in place, and let this cure for 24 hours again.
5. Once your easel frame pieces have set, you can go ahead and paint them. We used white paint and simple foam brushes. Once your frames are dry, you’re ready for the final assembly!
6. Take the smallest nails you bought from the hardware store and nail the painted masonite to the back of each of your frames. I laid my dry frames on the carpet to protect the front surface of them while driving in enough nails to secure the masonite to the frames. This also adds a good amount of rigidity to the frame pieces.
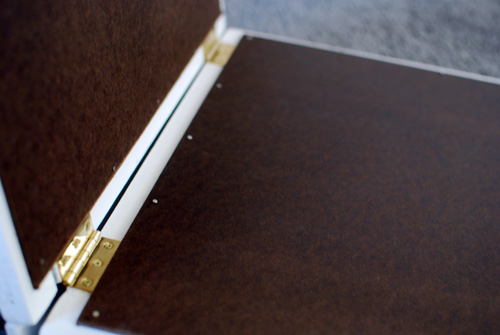
7. The final part is to simply place your hinges on the back of both of the frames, and screw them in! Once the hinges are properly placed and installed, you’re finished!
Note: This is one of our first wood working projects, so we are by no means experts. If you are experienced with woodworking, please use this as a general guideline and feel free to add your own touch!
Check out more of Holly and her family’s projects on her blog.






Comments
Shannon
I’m with you Holly! I love Restoration Hardware but don’t like to pay those prices either. I think your project turned out great and I’d love to try something similar for our playroom. Better Homes and Gardens has a great Lego play tower with storage idea, for all those little Lego pieces, I’m making as my next project. Thanks for inspiring me!
Holly
Thanks, Shannon! I’m happy to hear I’ve inspired you, good luck on your project! I’m sure it will be great! :)
Anne
That easel/chalkboard is just gorgeous! I love it. I would love to do some woodworking projects, too, but my husband doesn’t and he’s not keen about investing on some tools, and I don’t really think I can do everything by myself. Sigh.
Eulalia
You and your hubby did an awesome job. DIY projects like this put all those OVERPRICED, LOW-QUALITY products we see in stores and commercial establishments to shame! Hpmh!
Tammy
Just wanted to add that you can make your own chalkboard paint in any color you like. Here’s the link to Martha Stewart’s DIY custom color CB paint….. http://www.marthastewart.com/271574/custom-color-chalkboard-paint
You’re welcome! ; )
Holly
Thanks for the kind words everyone! Oh and @Anne–if you happen to take the task on check craiglist for the band saw, we found some really affordable options on there! There were plenty for $50 or under…so even with buying a tool you could still save some money :)
Tamara
If you are going to complain about grammer please check your fist before posting a comment.