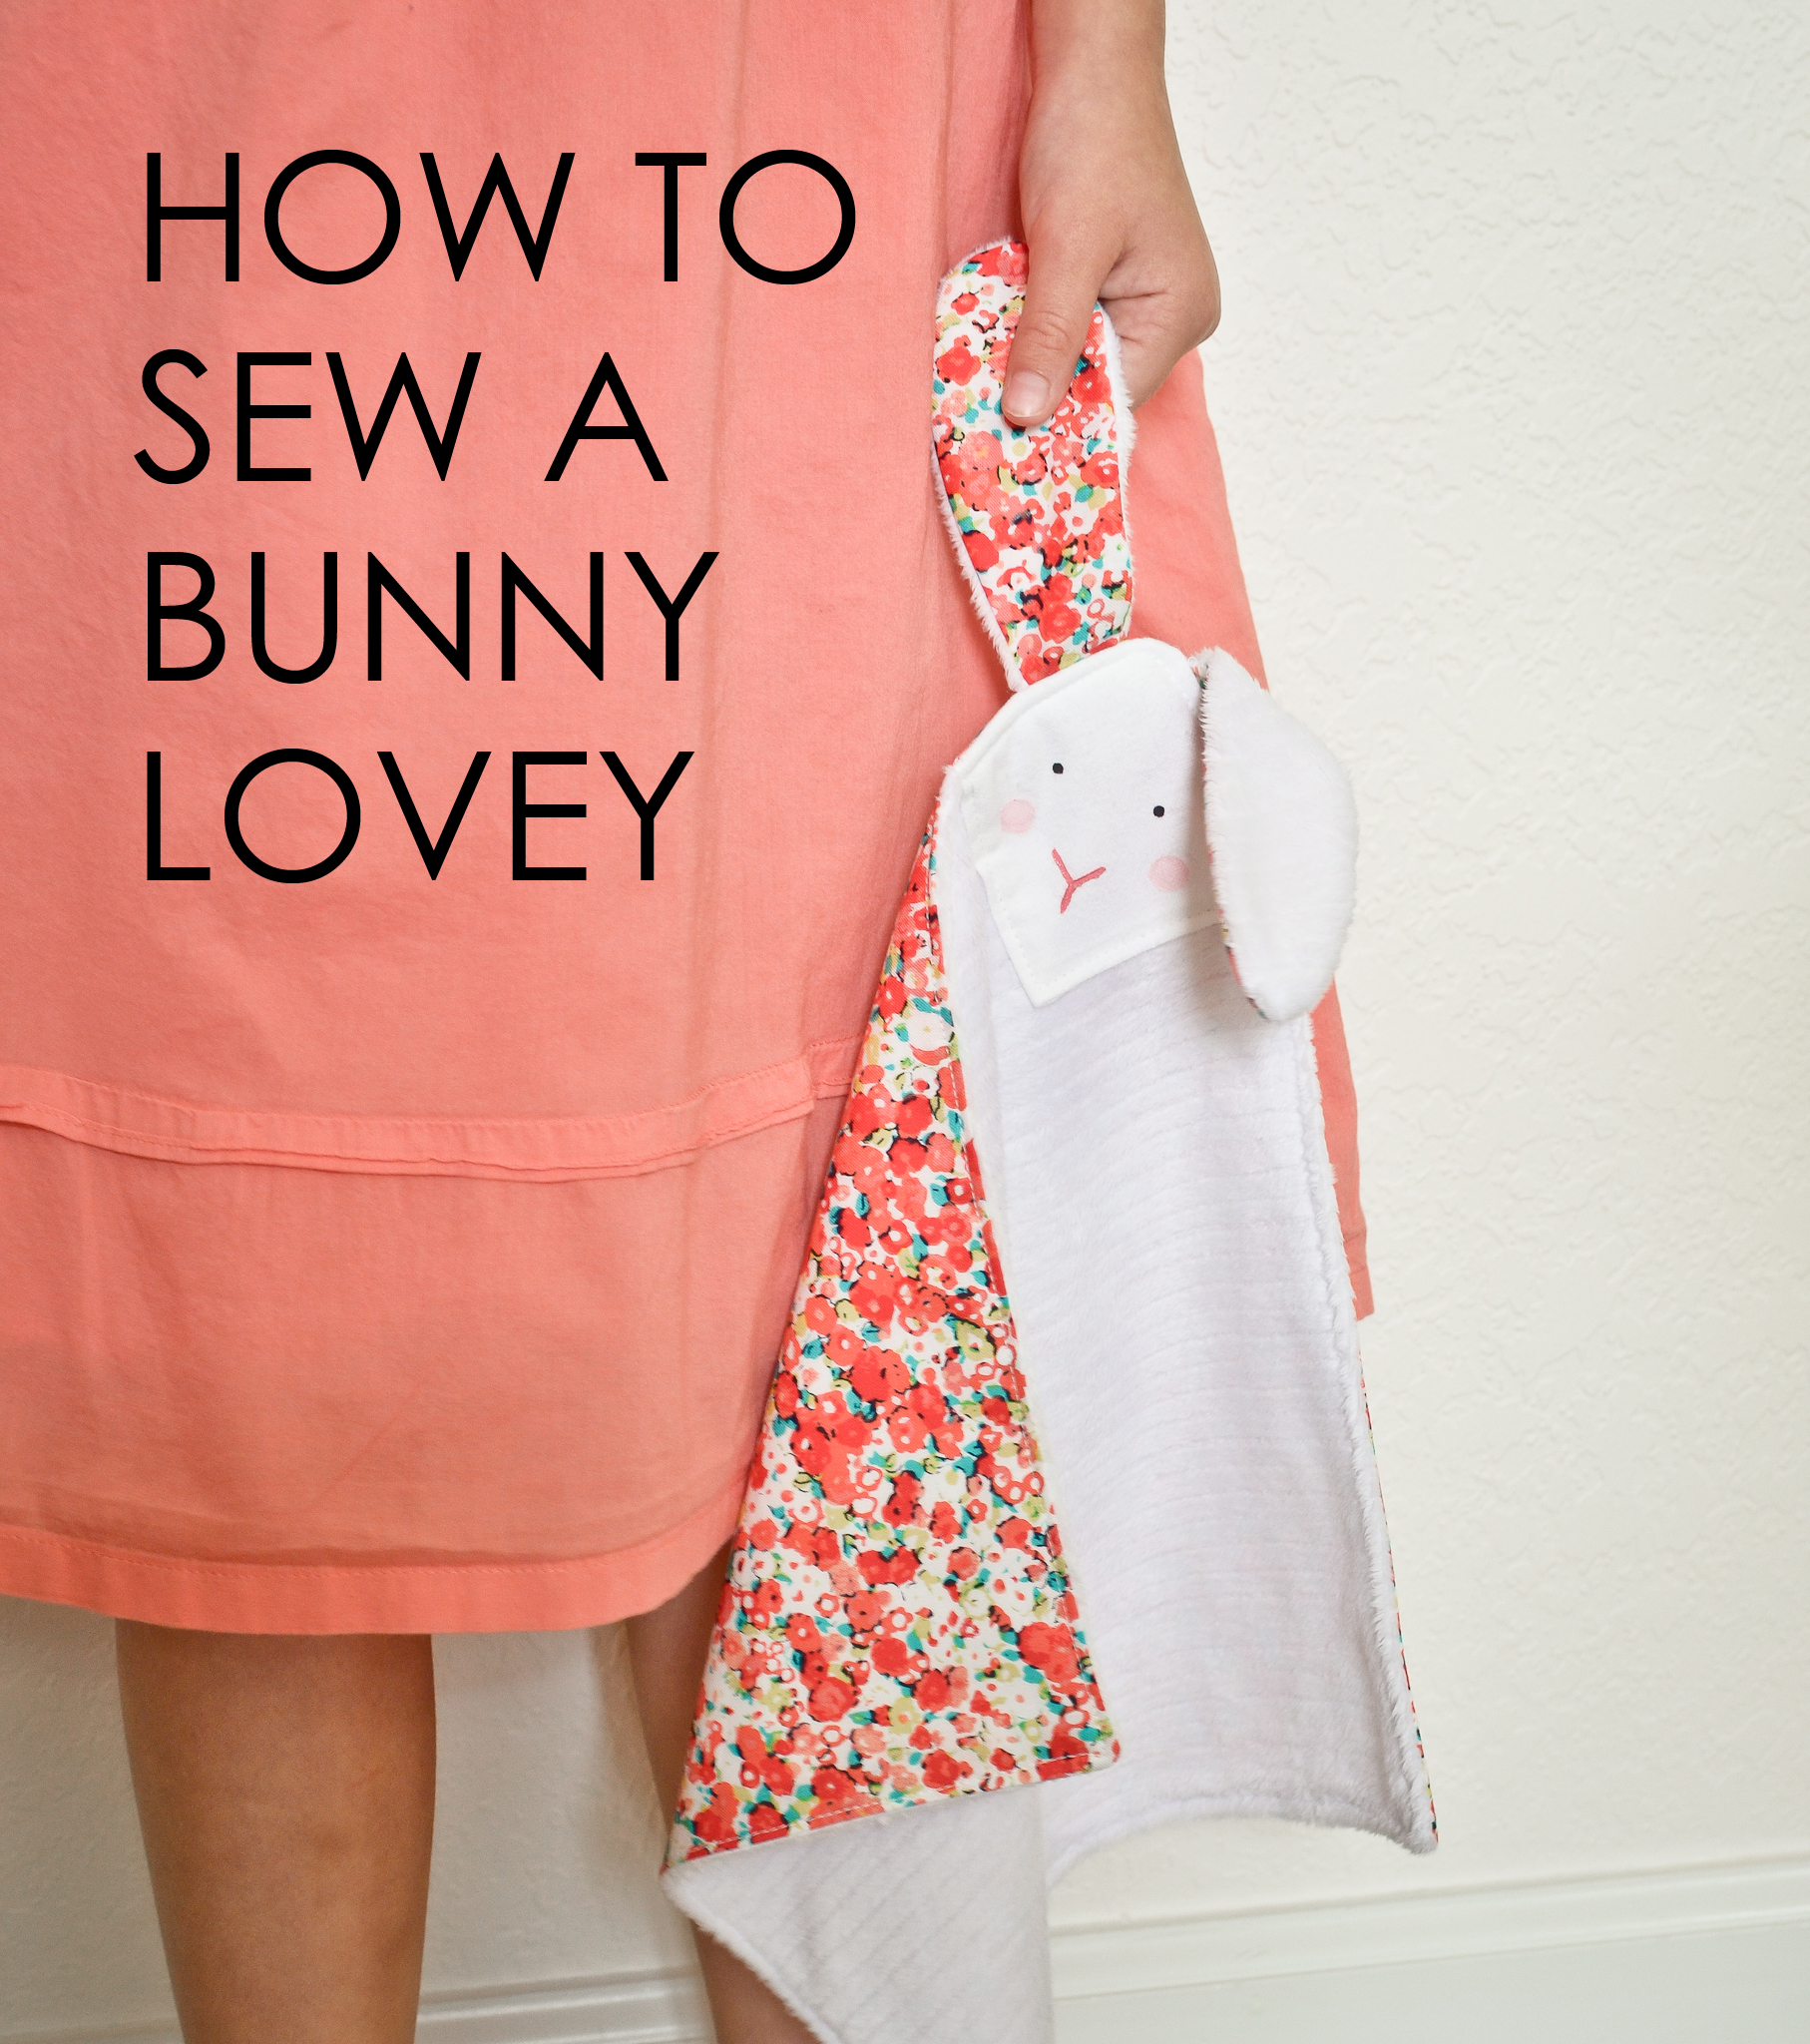
A blanket or special plush toy is a security staple of most childhoods, and experts agree that attachment to these objects is beneficial in soothing toddler anxiety. In recent years, smaller “lovey” blankets have gained popularity because they’re easy to take along while still providing the child with a sense of comfort. At just 12″ square, this DIY bunny lovey is totally portable and the best of both worlds—it’s a soft, snuggly blanket with some big-eared personality. Read on to learn how you can sew one yourself!
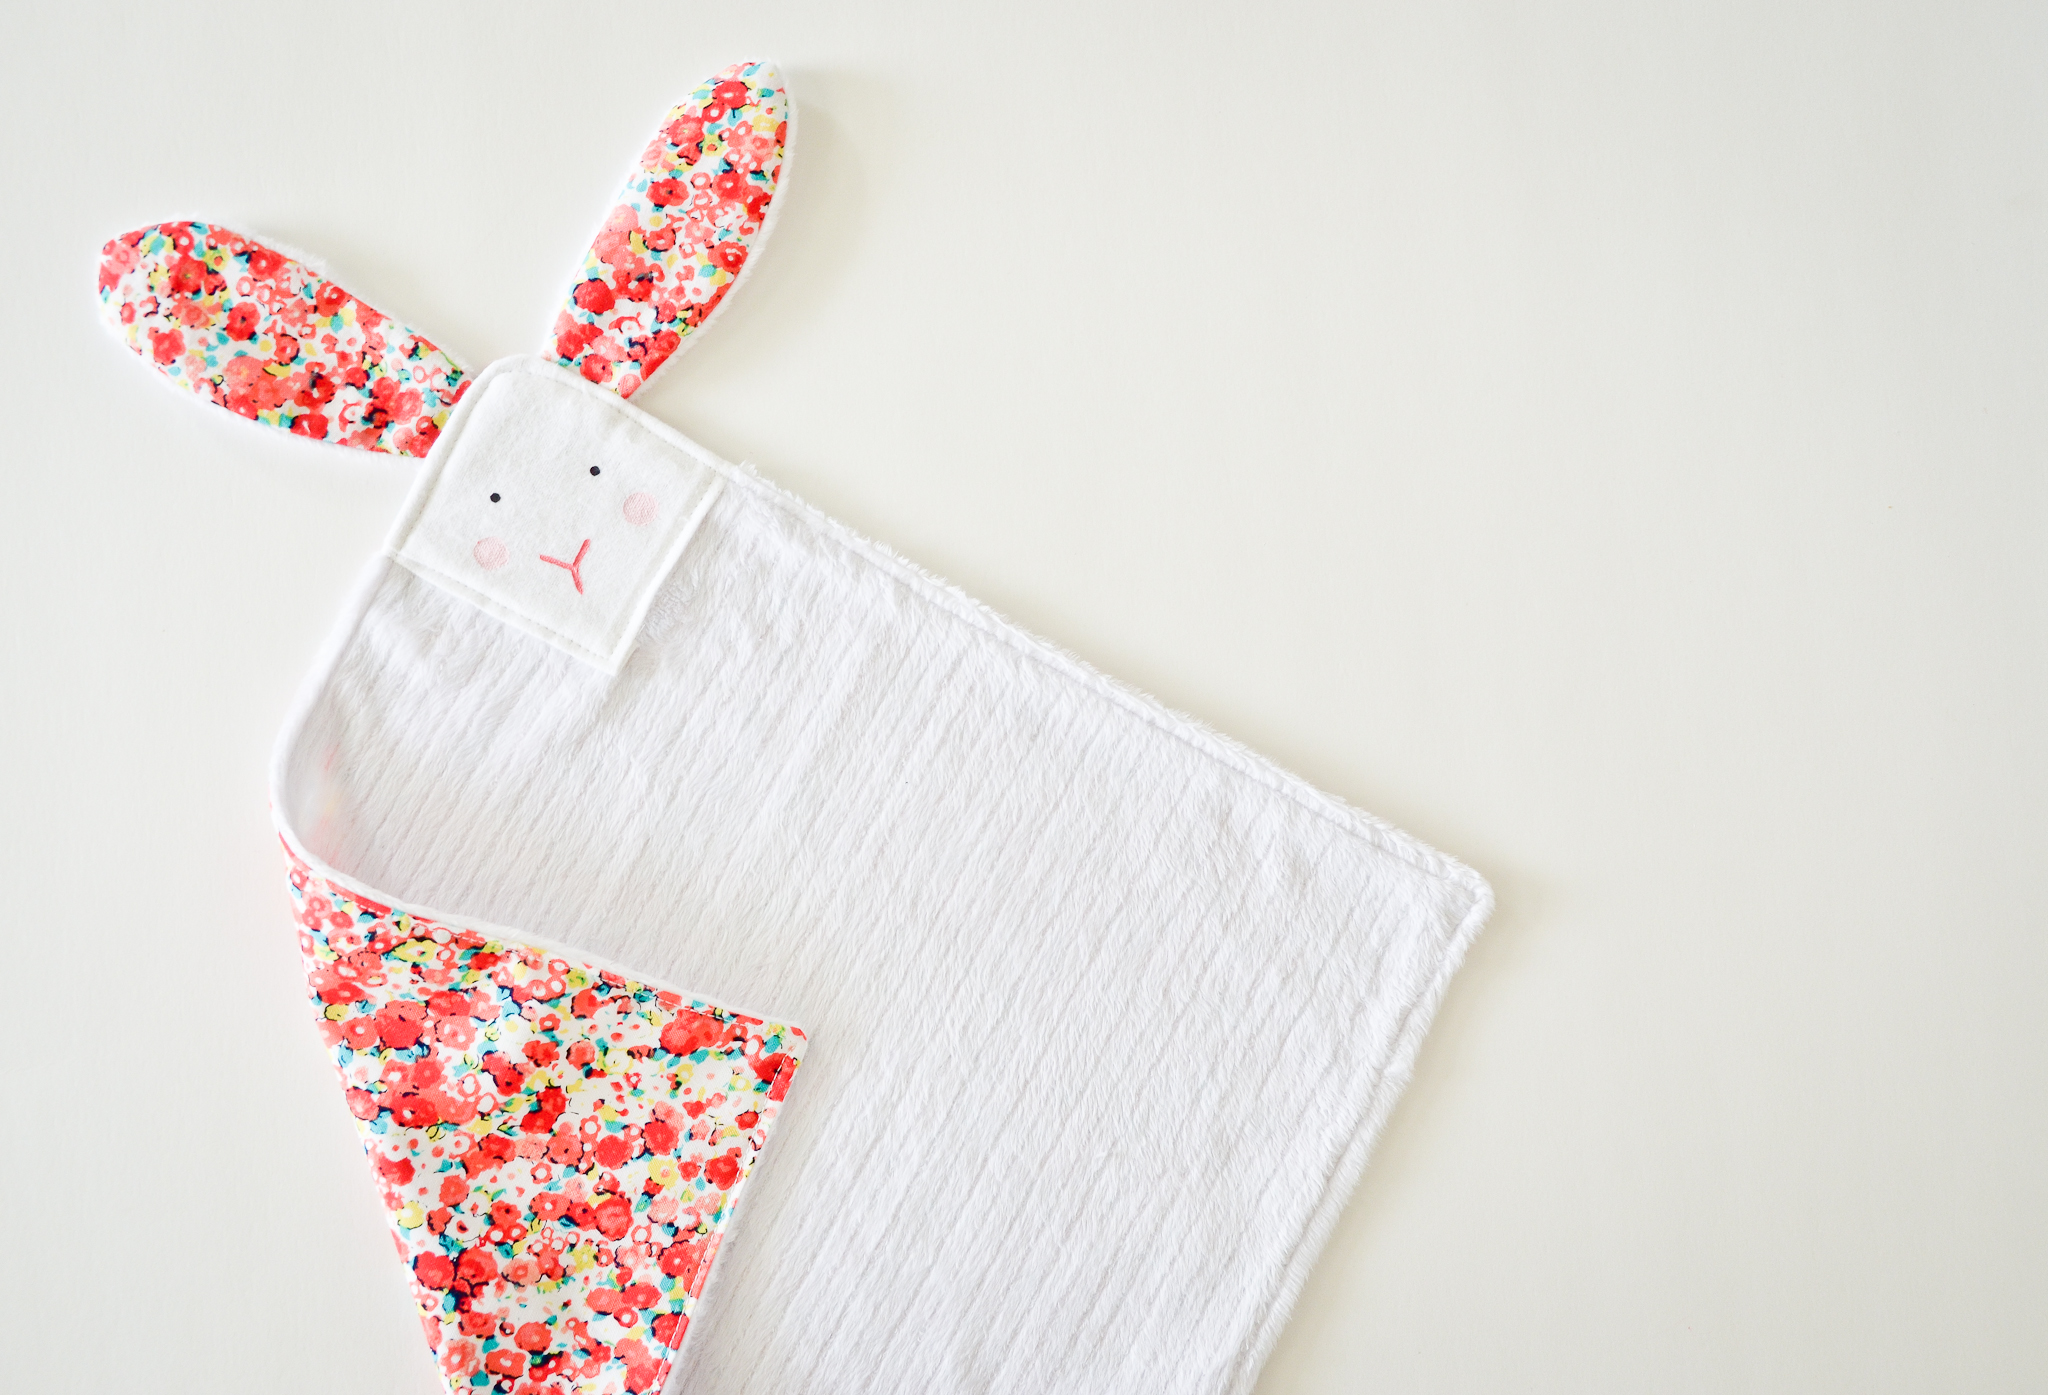
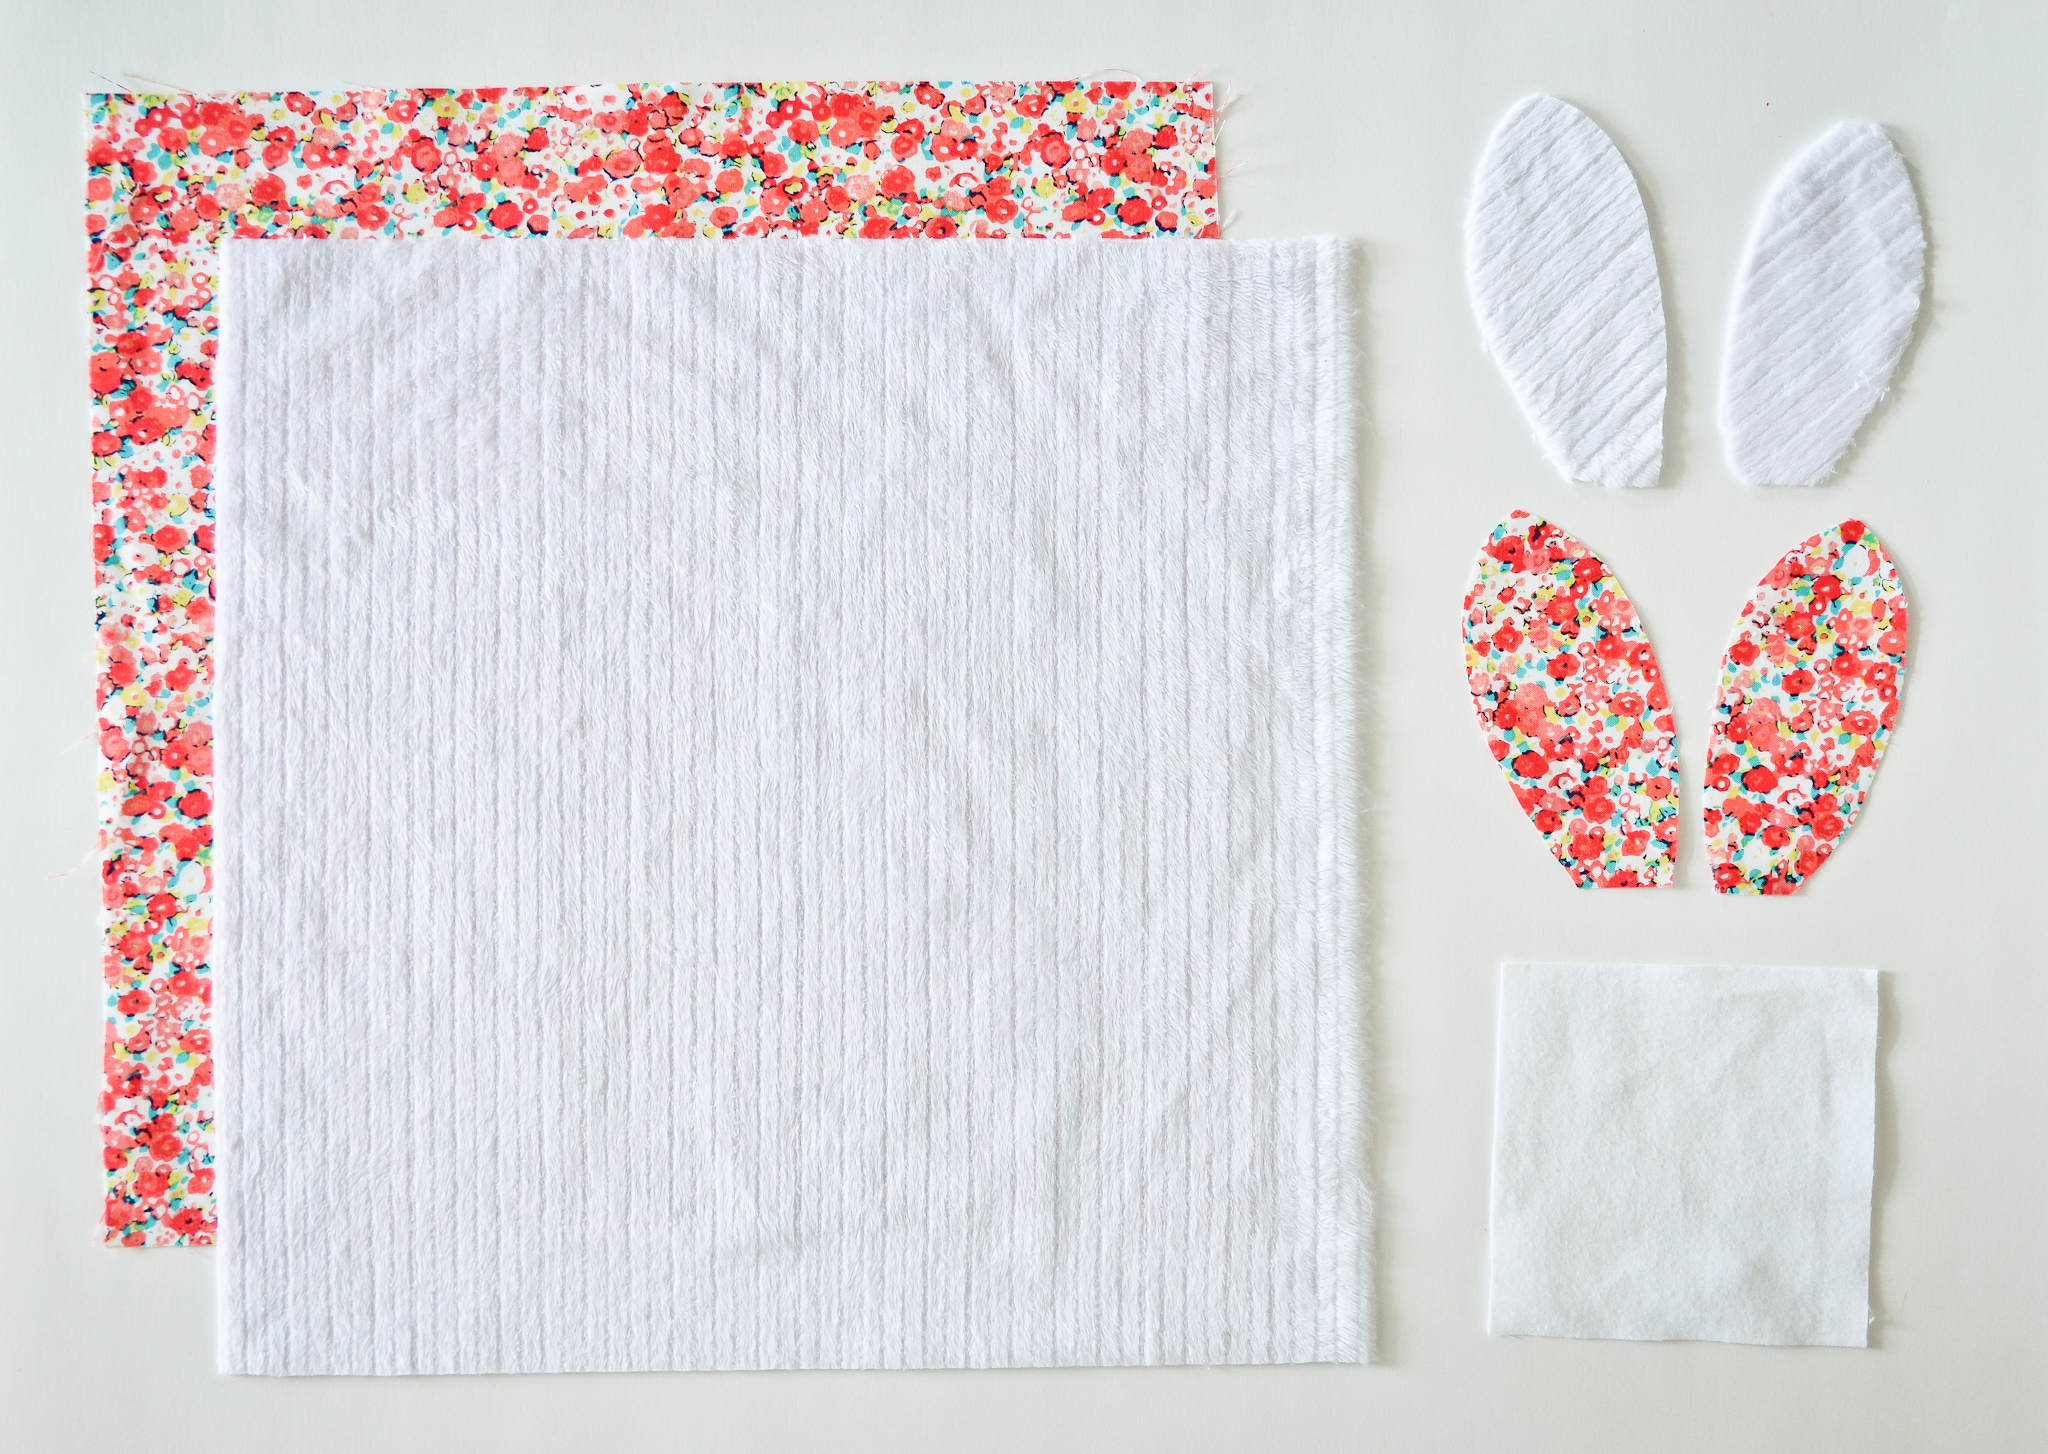
Materials: 2 contrasting fabrics (1/2 yard each), smooth fabric (1/8 yard or 4″ remnant), thread, scissors, iron, pins, sewing machine, fabric paint and paintbrush
There are no right or wrong fabric choices for this DIY bunny lovey, but keep in mind that this will (hopefully) become a lovey for your child to snuggle. With that in mind, I chose a super soft white cuddle fabric and a bright floral cotton. Brushed flannel and thin fleece are also good—just be sure that your choices are machine washable!
Begin by cutting 13″ squares of your two main fabrics. Download and print this bunny ear template, and cut out four ear shapes (two of each fabric) from the remnants of your large squares. Then cut a 3.25″ square for your face piece. My white cuddle fabric was too fuzzy to paint a face on, so I used a smooth white flannel for that.
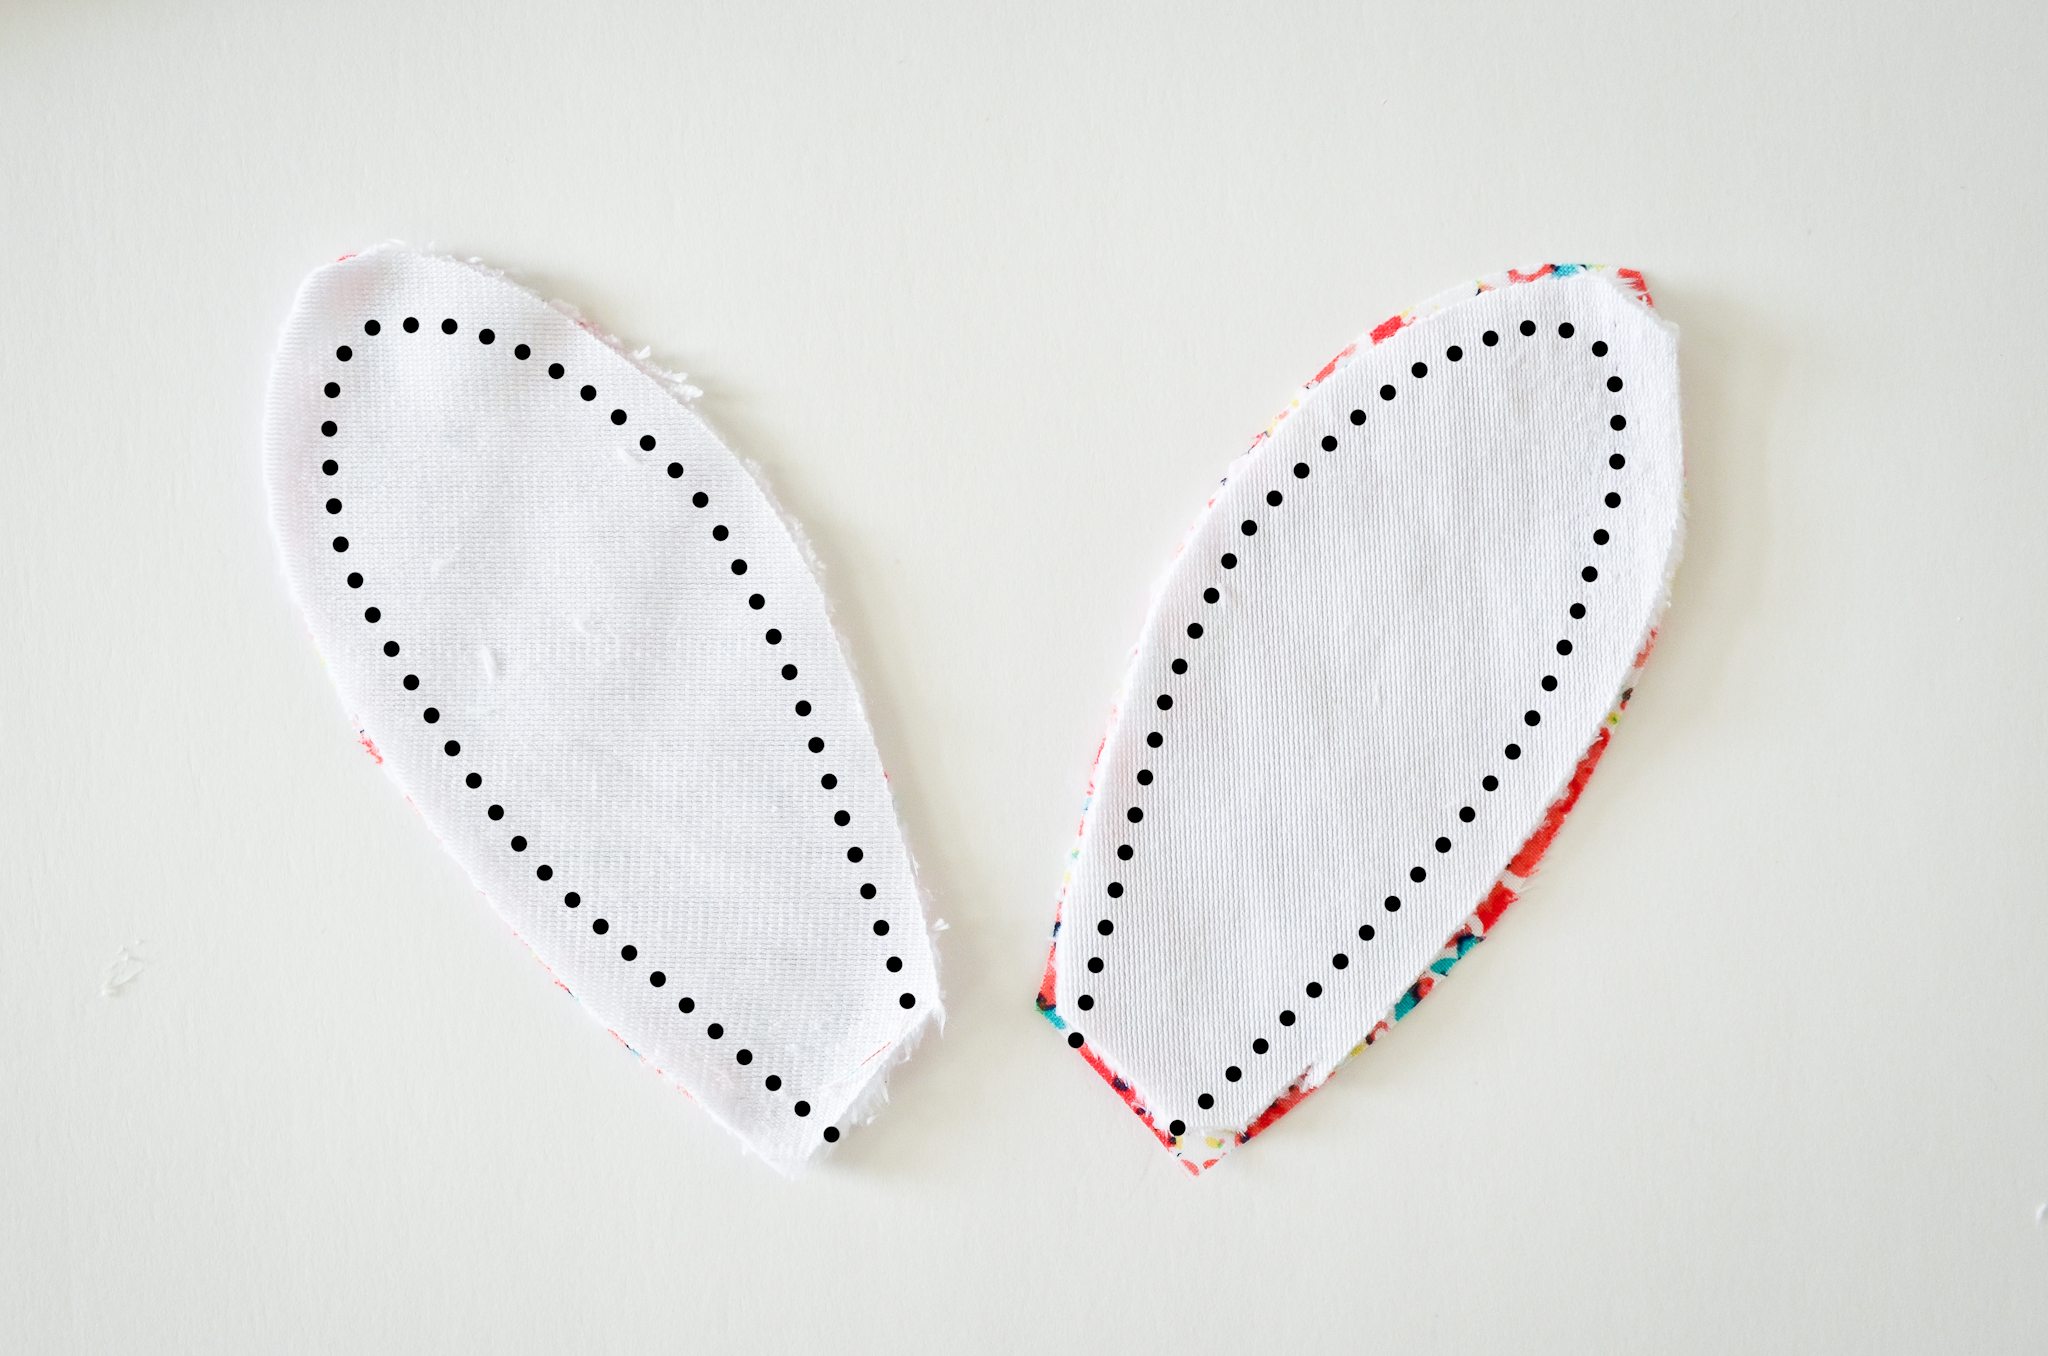
Start with the ears. With the right sides of your fabric together, use a 1/4″ seam allowance to stitch the curve. Leave the bottom open.
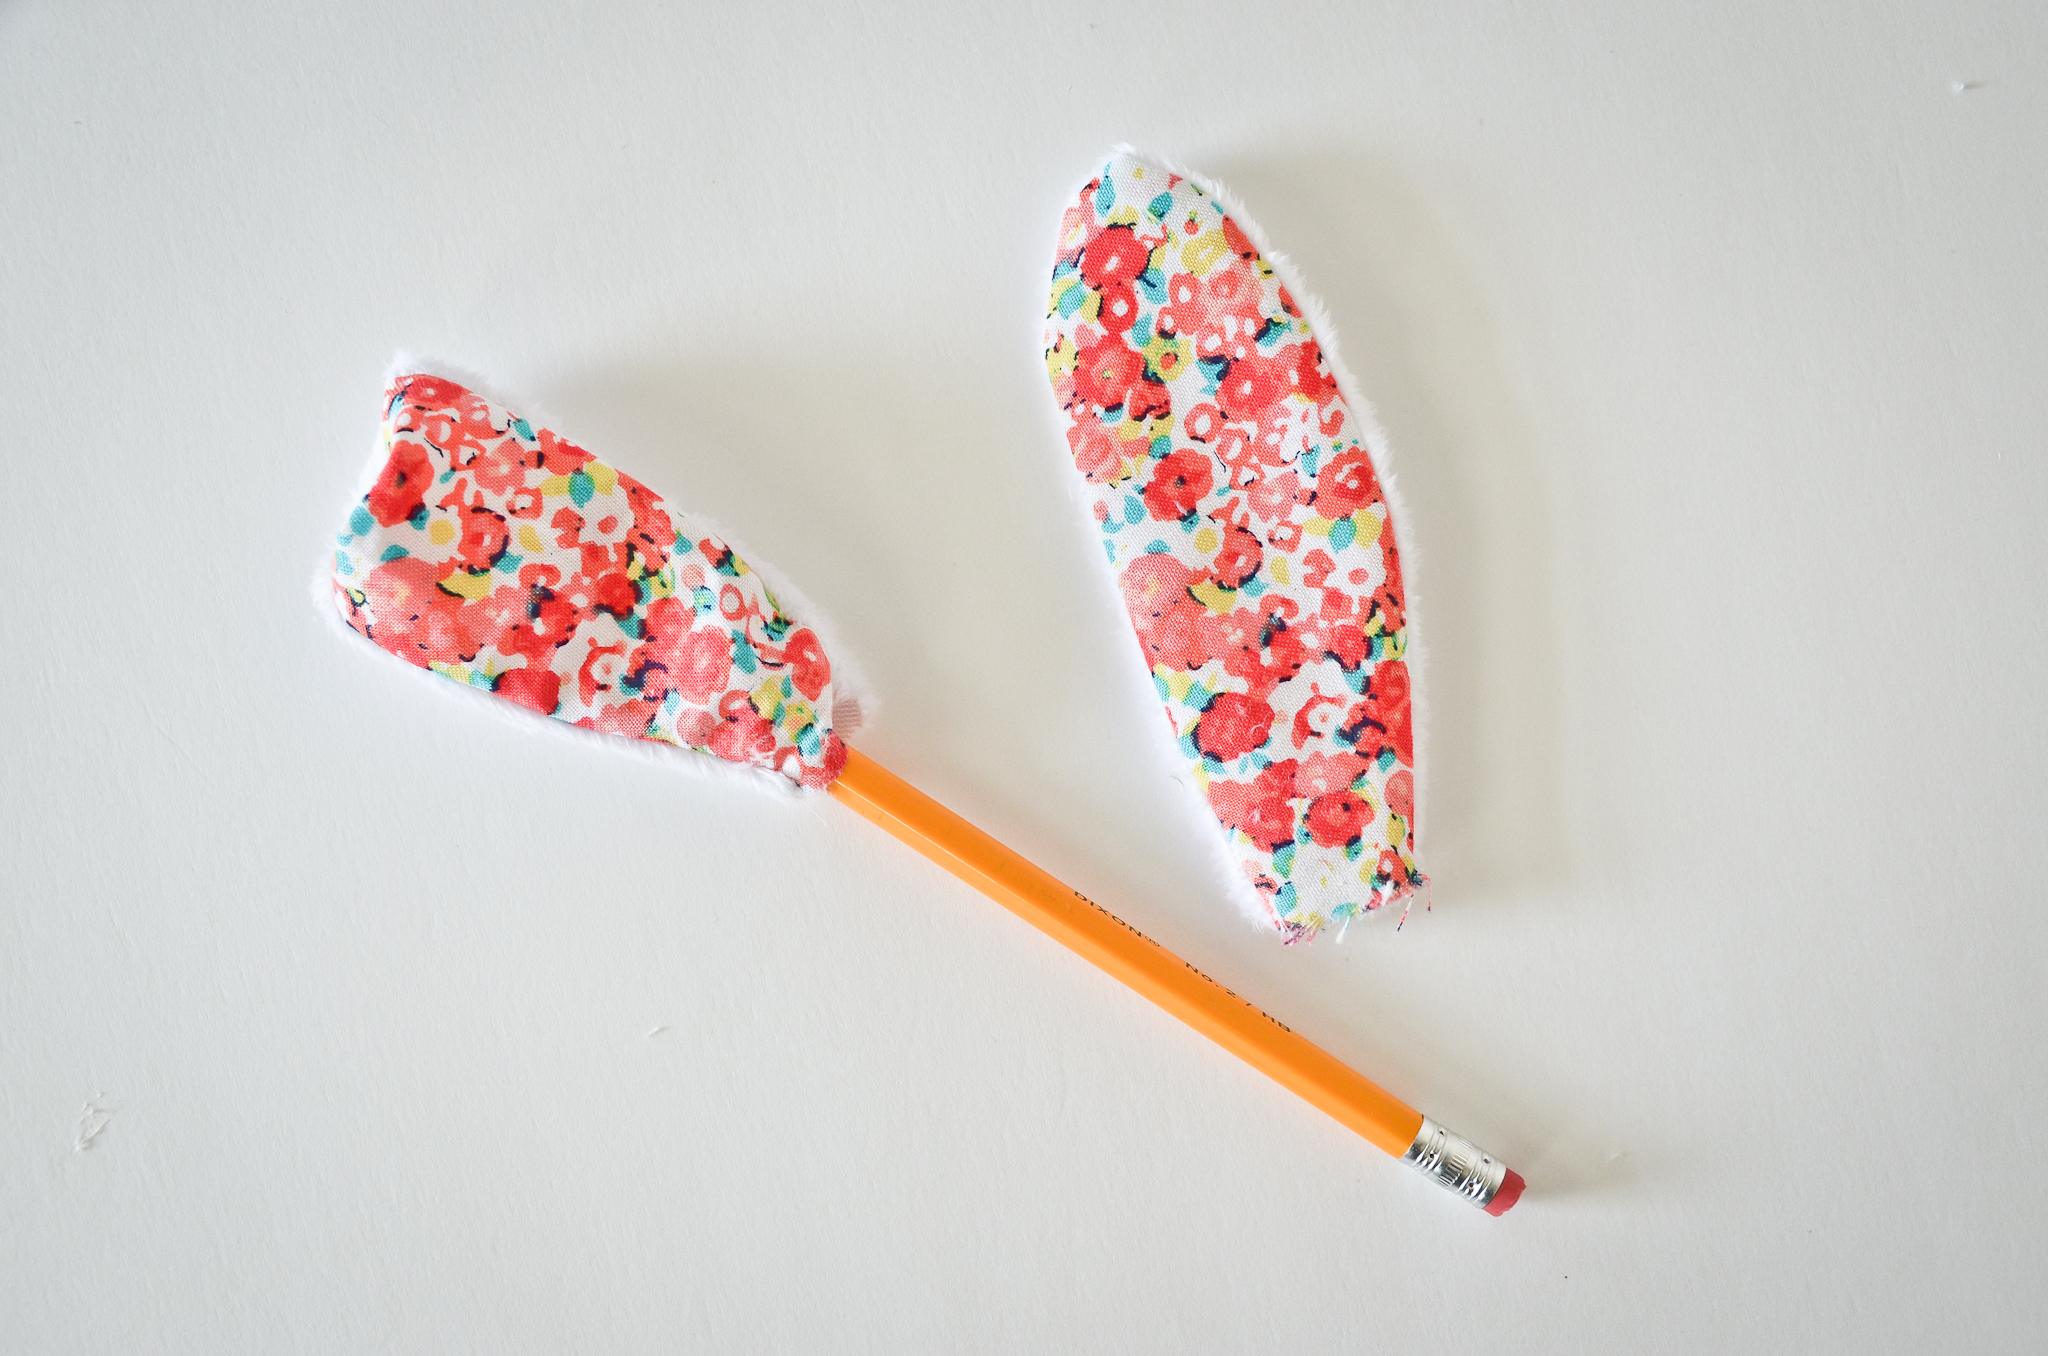
Turn the ears right-side-out with the help of an unsharpened pencil.
On your face piece, fold in 1/4″ on two perpendicular edges. Use a hot iron to crease these folds.
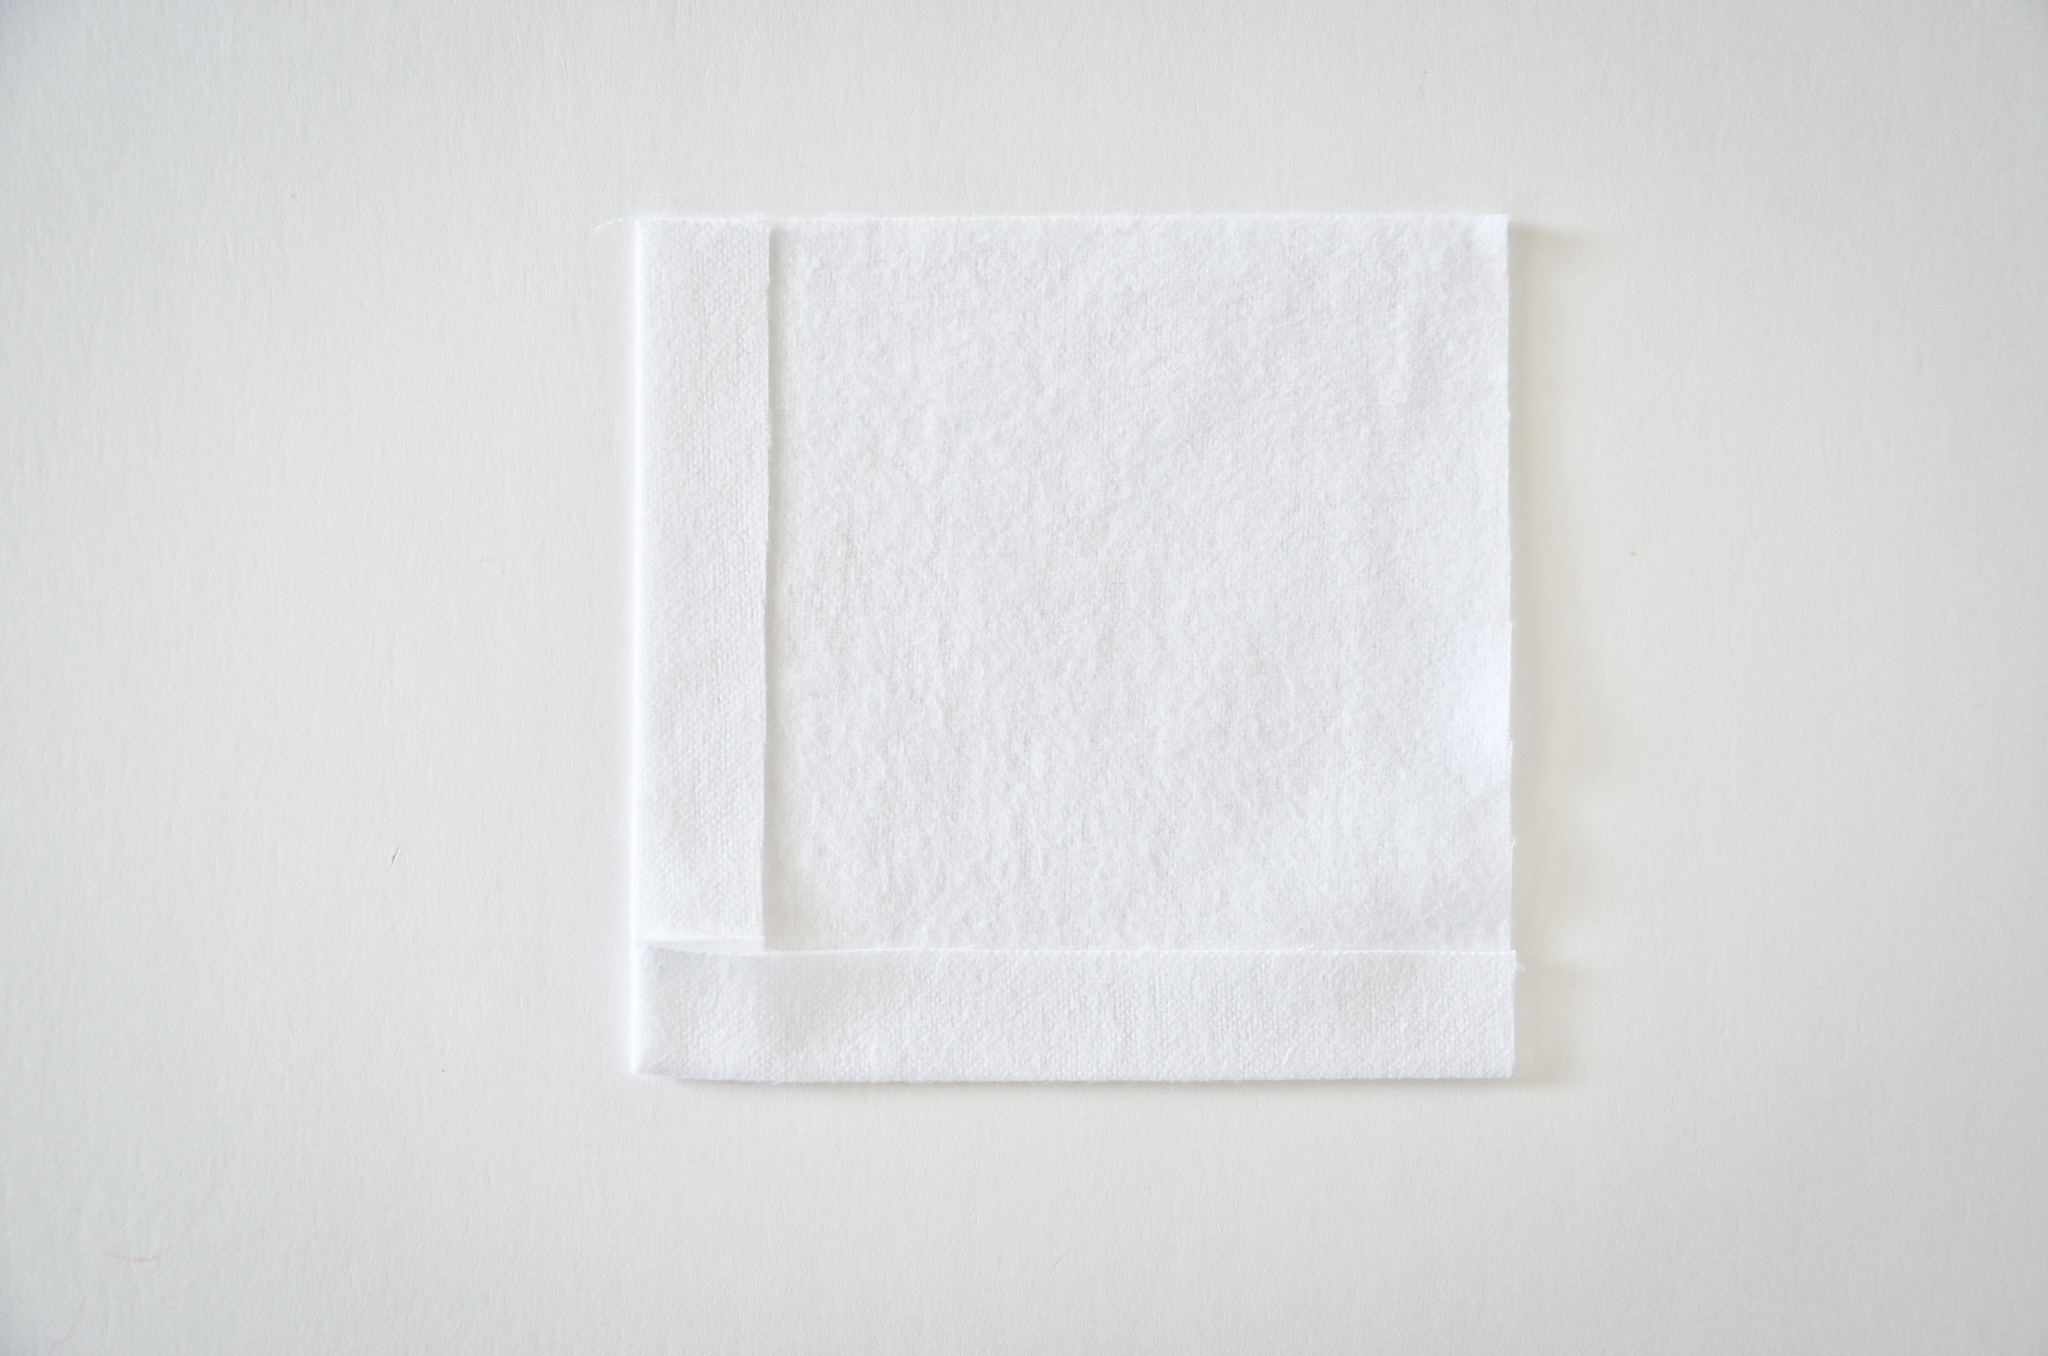
Flip the face piece over so the folds are underneath. Pin the face, folded corner down, to the corner of your front 13″ fabric square. Use an 1/8″ seam allowance to top stitch only the lower corner.
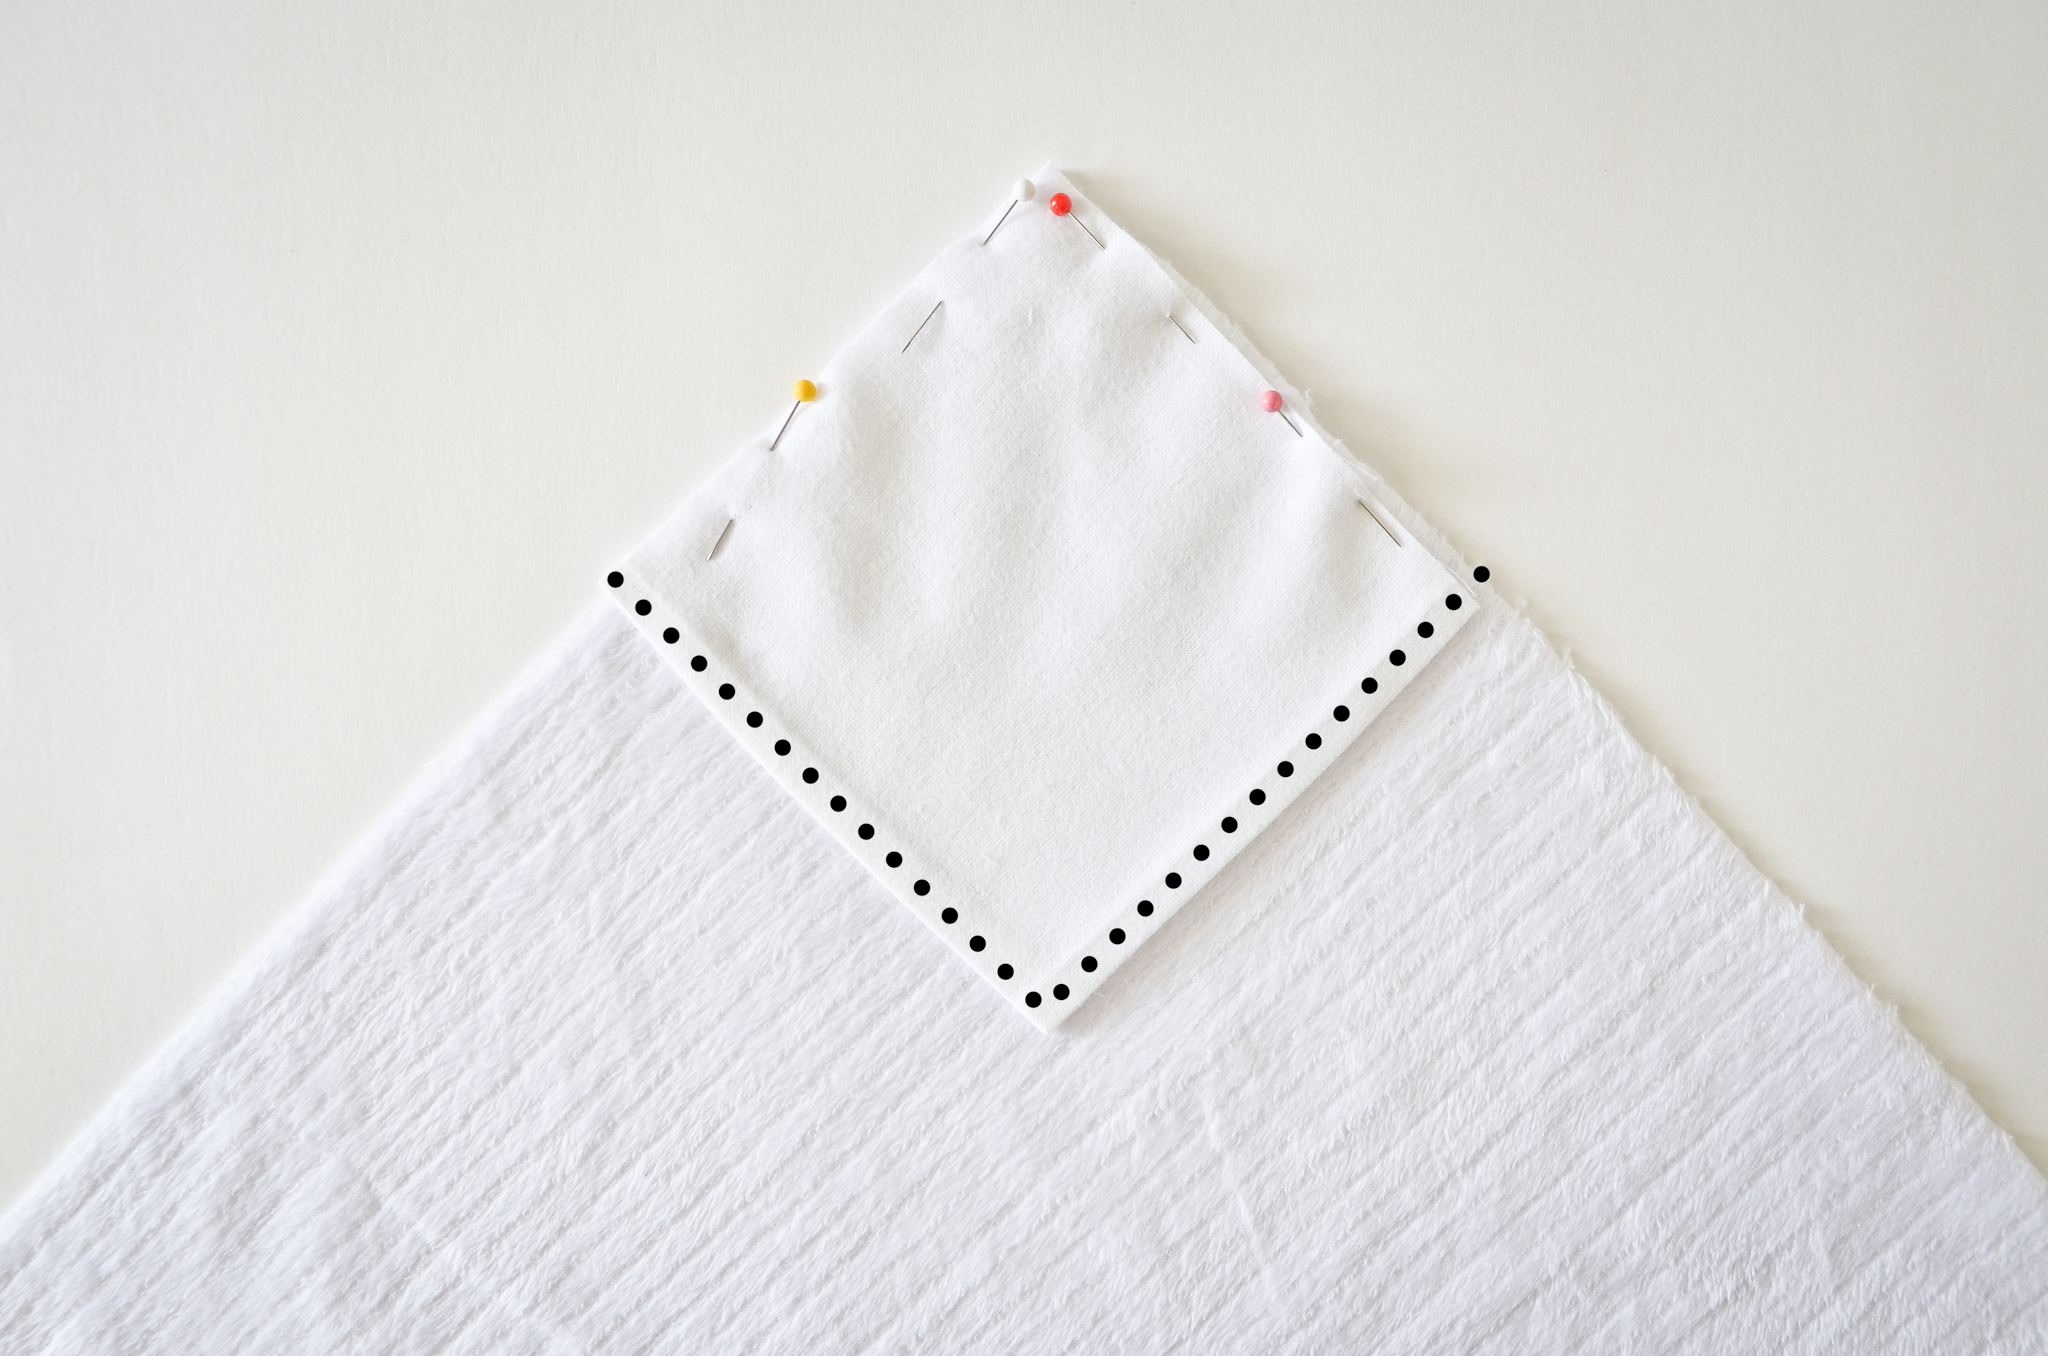
If you did it correctly, the top will still be open.
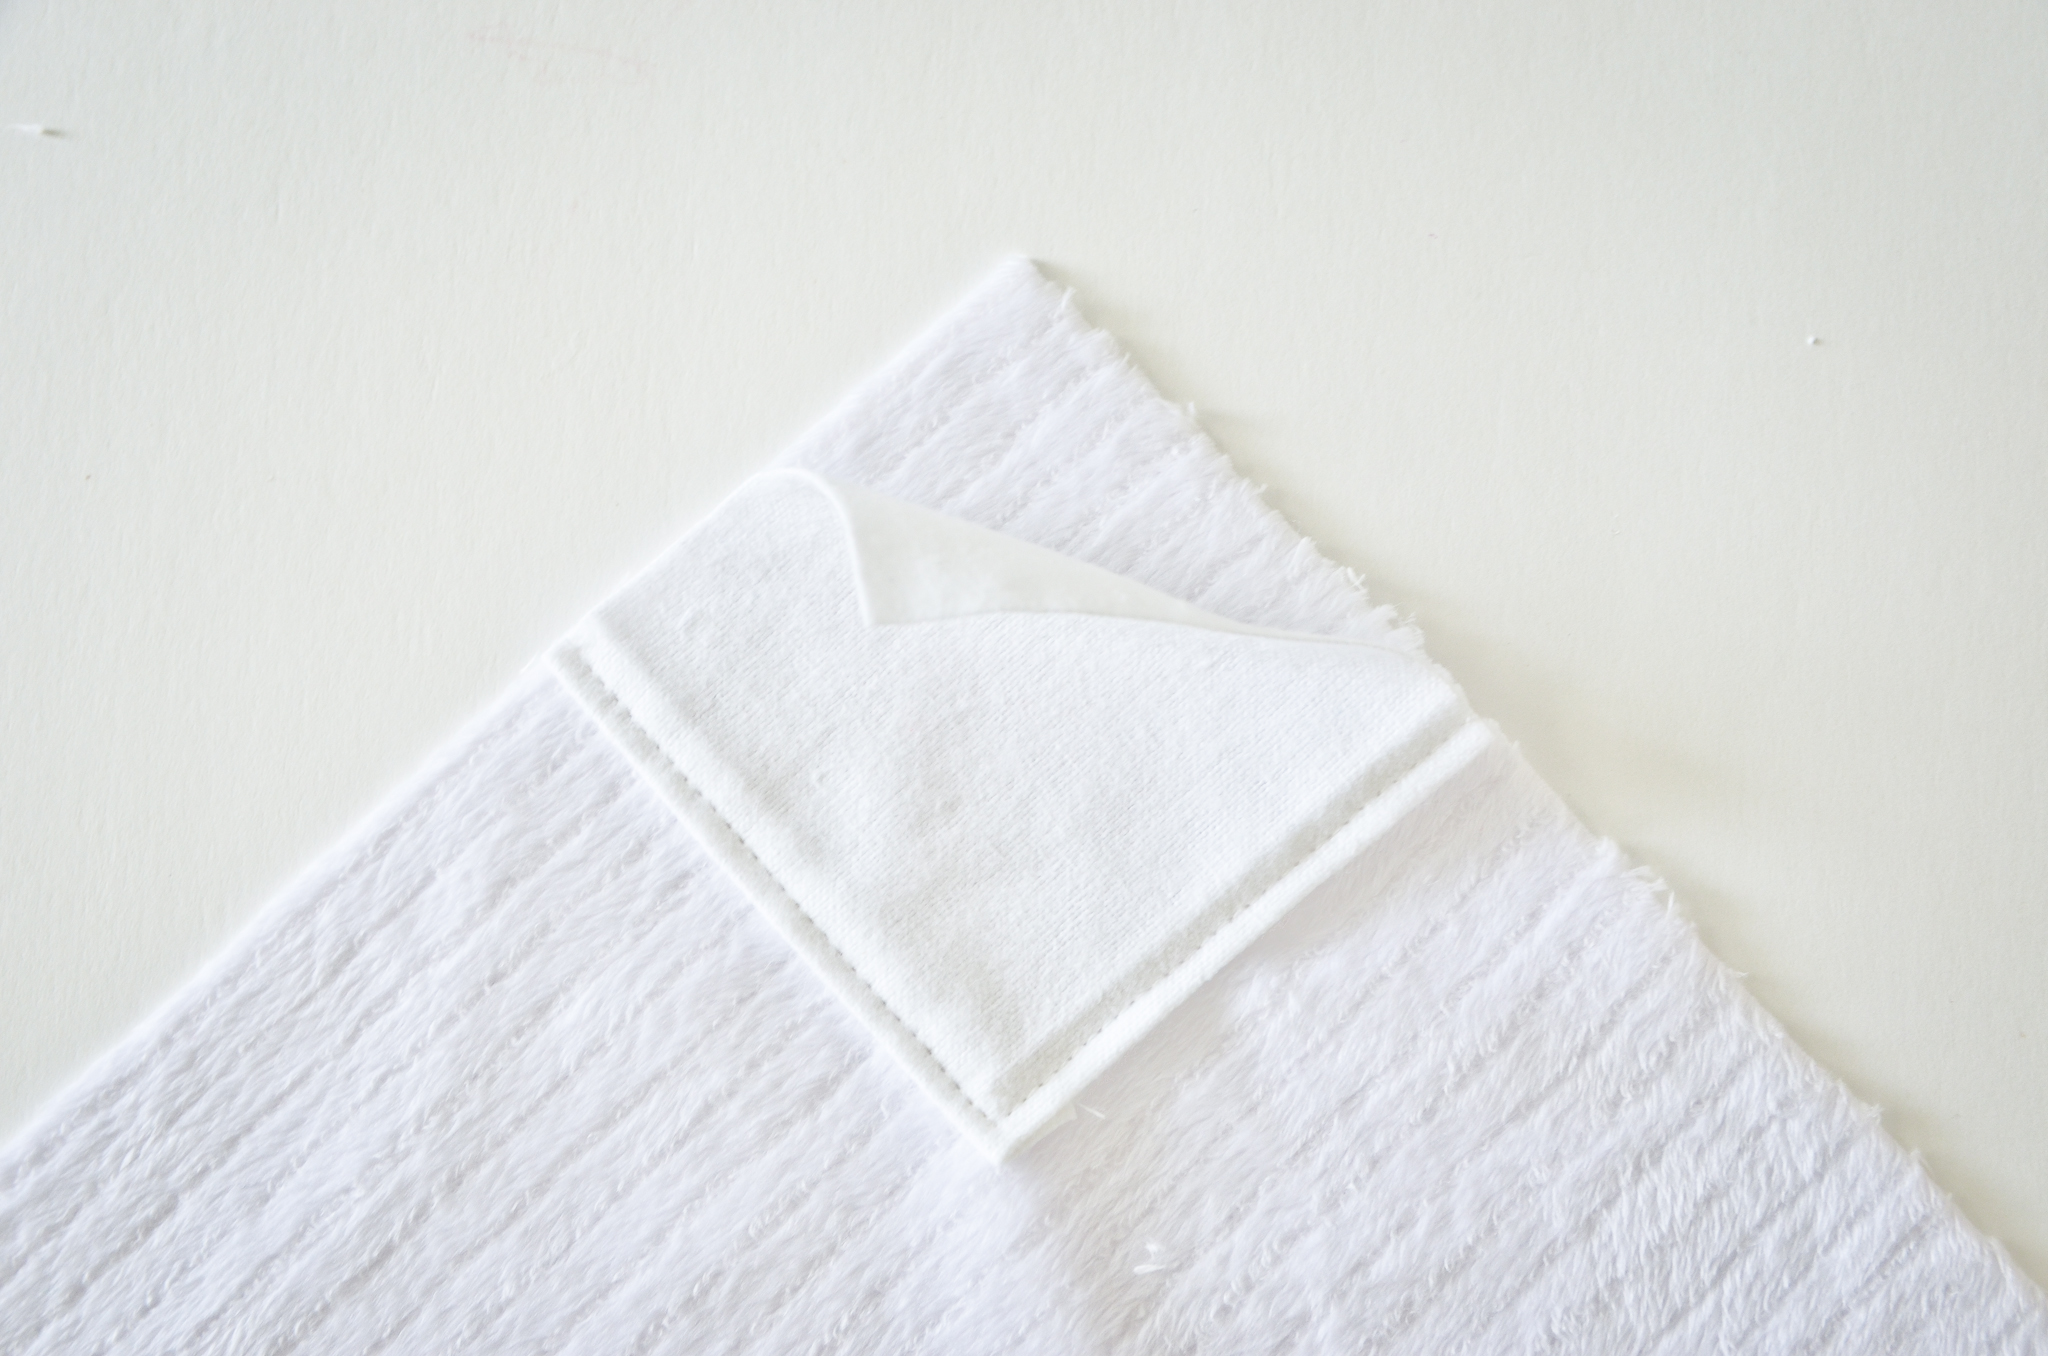
Take your two completed bunny ears and position them on the corner. Flip each ear over and in towards the face. They will overlap as shown below.
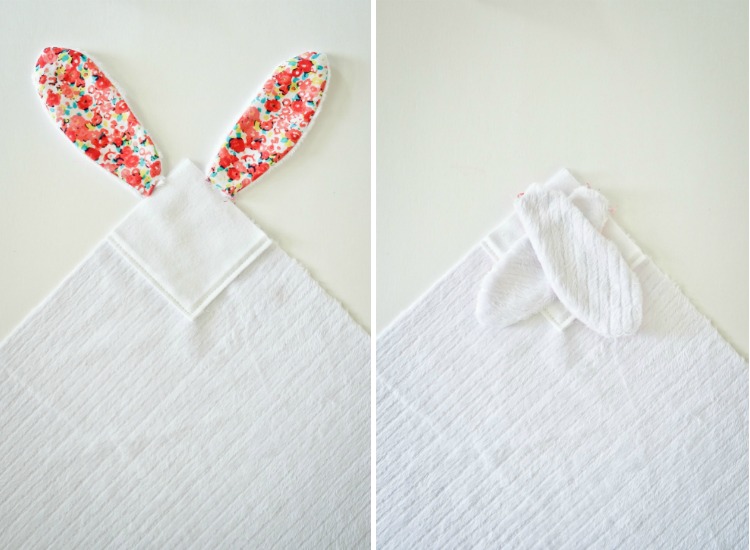
Align your back 13″ fabric square on top of your front square and ears, right sides together.
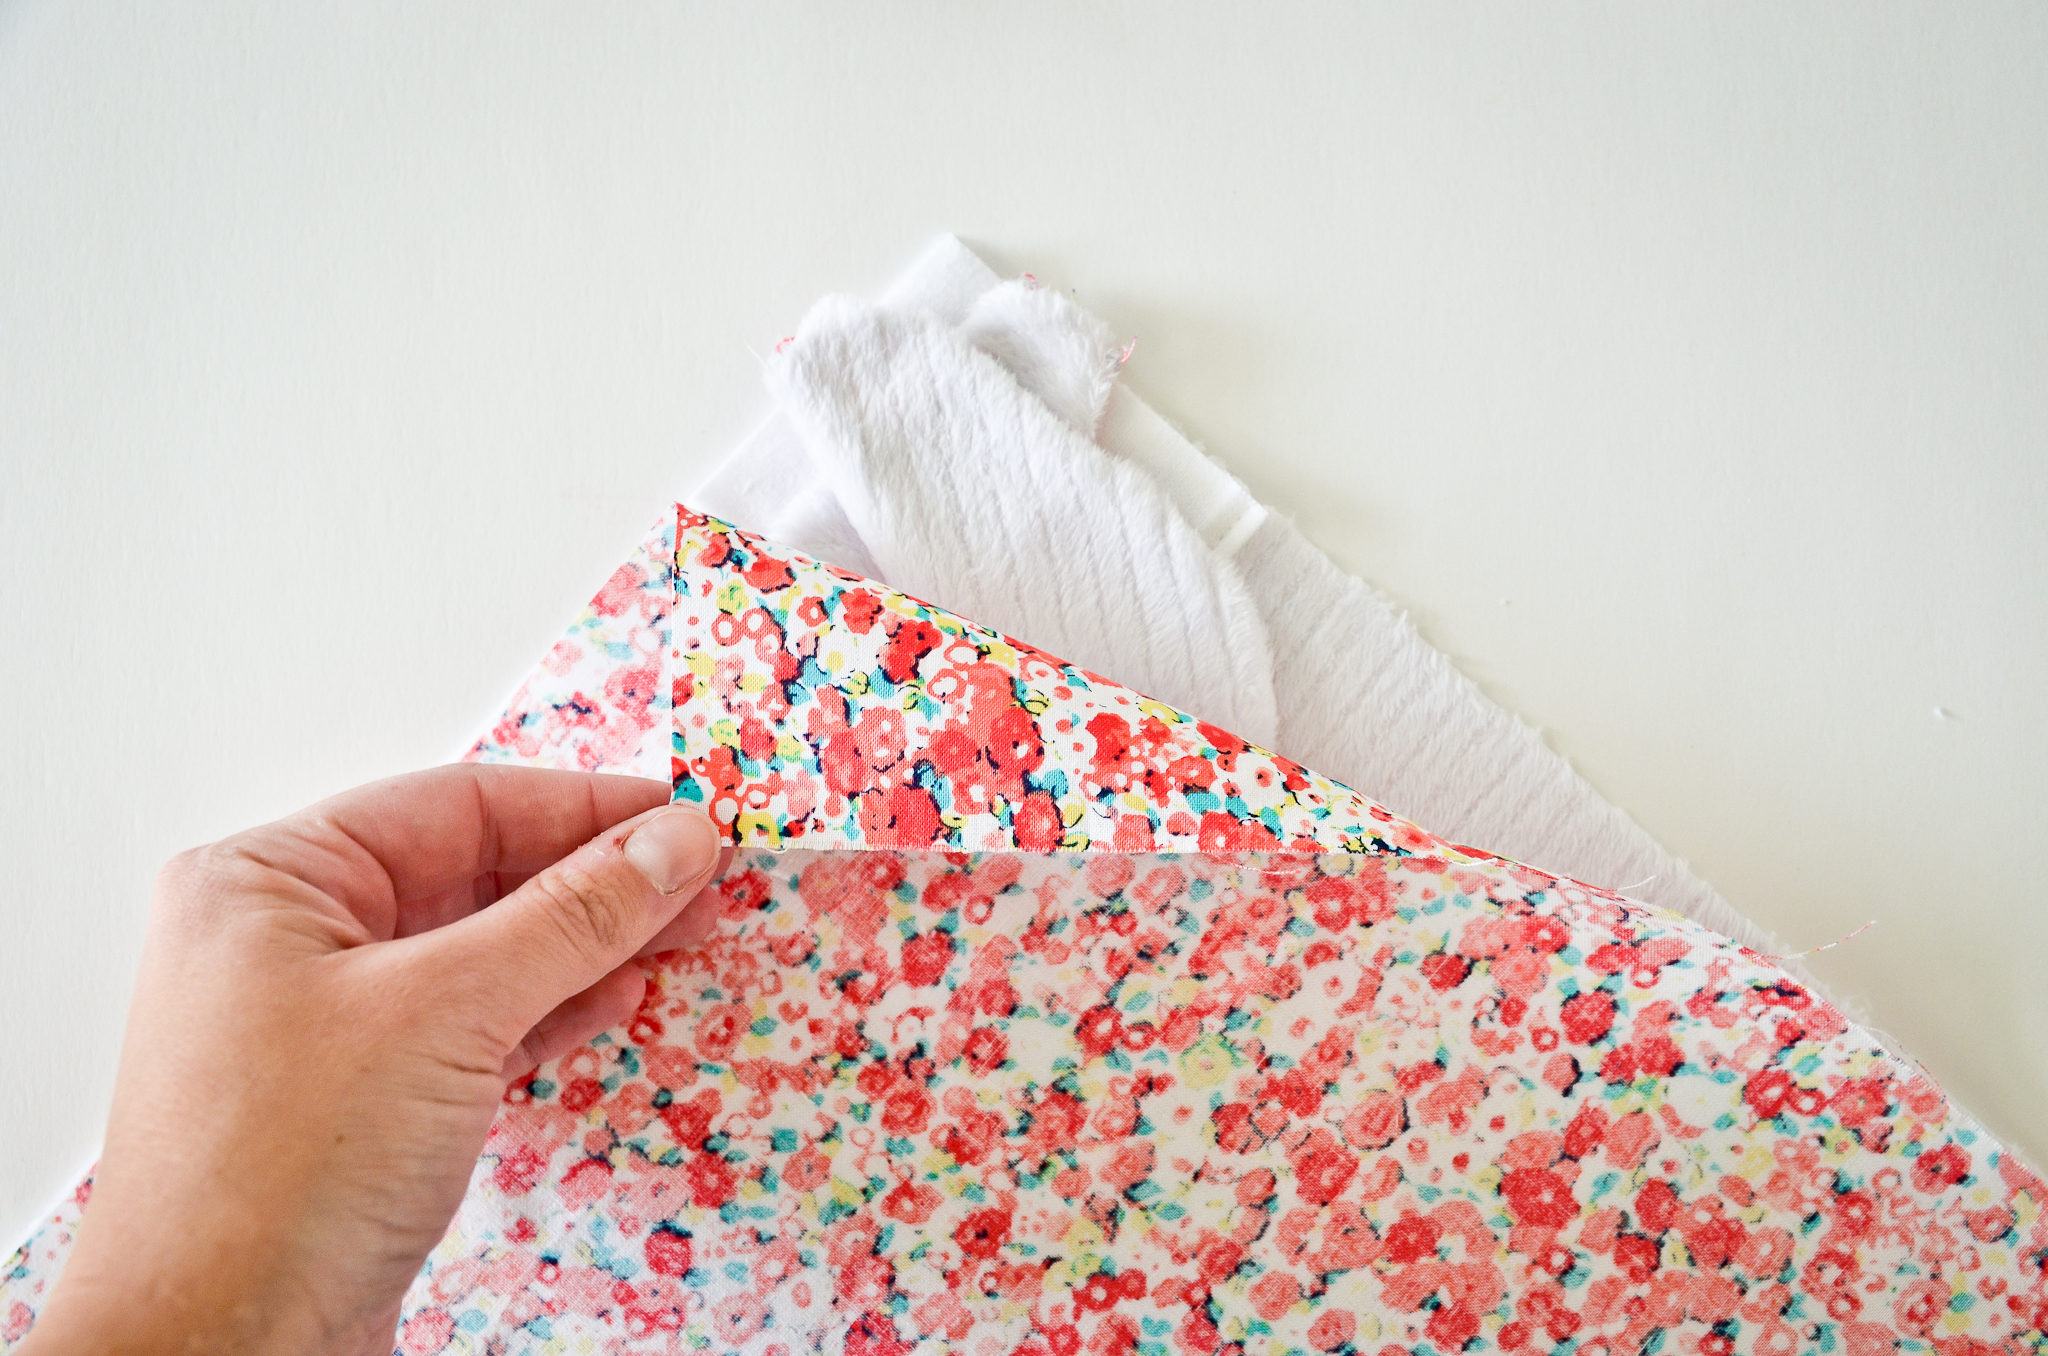
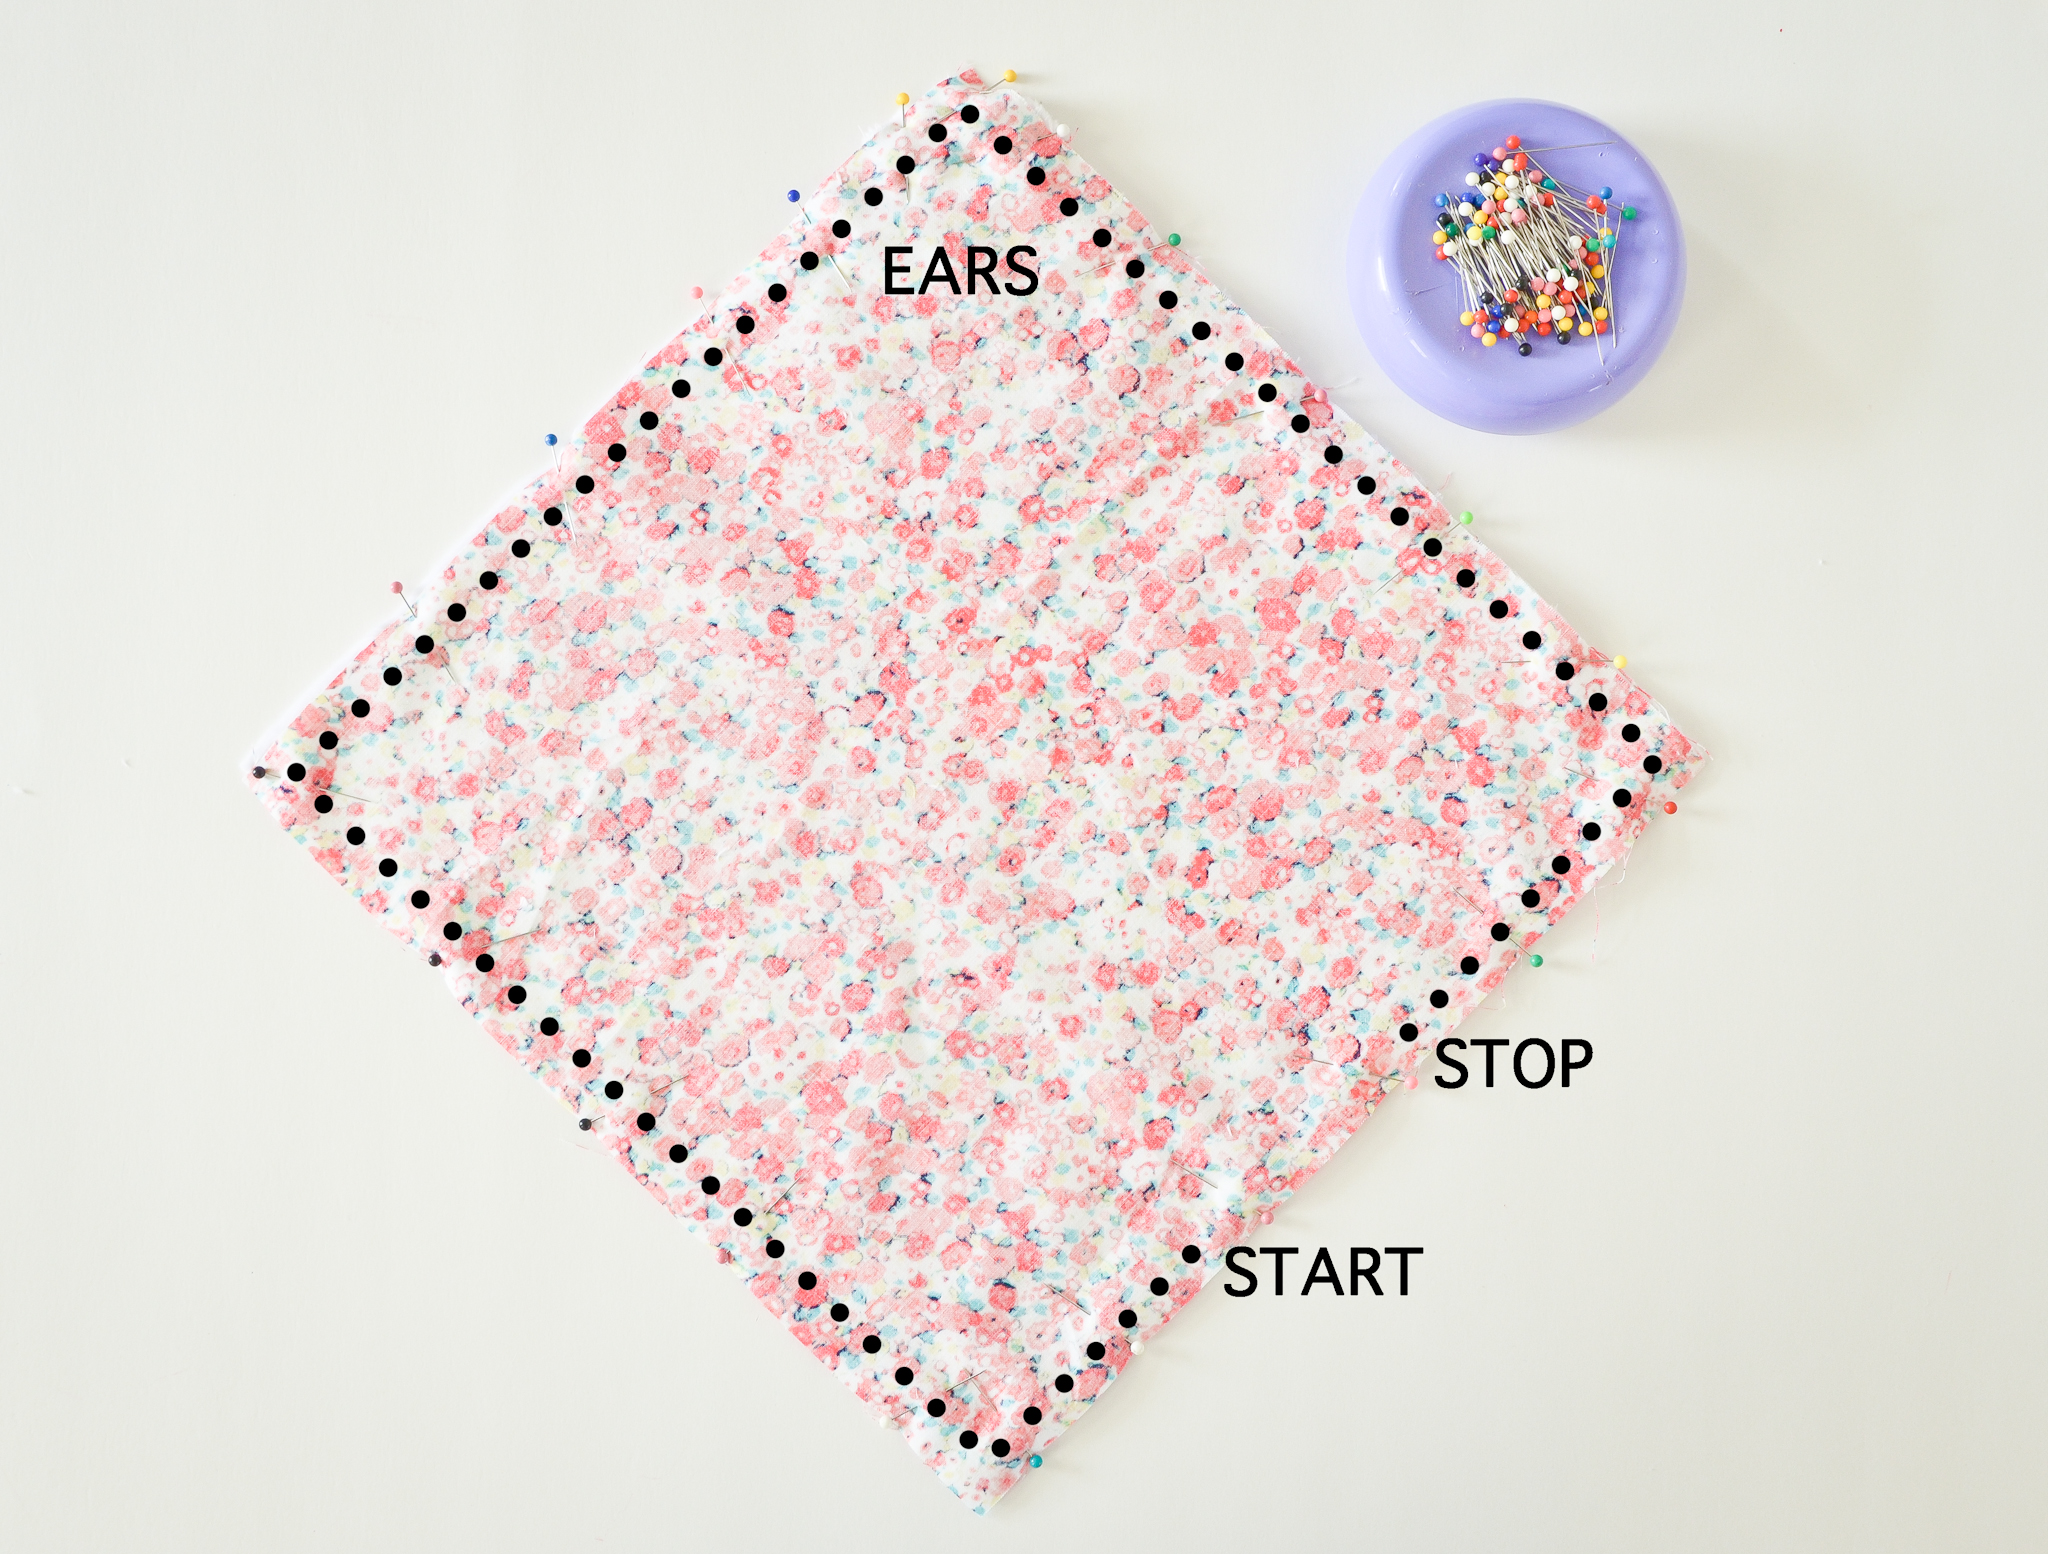
Pin everything together. Make sure you get pins through those ears! Use 1/2″ seam allowance to sew around the edge, leaving a 3″ hole for turning. As you come around the ear corner, be very careful not to accidentally sew the long edges of the ears into the blanket seam.
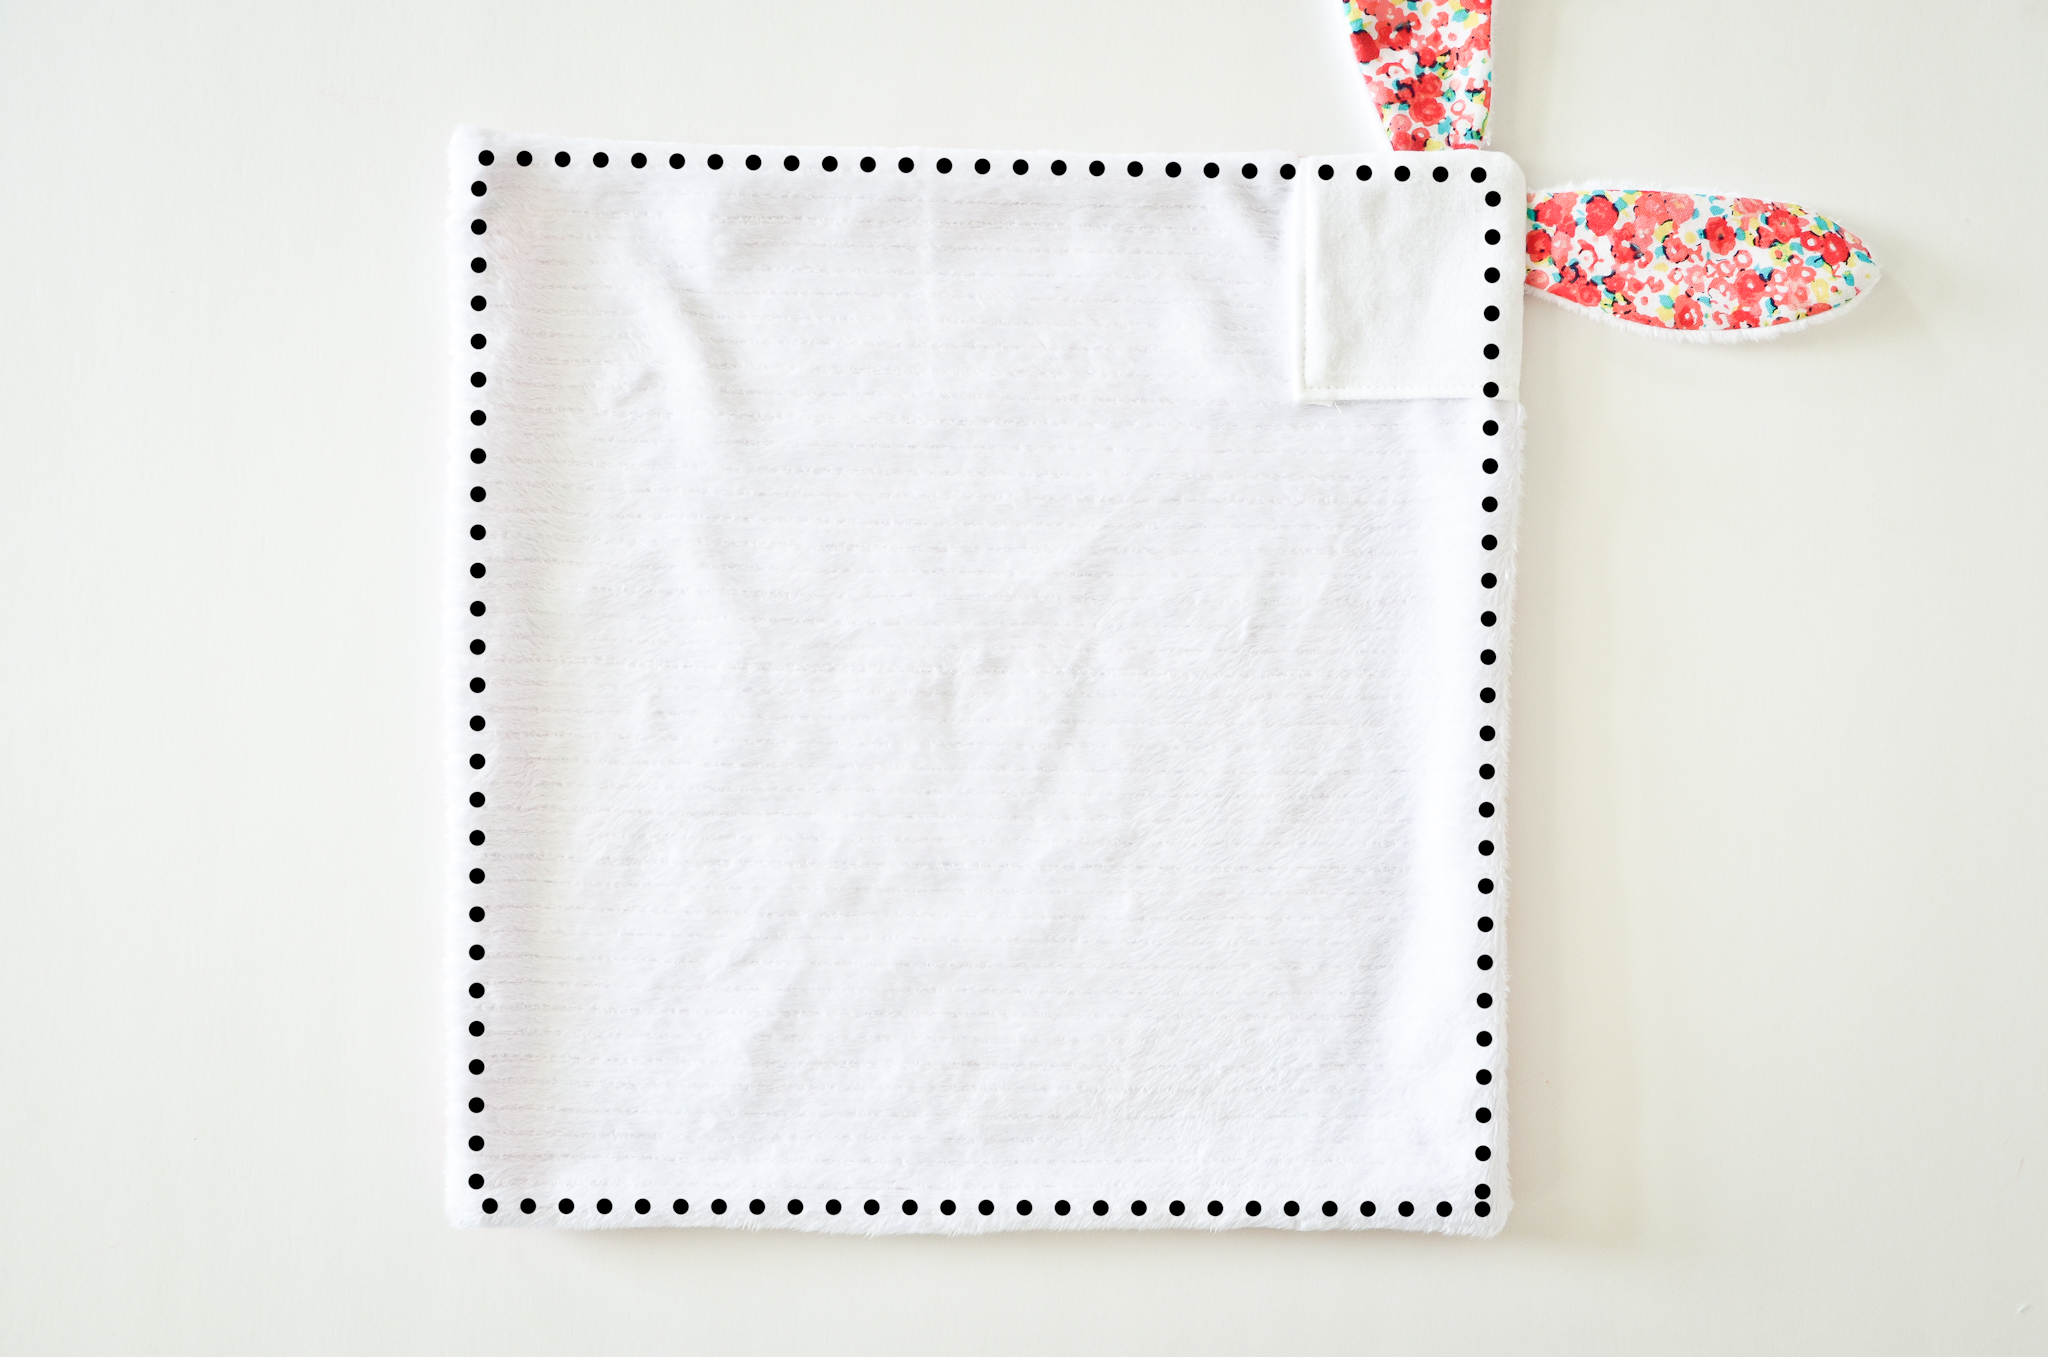
Turn the bunny lovey right-side-out. Top stitch around the entire square to close the hole and finish the edges.
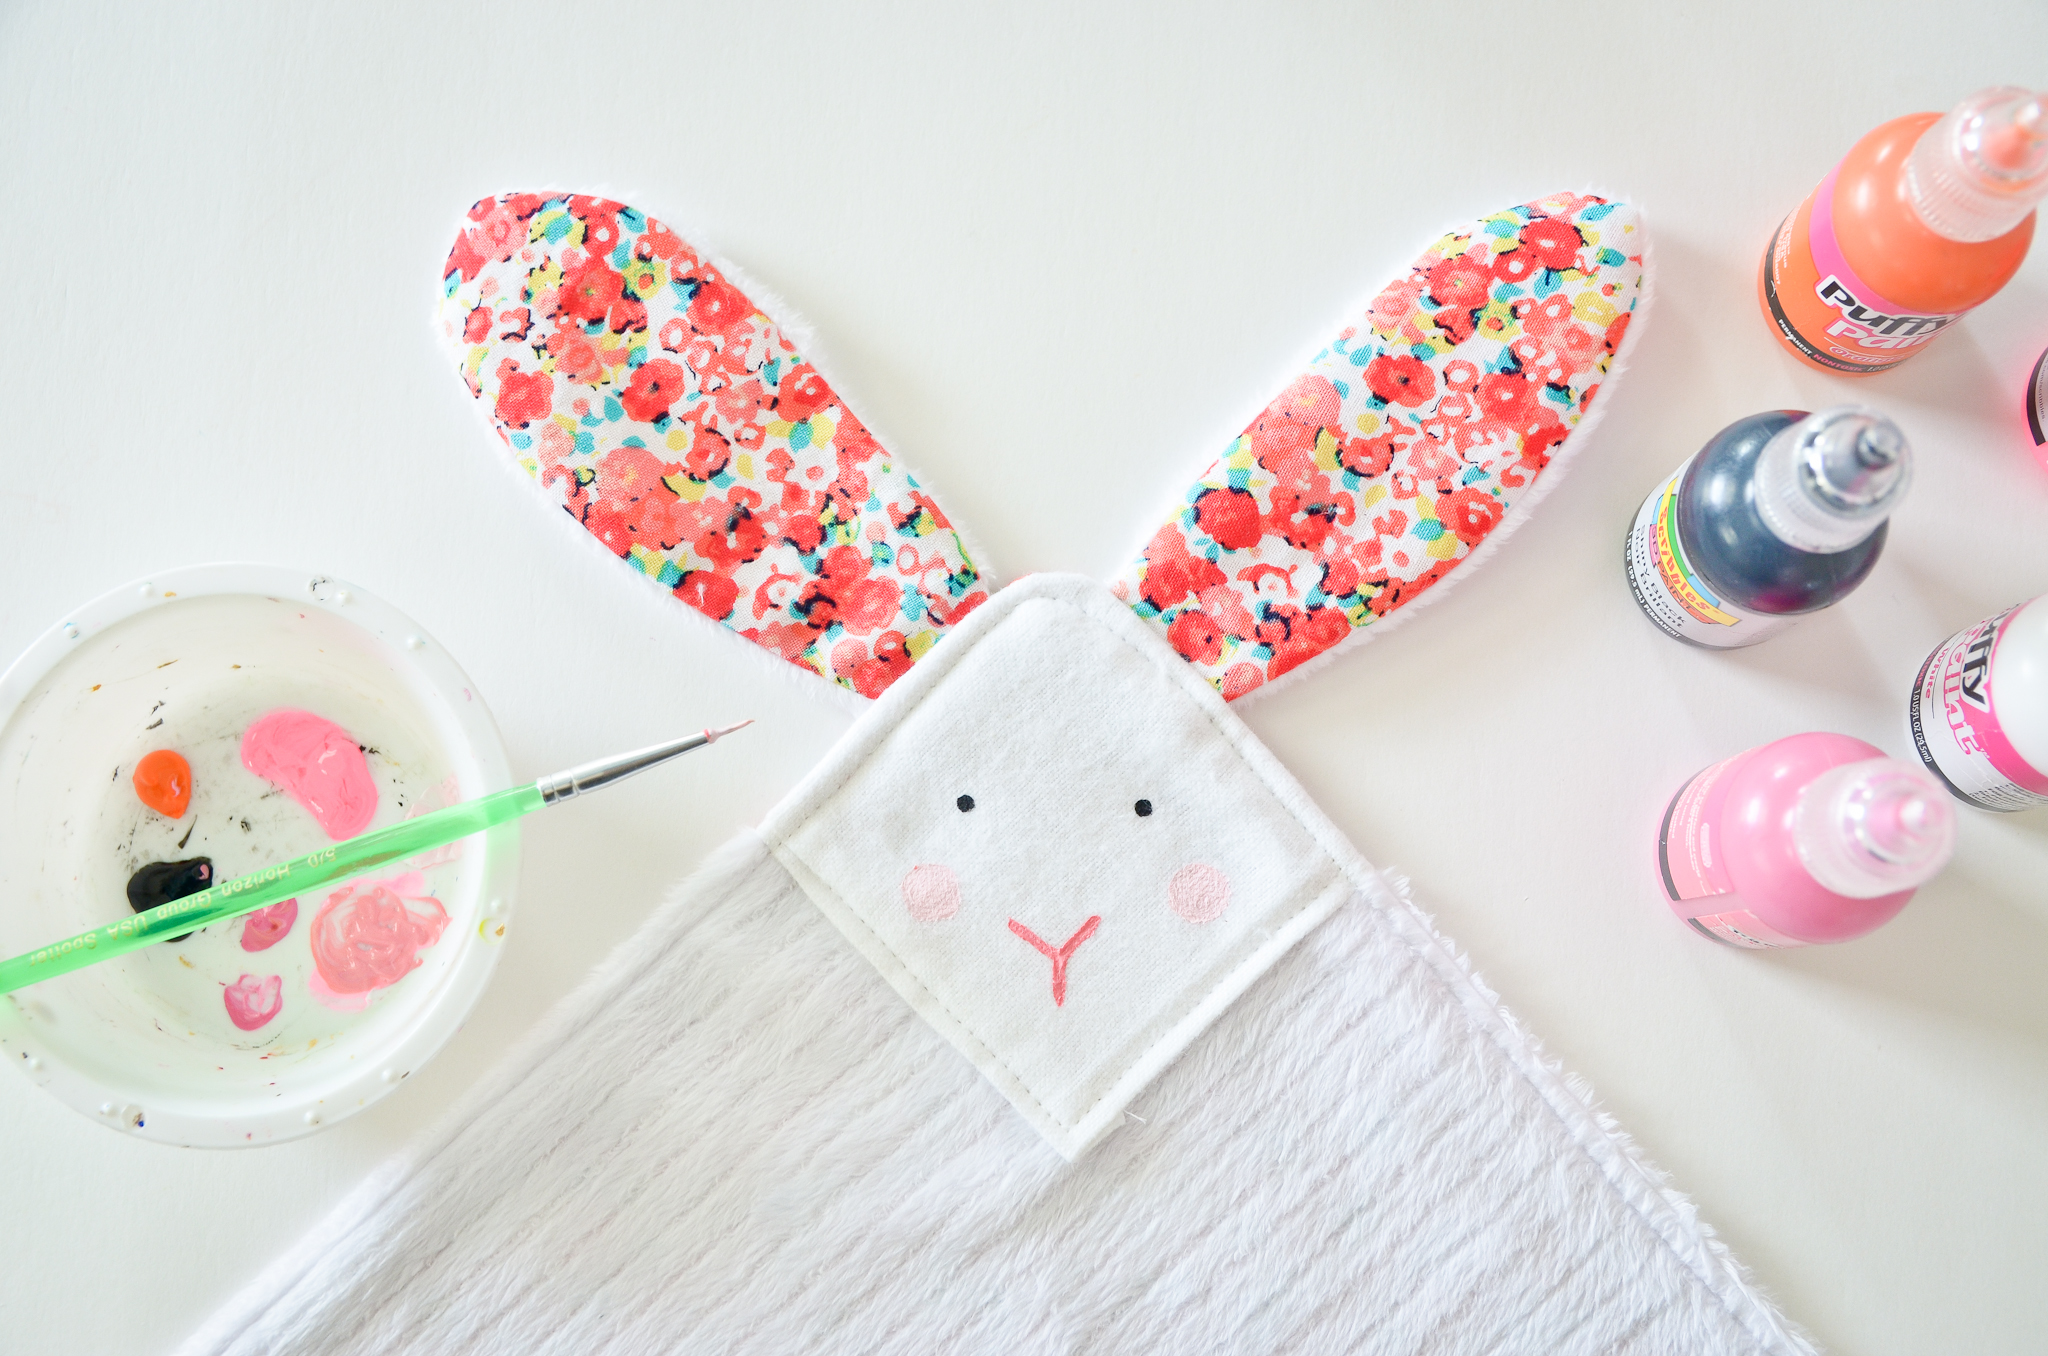
Add eyes, cheeks and a nose on your DIY bunny lovey face with fabric paint and a detail brush. Let dry.
This is a wonderful handmade gift idea for a baby shower or first birthday celebration. Go and sew a bunny lovey for somebunny you love today! Not a DIYer? Check out the loveys we have in The Project Nursery Shop!




Comments
Dana Decals
Oh that is so charming. This wouldn’t be a handkerchief, though, right?
Grey House Harbor
Hi Dana. Thanks for the compliment! As far as a handkerchief goes… I suppose it’s highly likely the lovey will get little boogies on it at some point (hence, the importance of washability), but it’s definitely not intended for wiping noses. ;)
Grammy Susie
Thank you for sharing this sweet little bunny lovey! Being a 1st time Grammy, I can’t wait to make one for my 4 1\2 month old granddaughter, Adeline Grace! This looks so simple, so quick & so SWEET!!!
Beth
So glad you like it! Congrats on your new grandbaby!
Dawn
If this is not the Sweetest thing I have ever seen. Just Darling. Thank-you for sharing
Grey House Harbor
Dawn, You’re so welcome! I appreciate the compliment. ;)
Sheryl
Love this project! Thank you for sharing the pattern. A group of nurses from my birthing unit are planning a sewing bee day to make “loveys” for moms and babies who are separated (when a newborn needs to go to the NICU having something that can hold the scent of mom is comforting to the infants). I searched long and found your post because we need a project that is fairly simple since we need to make quite a few. Thanks!
Grey House Harbor
Sheryl, Your comment made my day! I am so pleased to hear that NICU babies will soon be snuggling up with some very special bunny loveys. You and your sewing nurses are truly the best.
Laurel arnold
Would you mind sharing what kinf and where you got the white fabric? Thank you!
Kelly
Love this! Where did you get the floral fabric?
Grey House Harbor
Hi Kelly – This floral print was a remnant from a project I did last year. It was from the Sarah Francis collection at Joann Fabrics, but I’m unsure if they still carry it or not.
Grey House Harbor
Hi Laurel – The snuggly fabric was found at Joann Fabrics in their nursery area. I don’t recall the actual name, but it’s next to all the “minky” type fabrics that are used for baby blankets. And if you’re not familiar with “minky” fabrics, ask a Joann’s associate… I’m sure they’ll know!
Mary Clark
Hello, Iove your Lovey and plan to make up some for NICUs and send them to have for those little angels. Is there any way to print the instructions off. I have to have things written out, so I can just write it if not available to download. I am certainly not wanting to use it for anything other than to give for gifts and to give comfort to as many little angels as possible. Thank you, please continue to create
Michelle
Hey there, this is utterly adorable … I tried to get the material but I think it’s discontinued…. Can you recommend an equivalent ???
Erin
My 18 month old son has a store bought bunny lovey that he adores. I have been looking for something he can love equally as much to leave at the babysitters. I think I have found it! Thanks to your detailed tutorial, I think I can whip one up during one of his naps!
Grey House Harbor
Erin, So glad you found the tutorial! Here’s hoping your son loves it as much as his original.
Sam Campbell
Just finished sewing a total of 58 of these (52 were for Operation Christmas Child)! Made a few changes though. I made my bunnies a little smaller so I could get more out of each yard. My fabric was cut at 12″ x 12″. I used a sturdier fabric for the faces and embroidered the faces on. My face fabric was cut at 4″ x 4″. I made my own ear templates out of cardboard. I also made a face template with holes for stitching points so I could use a marker to transfer each face. Made life much easier! I also top-stitched everything to make it stronger. I used Minky Dimple Dot fabric and whatever cotton blend quilt fabric I had in my sewing box. Thanks for the awesome idea and starting point!
Nicole
Love this!! How well does the paint stay on once washed?
Grey House Harbor
If you use Puff paint or fabric paint, it will stay on no problem!
Melissa
I made four of these over the weekend, two for my niece and two for the baby we are expecting. They turned out so cute…thank you for the great idea and instructions!
Jean Kohn
Easy patterns are my favorite — not only does this come together quickly, but your instructions and photos leave out any guesswork on my part (I usually guess wrong if the directions are the least bit complicated!) LOVE THIS! THANK YOU!
Heidi
Hi there, love this pattern but only had one colour of fabric paint at home. I thought about stitching the face on but then you would need to do that before assembling all parts. Will try that with the next piece.
Thank you!!
Linda
Thank you for this tutorial I made the bunny lovey , and just love it, I made an adjustment to the face but it’s so cute and cuddly ????
Grey House Harbor
Linda – So glad you enjoyed the tutorial. Everyone needs a lovey. ;)
Jean Kohn
I made 3 of these in a jiffy! So cute and perfect quick gifts for baby! I have been using smooth white cotton for bunny’s face, but would like to hear what others have used successfully!
Iris
Ooh, this is soo cute! I’m making it for my cousin, hope it will work out!♥️
Christine L Woodall
I made this out of pretty pink flannel and white chenille with a piece of white on white for the face. Haven’t painted the face yet. I’m going to test permanent markers for the face, if not I’ll have to buy some fabric paint. So easy and cute
Liz
Lovely item. May I suggest you make a few so that one can be in wash!!
Grey House Harbor
Never a bad idea to have multiple lovies on hand! And when they’re this easy to sew, you really have no excuse. ;) Thanks Liz!
Trish Eyerly
Thank you! Just finished a Bunny lovey for my new niece or nephew due June 2017, super simple and so cute! I used the leftovers from a quilt I made for the baby so now the little darling will have a perfect set!!
lorraine
This is adorable but wondering about the paint if a child puts it in their mouth.
Shirley
Keep up the good work…luv it!
lili
Merci c’est adorable !
lili
Laurie
I’ve made three of these fir baby shower gifts. I just love them. I do a needle point face on them and reinforce the ears by back stitching a few times.
Beth
Great tips, Laurie! Glad you’ve enjoyed the DIY.
amelia flint
thanx for this wonderful, simple project! i have made several for baby shower gifts….. Everybunny loves them!
Beth
So nice to hear this, Amelia! Thank you.
Meghan
Loved making this project! Have as a gift and my friend love it… So did her little one! I did the back fabric to look like a small patchwork quilt. I also embroidered the face because I didn’t have fabric paint. Turned out adorable!! Thanks for the great tutorial. :)
Joy Bandy
i do have a ? or 2 will paint hold up as will get washed a lot? could you use a pom pom for nose? buttons for eyes? i would love to see how the fellow Sam did his faces since he did so many & others too any tips would help
Thank-you VERY cute love this project very nice!
Christina
I am a beginning sewer and have a baby on the way in October. I can’t wait to make this project for my little one. :)
Hinnie
Thank you for sharing, I used terry cloth & 100% fabric for the other side. I feel they this would help with drooling & spills.
Love the pattern, my granddaughter is going to love hers!
Joy Bandy
got an e-mail saying NEW comment on sewing the bunny lovies but do not see it? can you help ? also paint how well does it hold up thank-you Joy Bandy
Beverly B Gladin
May I sell items made from this pattern?
Thank-you.
Beth
No, sorry. It’s for personal use only. Thanks for checking.
Hannah Joy
Hi!
I’m really excited to make this project for my upcoming niece or nephew. I cannot however print the ear pattern, would you please mind telling me the measurements of the ears roughly? Thanks!
Marie-José PEYRAUBE
Bonjour, en cette période difficile de confinement … on cherche toutes et tous à bricoler de mains. Votre doudou lapin a retenu mon attention mais je ne parviens pas à télécharger le tuto pour les oreilles ? Pourriez vous SVP me l’envoyer ? Je vous remercie par avance et vous souhaite une belle journée
Brandi
You have made a great pattern and instructions. I have been meaning to make this for awhile, but now with COVID can’t have stuffies at daycare I made one for my LO out of low pile terrycloth.
Rita B
Very clear instructions! This is so adorable. I’m making one for my two new grand babies- a boy and a girl!
Mandy
If the front fabric is smooth enough, and I plan on embroidery instead of using fabric paint, would it be acceptable to skip the extra square for the face? Like make the face right on the corner?
Grey House Harbor
Mandy – Sure! The extra square isn’t necessary if you’re doing embroidery and the fabric is smooth. Just be sure to do the face prior to putting the two halves together!
Mandy
Thank you!
Judy Stewart
I love the bunny pattern. Not to many give away free something you can use and understand thank you!
Carolyn DiPerri
I love this bunny blanket; easy to carry along and easy for baby to hold. So soft and adorable. You could easily change this into other animal blankets and use up a lot of your scraps. Thank you for sharing this pattern.
Carolyn
lynda rose
I just love this pattern. The minute I saw it, I pulled out my terry cloth and flannel and made four of them in one affternoon. However, I embroidered the eyes and mouth of the bunny. I LOVE THEM~
Thank you so much for the pattern and instructions!
Sonia
I love this tutorial! I’ve made two of these bunnies so far, for friends who had babies. I used a minky fabric for one side and a faux sherpa for the other, and embroidered the bunny’s face instead of painting (I backed the face material with interfacing to strengthen it), as well as the baby’s name at the bottom, on the plain side. I love how it’s simple to follow and comes out so cute!
Louise
Great project! Can’t wait to make one!
betty
I just finished my first bunny lovey … so cute. Wish the pictures would print out along with the directions since it may be months before I make more. Thx for the tutorial !
Beth
So glad you liked it! Thank you for letting us know!