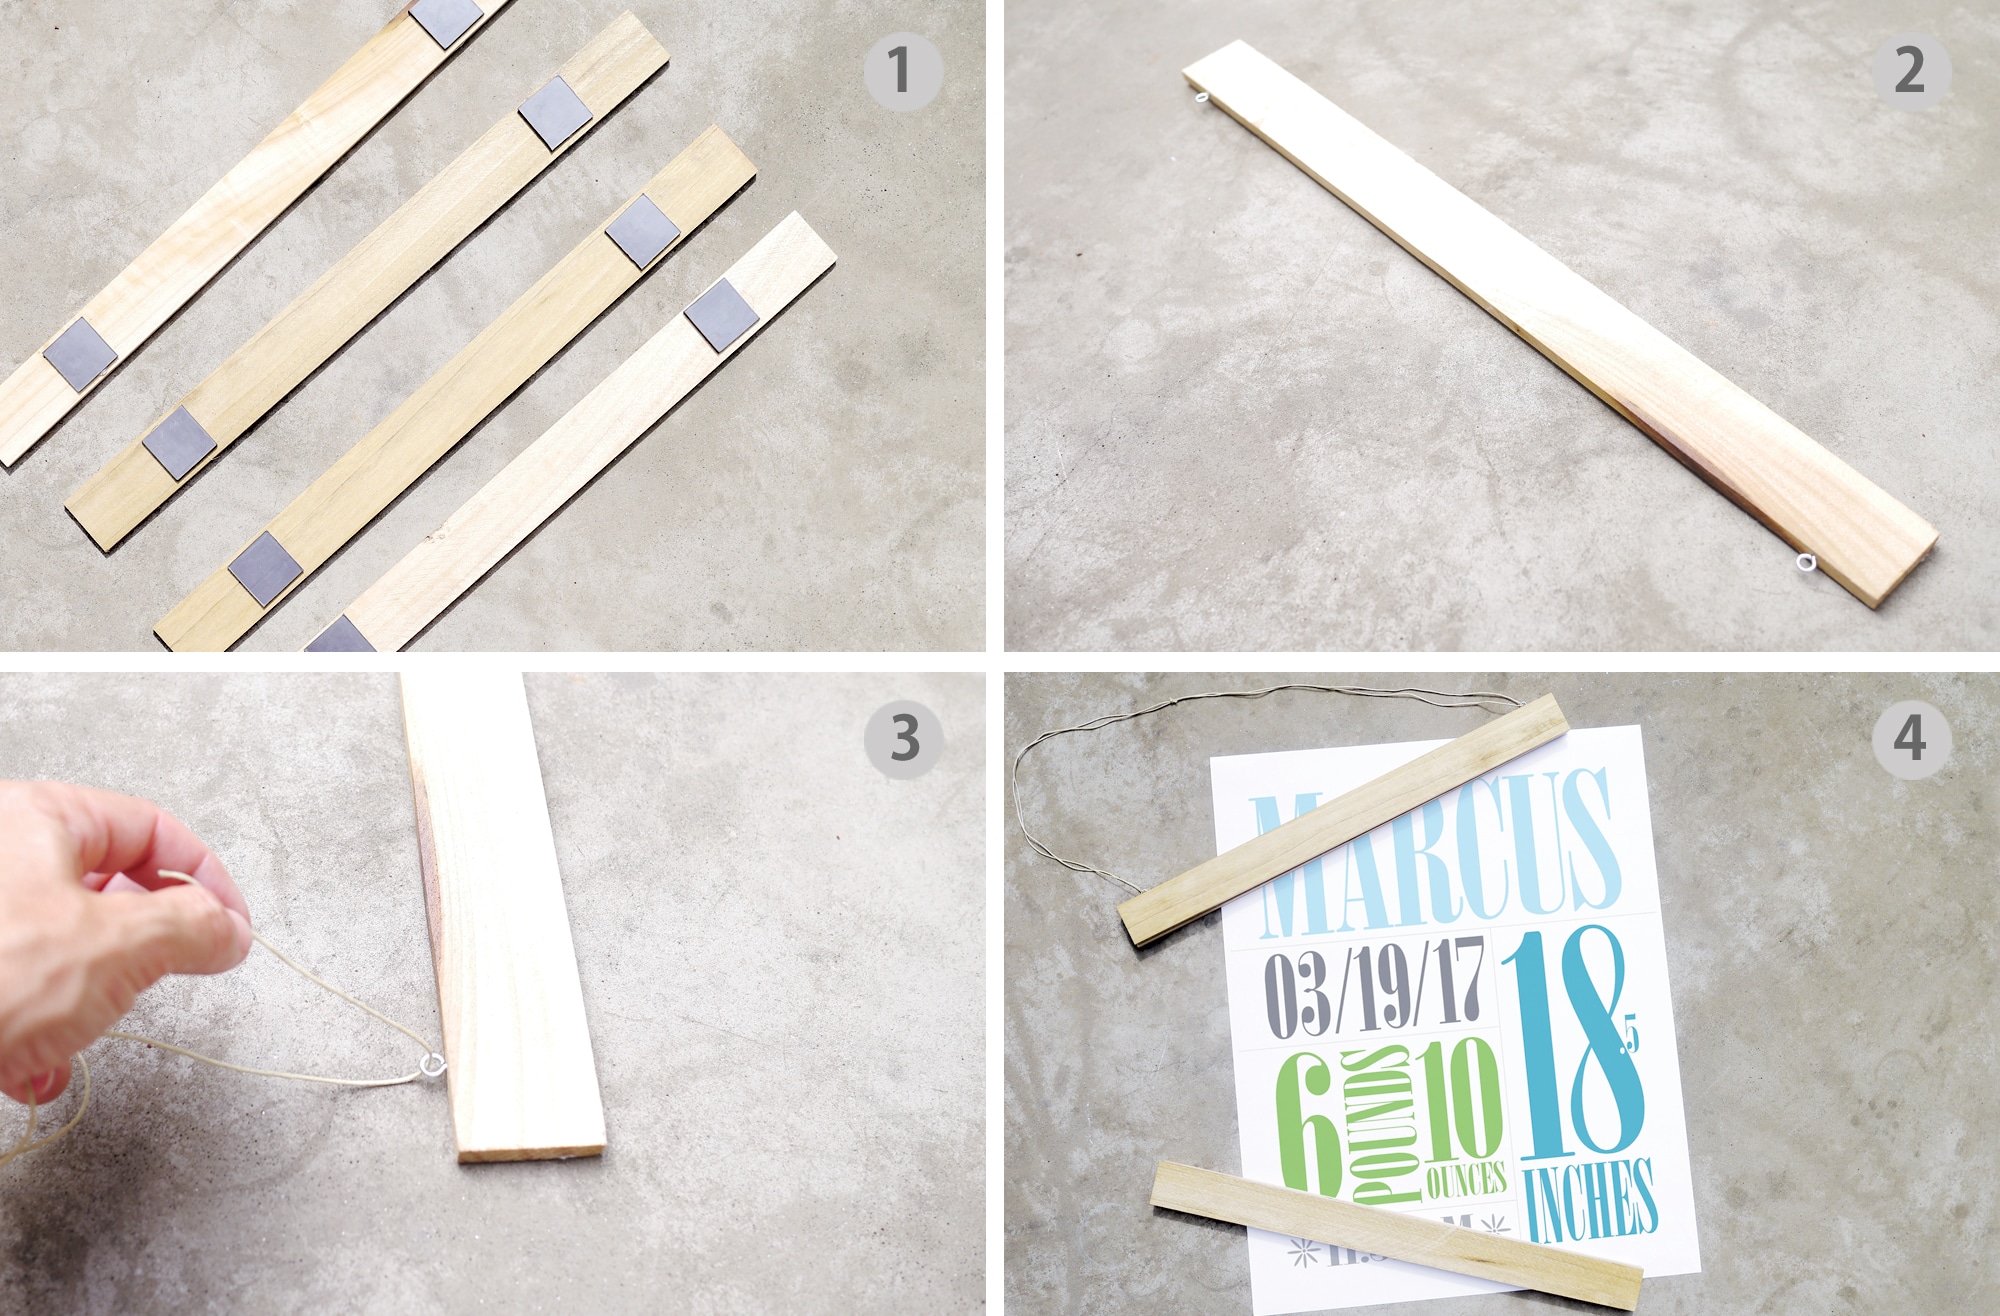
Let’s give that nursery corner a special touch with a non-conventional framing, shall we? We put together a simple, but oversized, DIY poster hanger. Using natural colored wood and some magnets, this user-friendly hanger will look lovely in your nursery.

 Materials: 4 poplar wood strips (size 17.5″ long by 1.5″ wide), 2 small eye screws, a wood stain of your choice (we use natural color stain for a soft look), natural colored cord, 8 square magnets and a glue gun

1. Once you have stained the wood strips, it’s time to glue on the square magnets. Using hot glue, place all 8 magnets onto the strips making sure they are all aligned.
2. Install the two eye screws to one of the wood strips placing each eye screw 1.5″ from each edge.
3. Attach the cord to the eye screws making a big loop.
4. Now, all that is left is to assemble the poster and hang the finished piece. Just sandwich your art print between two of the wooden strips at the top and the bottom using the magnets to hold everything together.
Keep in mind that you can customize the poster hanger as your heart desires. Perhaps painting the wood strips white and using a bright colored cord is what your nursery needs. Make it unique and personal so it fits your style.
 custom birth print | grid pillow
Because this DIY poster hanger uses magnets, you can easily change your art as you change your mood. Just unfasten the strips to change your poster and create a new look. So, what do you say, will you try this DIY?
Editorial Note: While most decor items should be kept out of baby’s reach, this DIY includes magnets so please be extra careful that it is hung high enough that your child cannot reach it.
SaveSave


Comments
Kelly
Hi there, I’m looking to make one it’s going to be 48 inches wide. Am I going to need a lot more magnets to hold something such as canvas? Many thanks! :-)