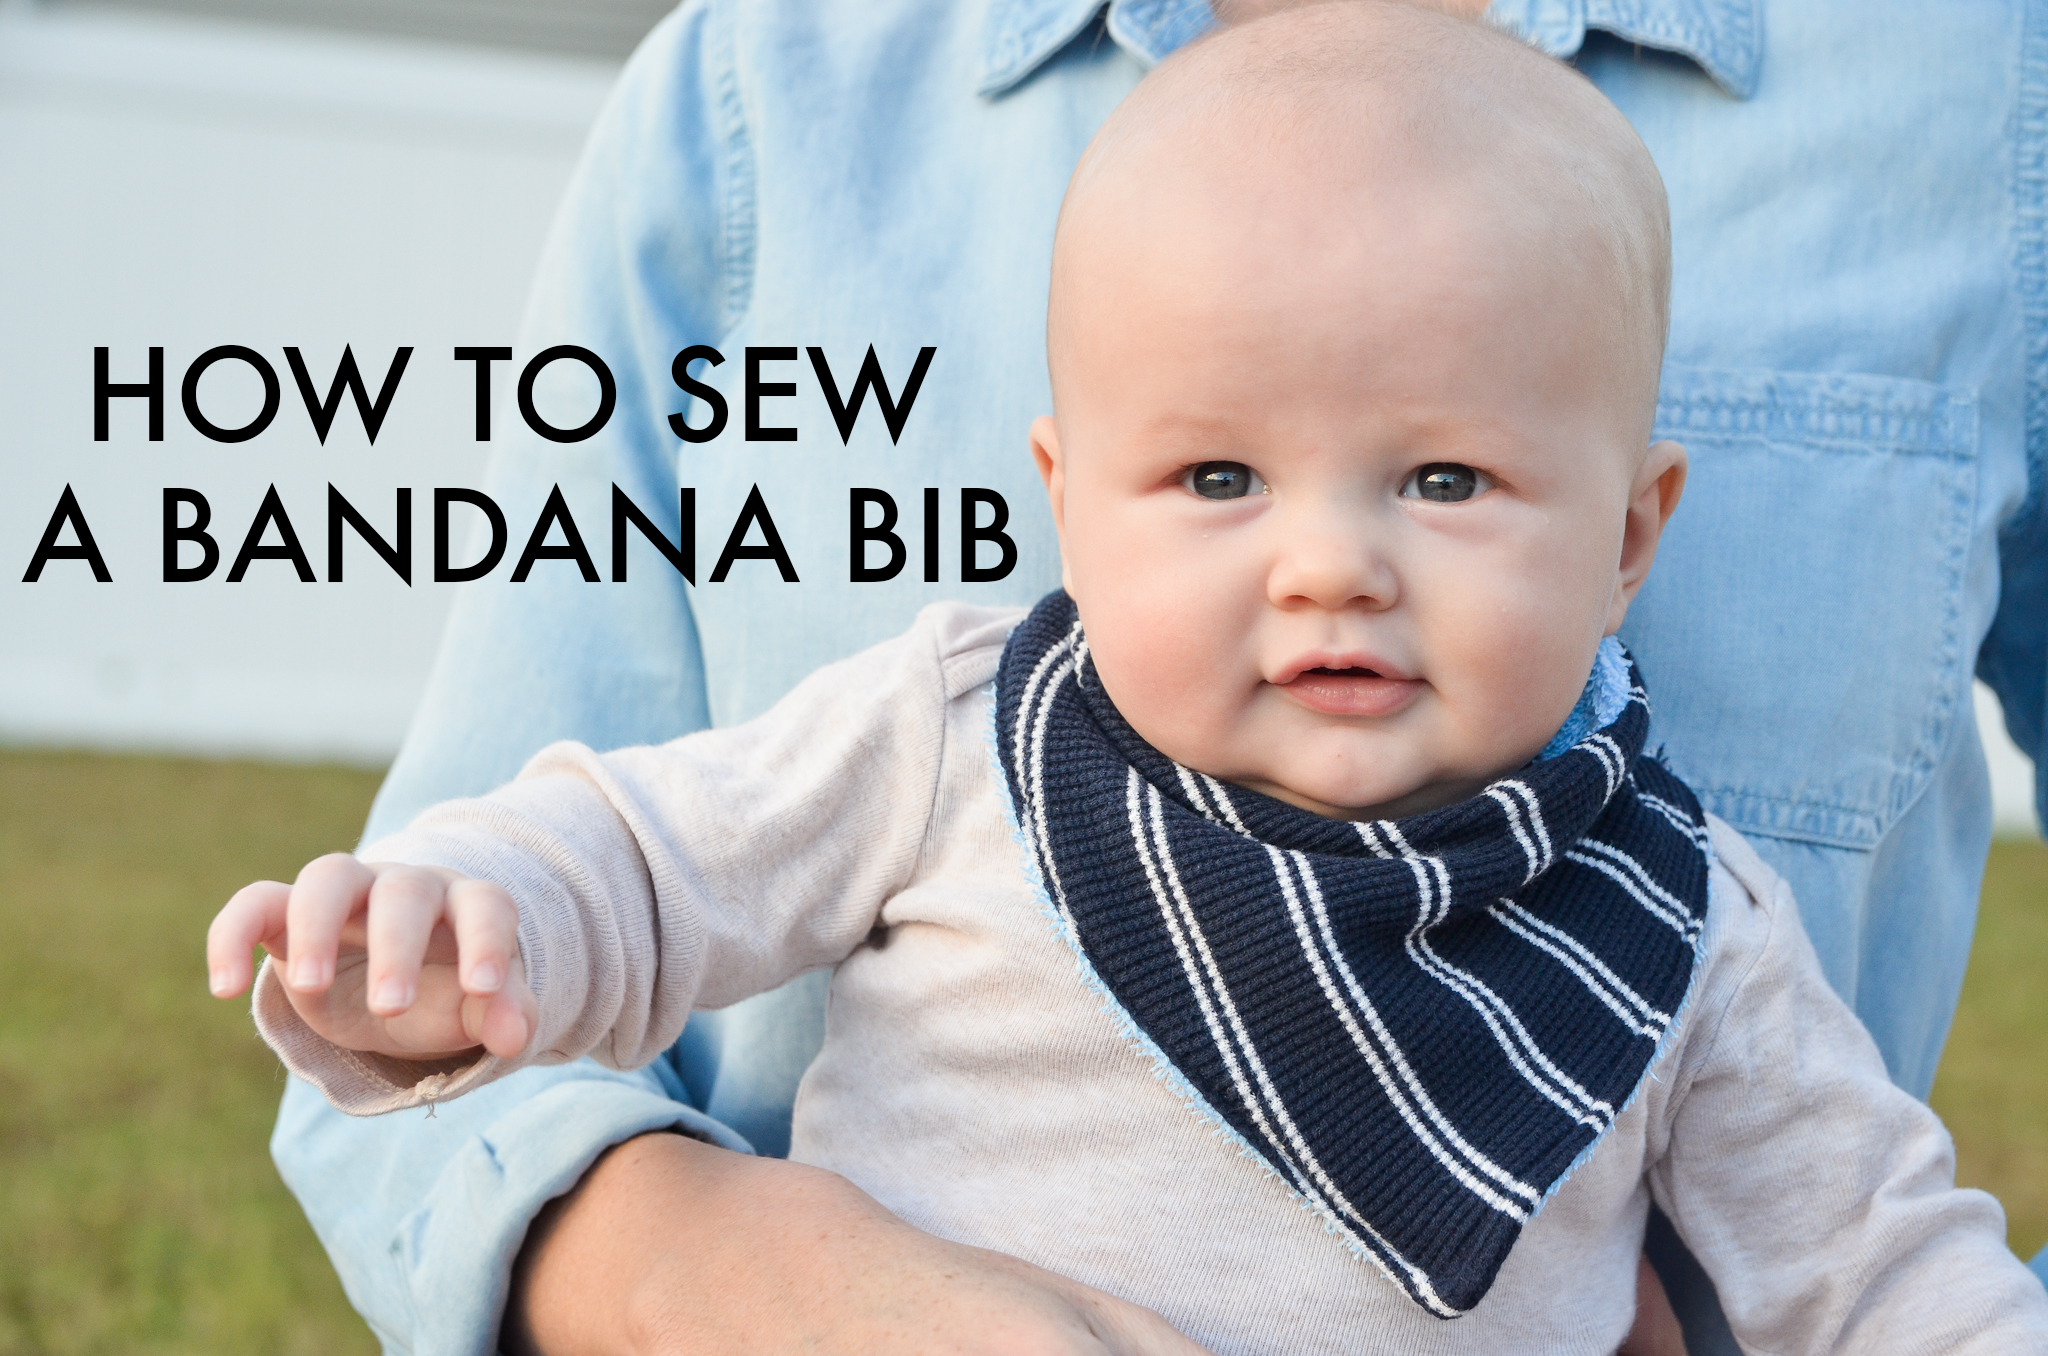
Teething is inevitable. Hooray for solid foods! But the drool that those impending chompers produce is unreal. Easier to change than a soaked-neckline onesie and more stylish than a traditional feeding bib, the bandana bib is a fresh way to keep the laundry at bay. This beginner-level tutorial will walk you through how to sew a bandana bib for the adorable drooler in your life.
Materials: two pieces of fabric (minimum size 22″ x 8″), pins, snap fasteners (Velcro or buttons work too), thread, sewing machine, bandana bib pattern
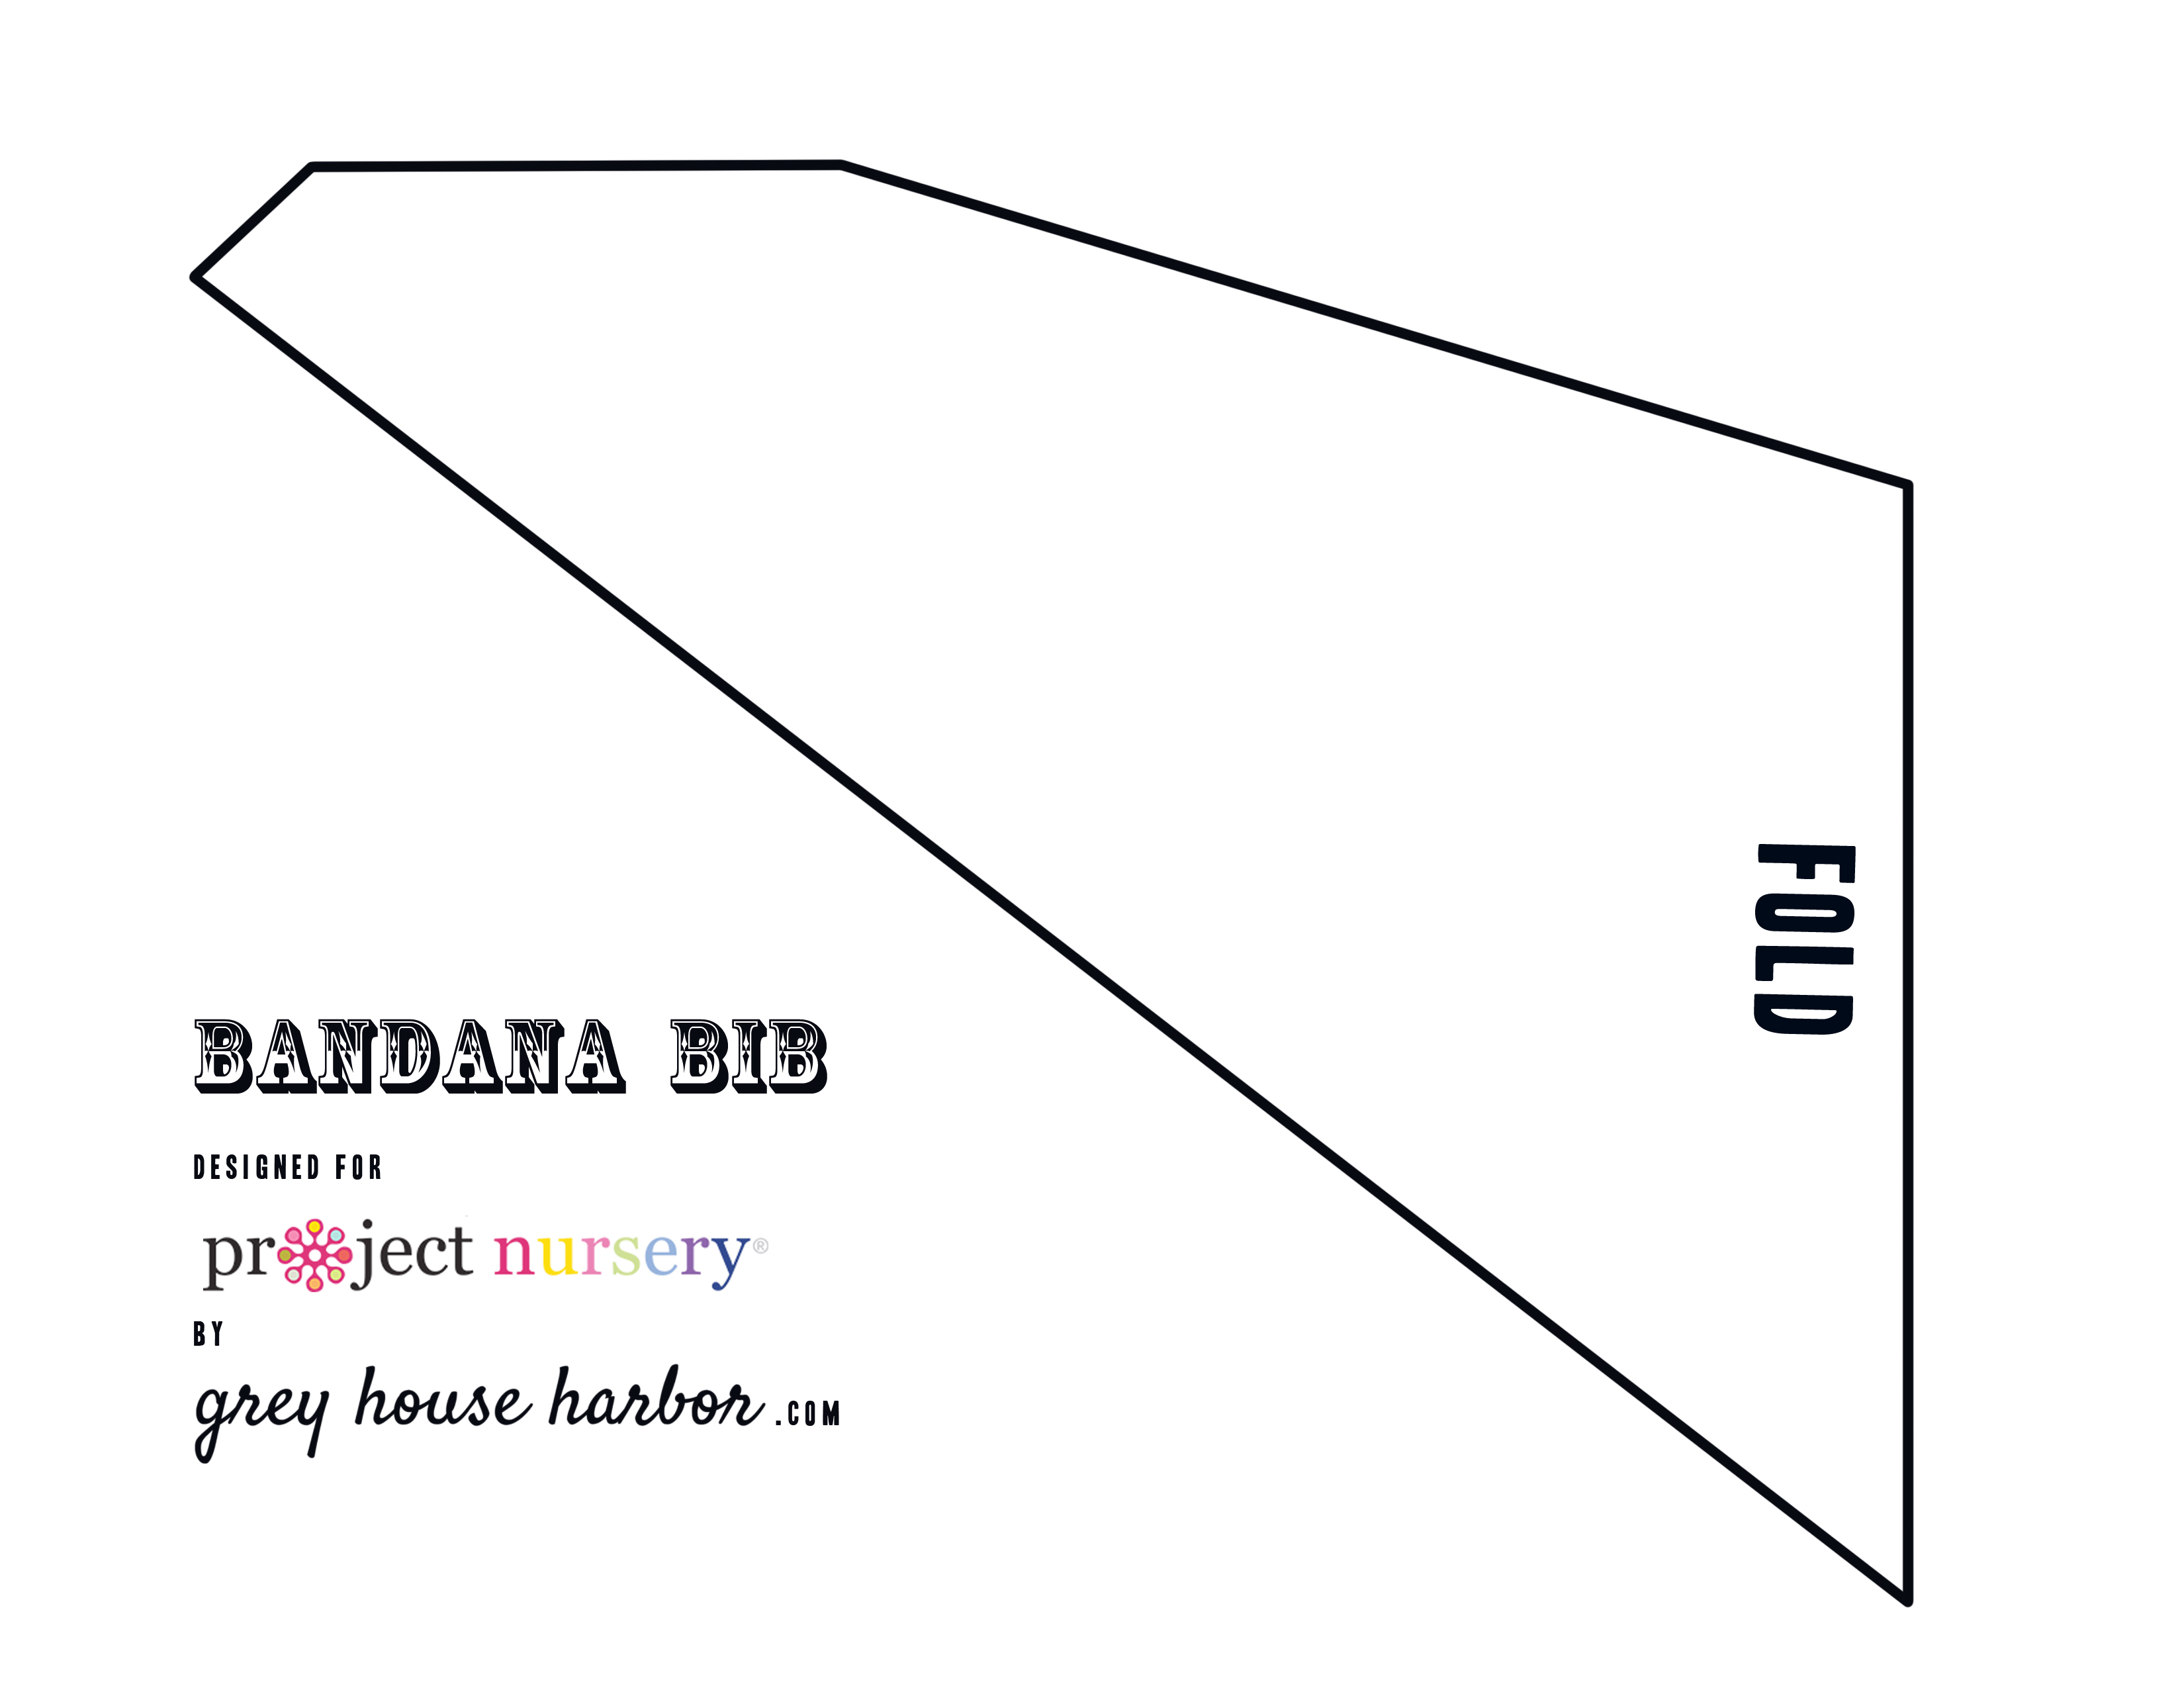
Begin by printing our free bandana bib pattern onto letter-sized paper, and cut it out. (This pattern will fit most kids aged 3 months to 2 years.)
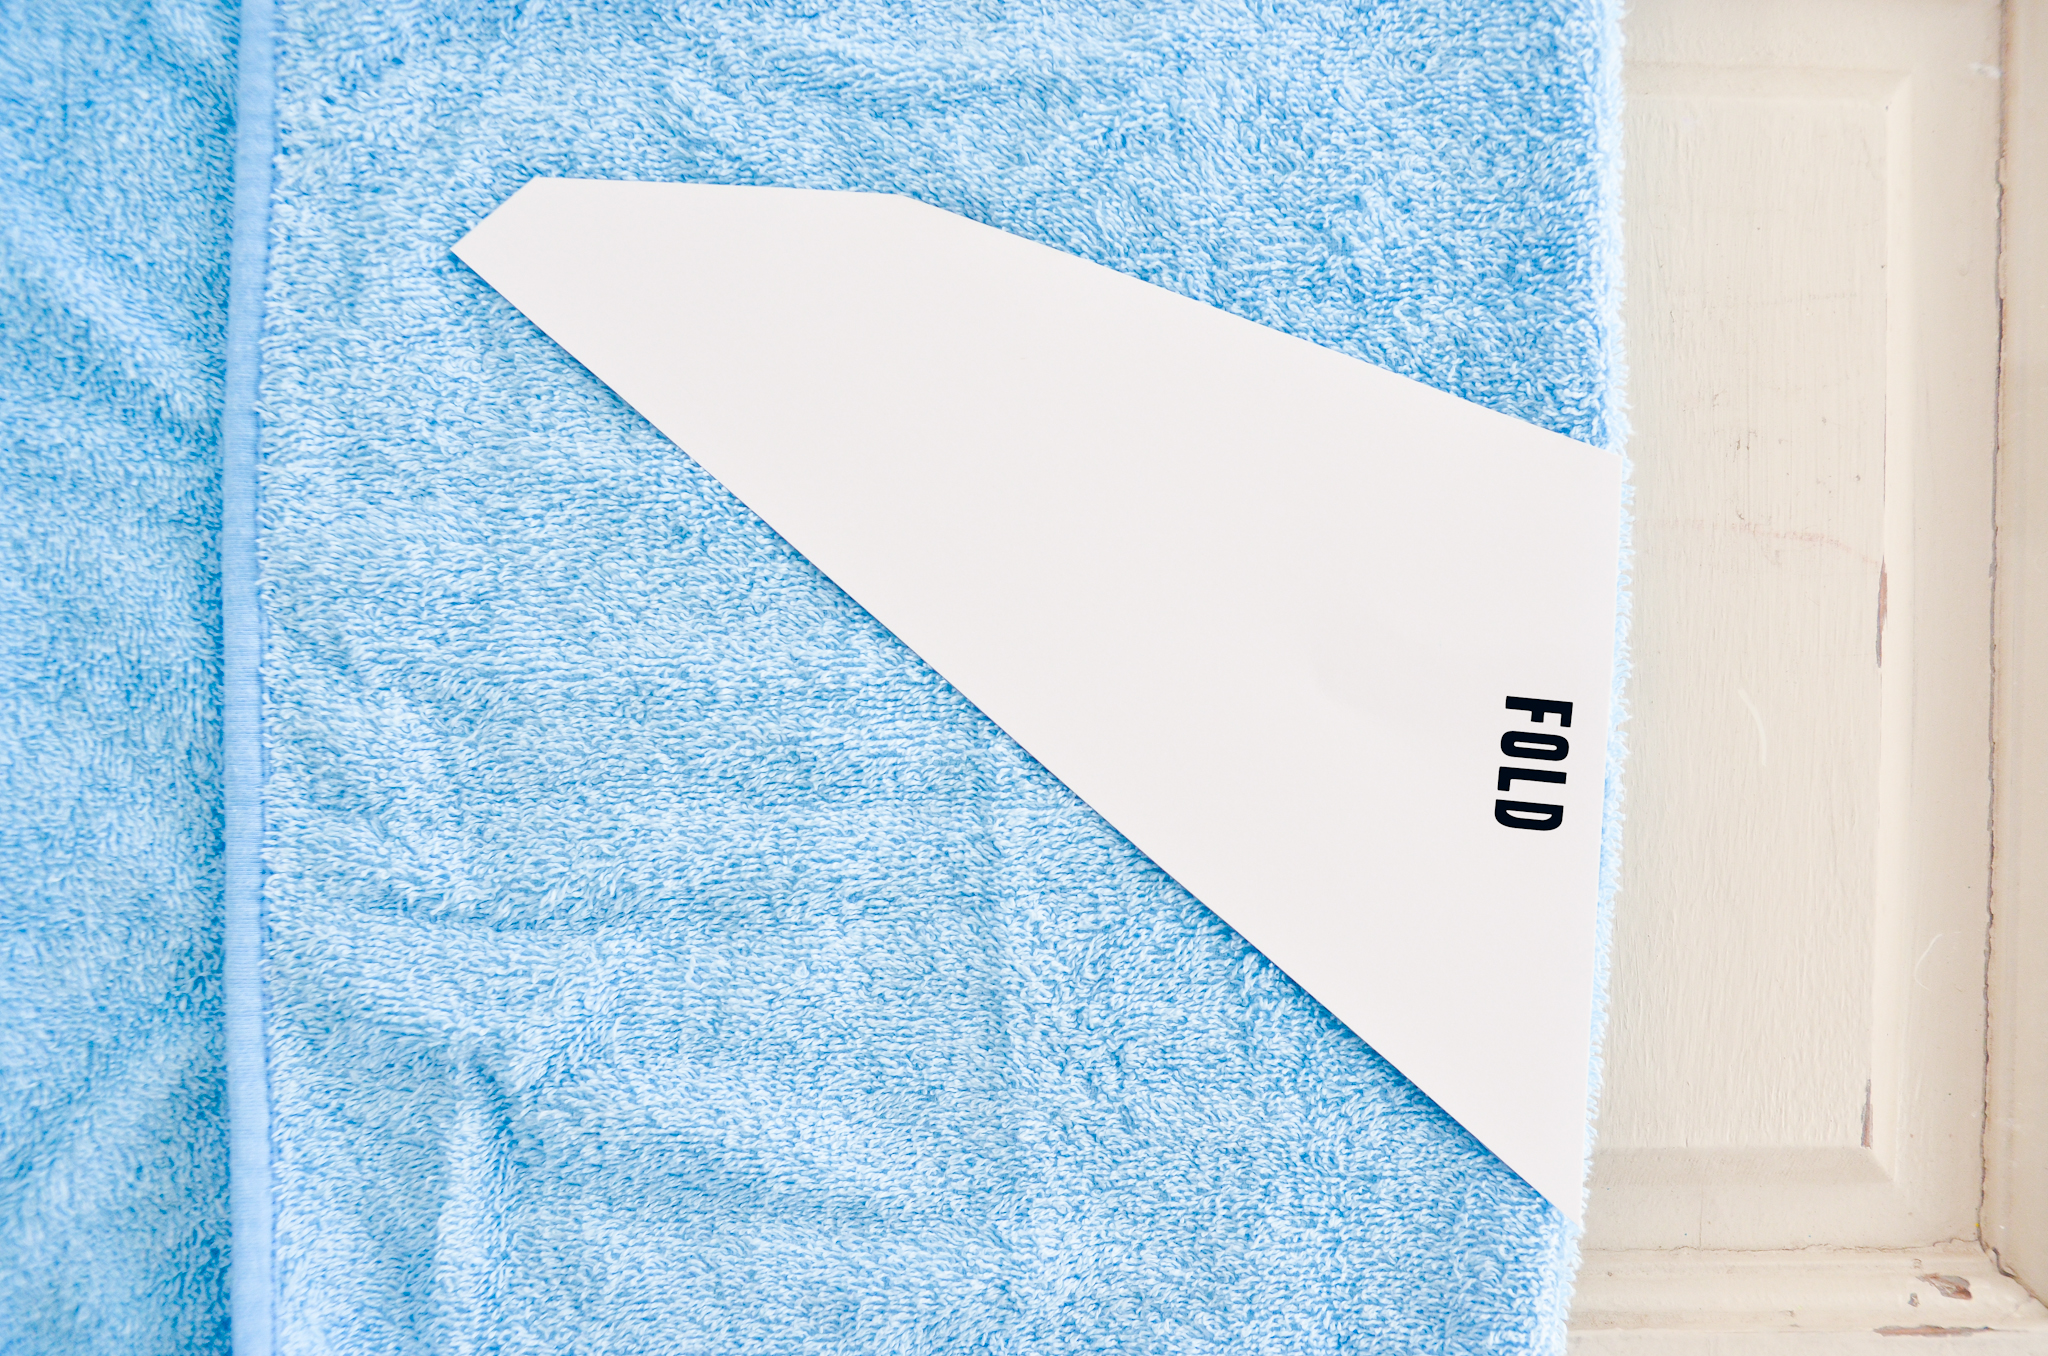
Let’s briefly discuss a crucial factor when it comes to fabric choice: it must be absorbent. If not, the bib will lack drool-catching functionality, rendering it cute but worthless. I suggest choosing fabrics made of terry cloth, muslin, flannel or jersey knit cotton—these are all absorbent and easily washable. Instead of buying new fabric for this project, I chose to use an old baby towel and child’s t-shirt, both of which were otherwise headed to the thrift store.
Whether your fabric is new or you choose to upcycle like me, start by folding one fabric so that the entire pattern fits on the folded section. Align the pattern edge that says FOLD along the folded edge of the fabric. Cut the pattern out.
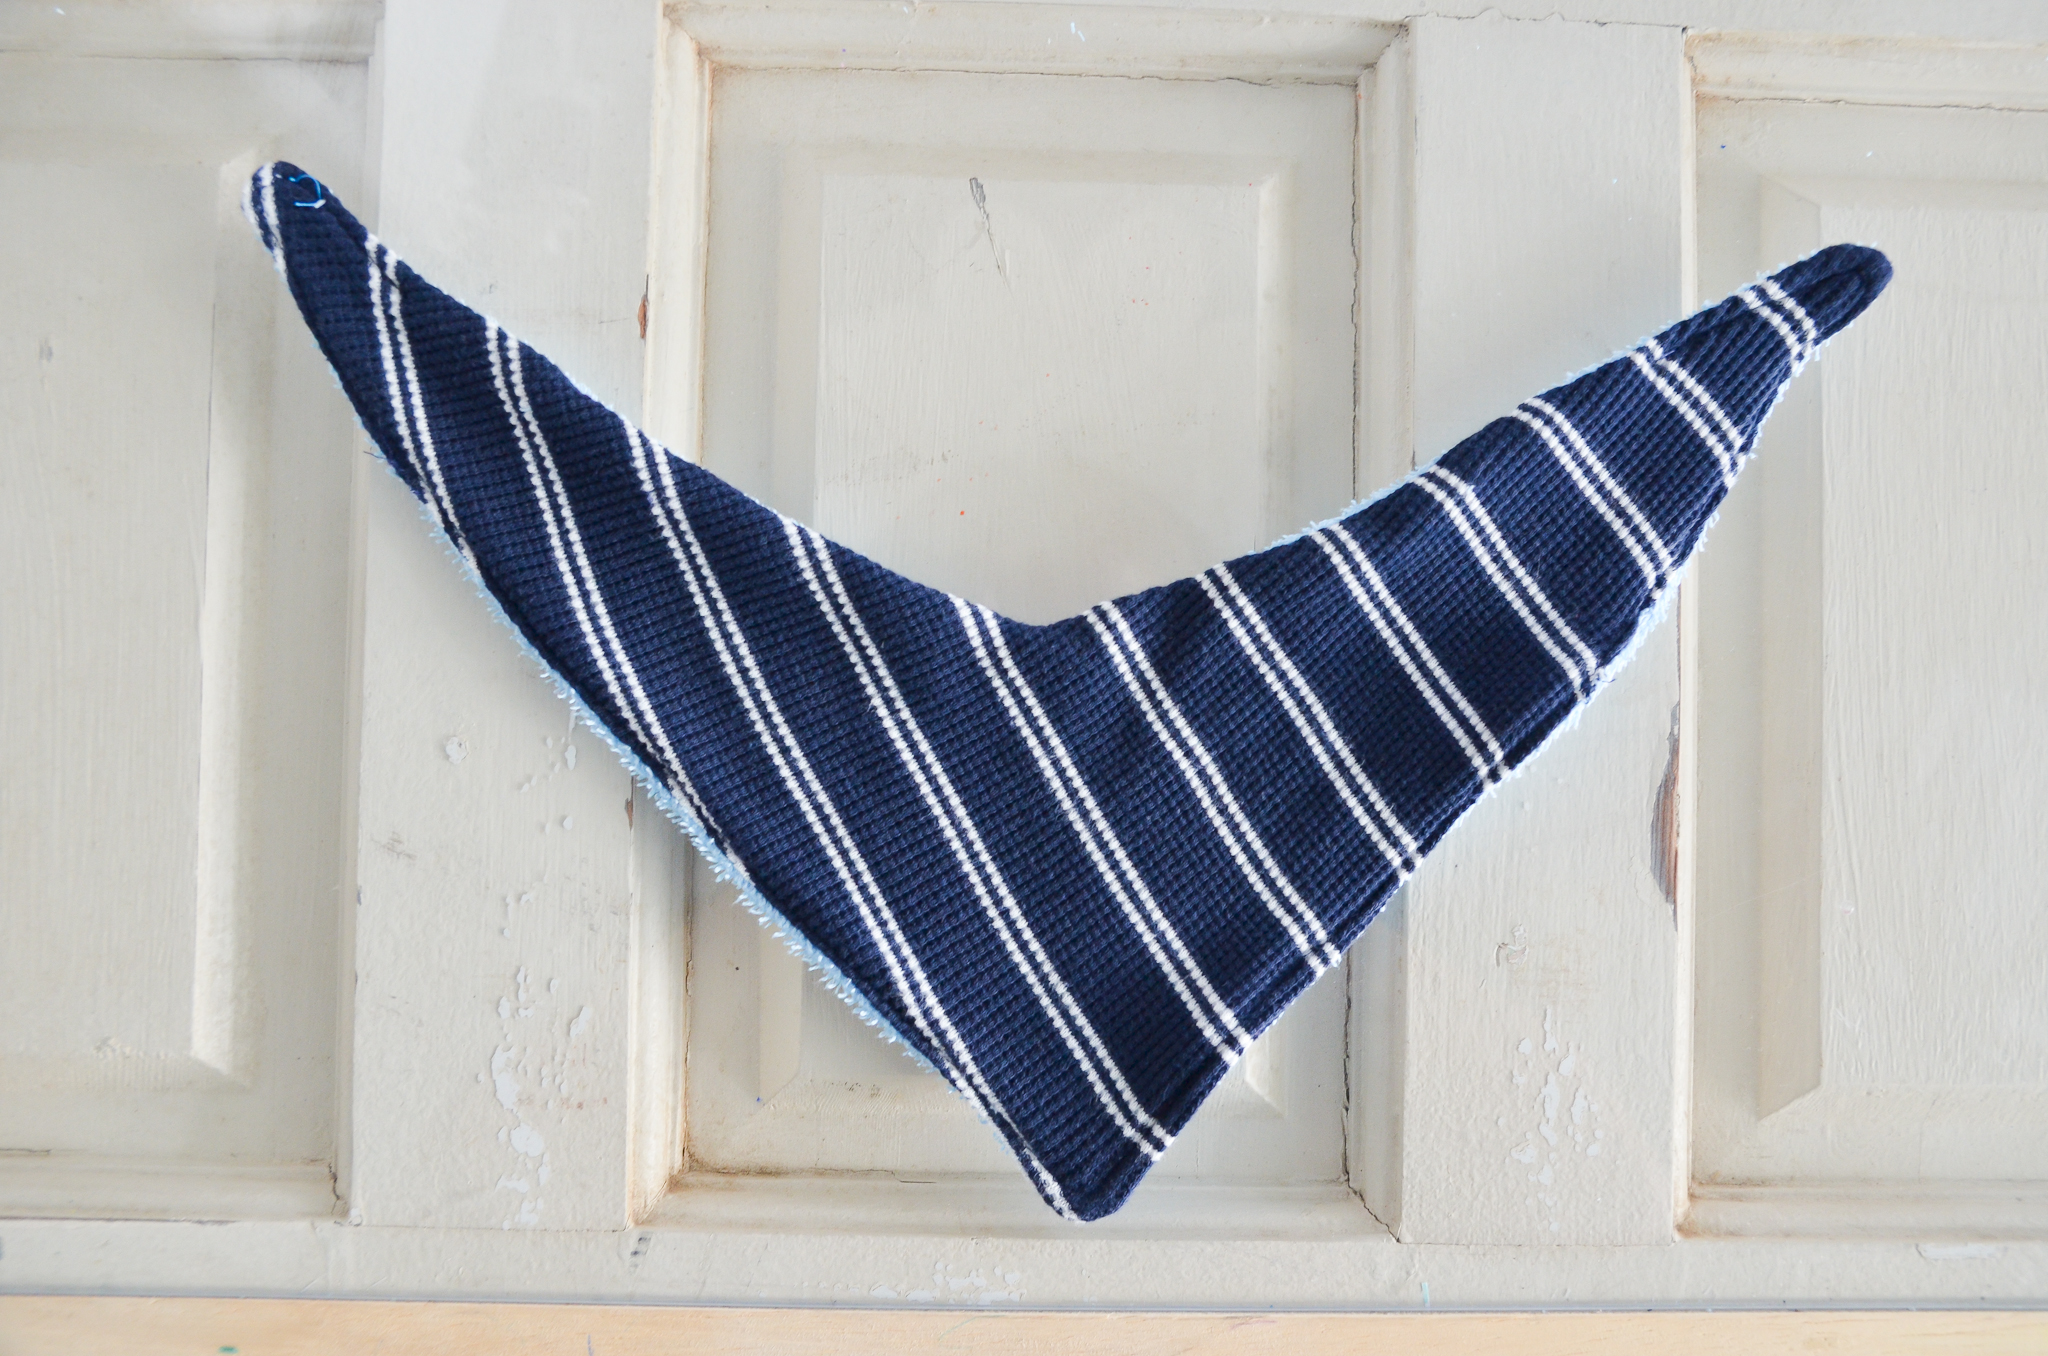
If you did it correctly, you’ll open the fold and have a bib piece that looks like this.
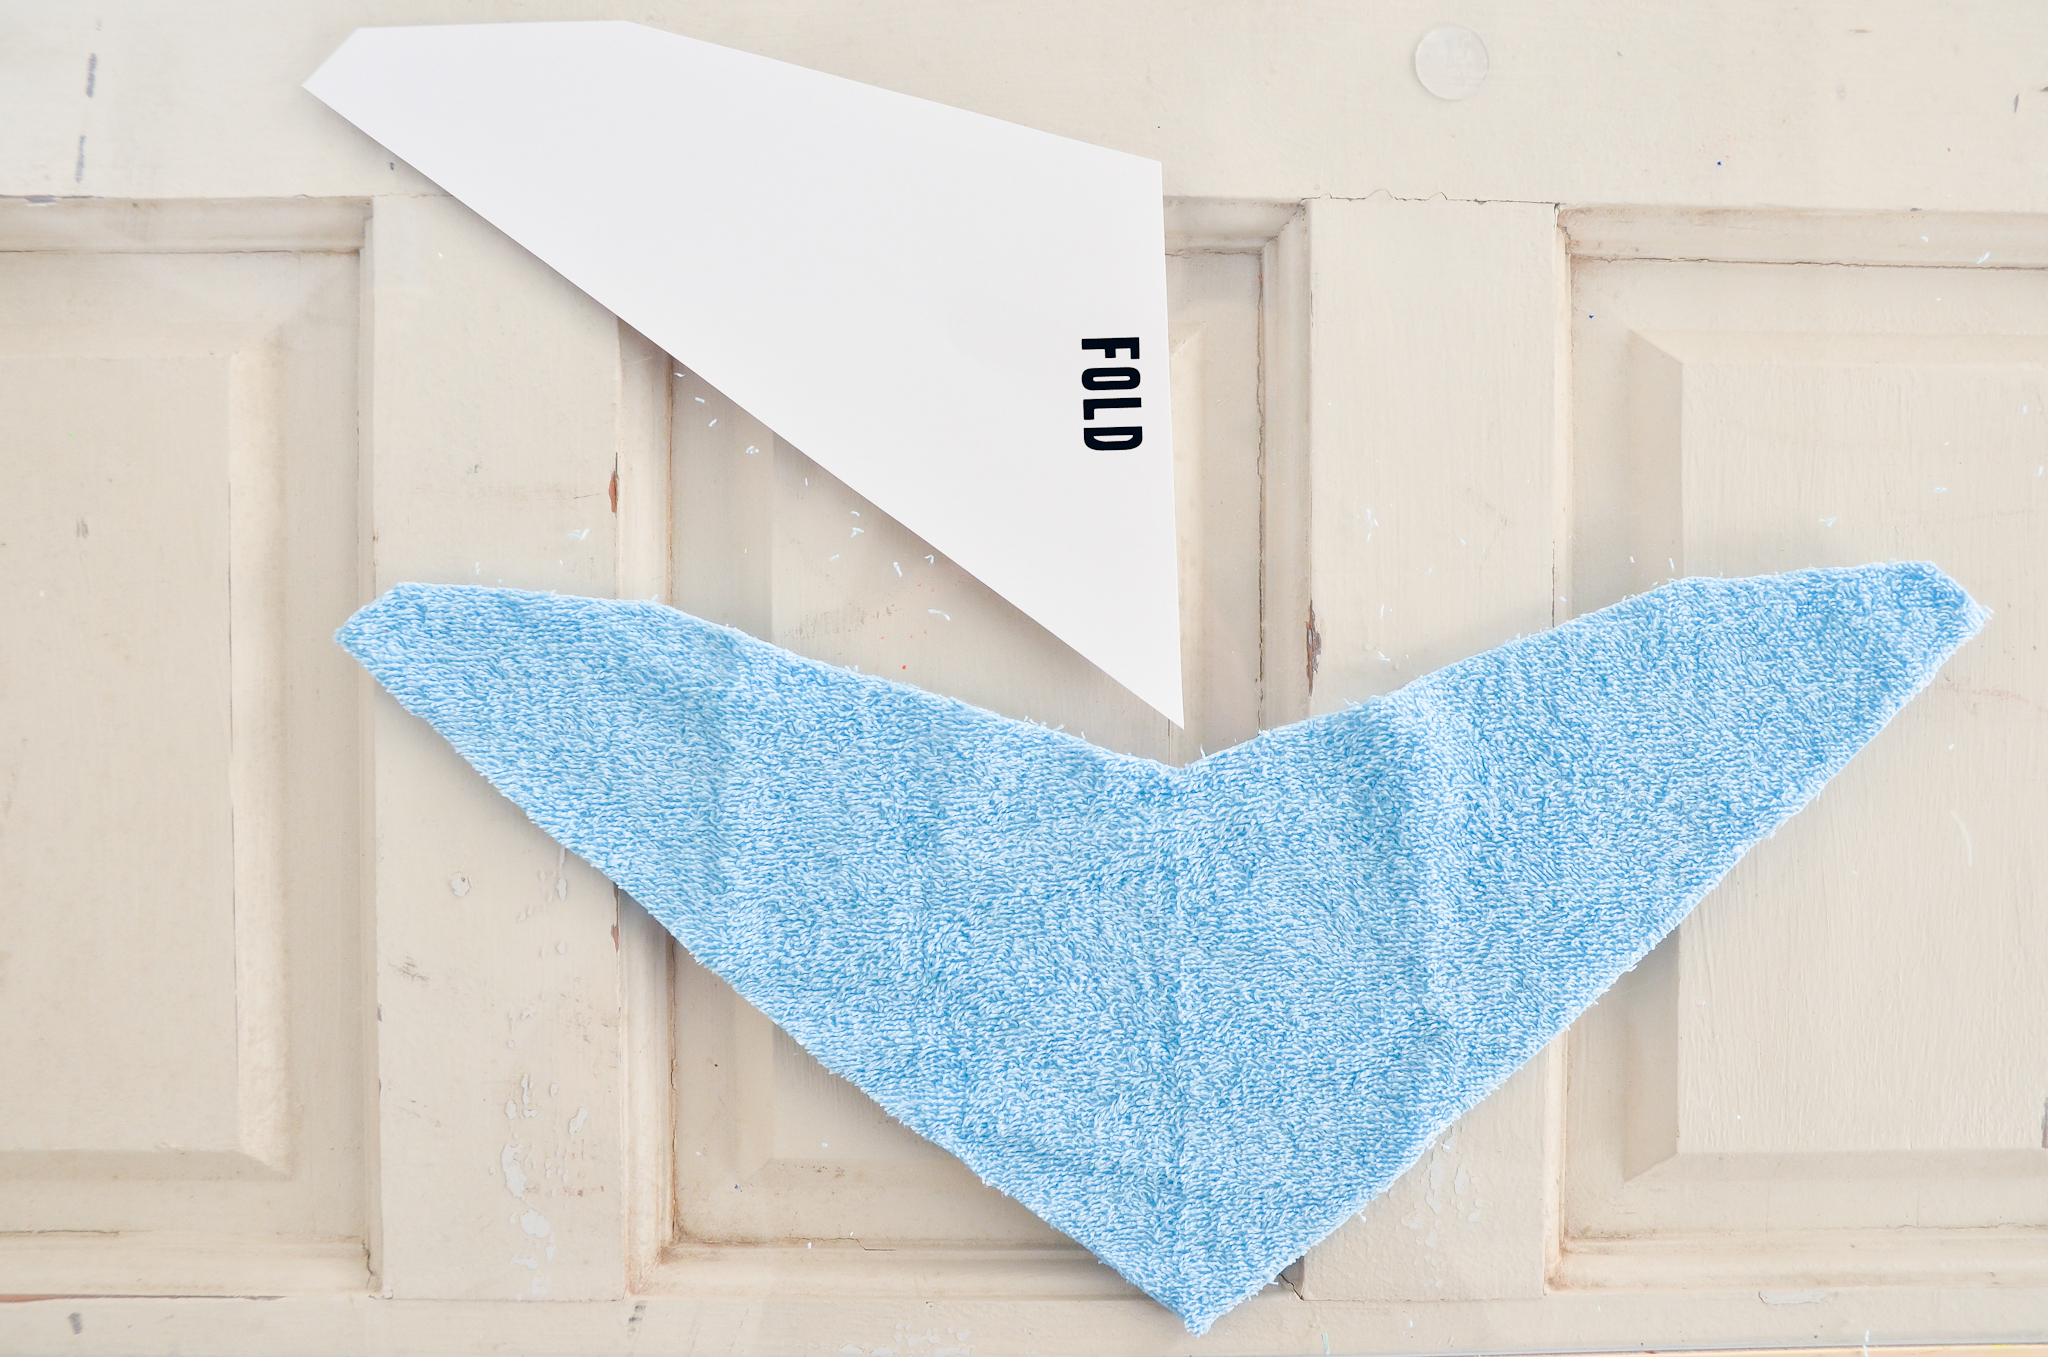
Repeat with your second fabric. Or if the second fabric is tricky to fold like my t-shirt, just lay your first bib piece on top and cut around that.
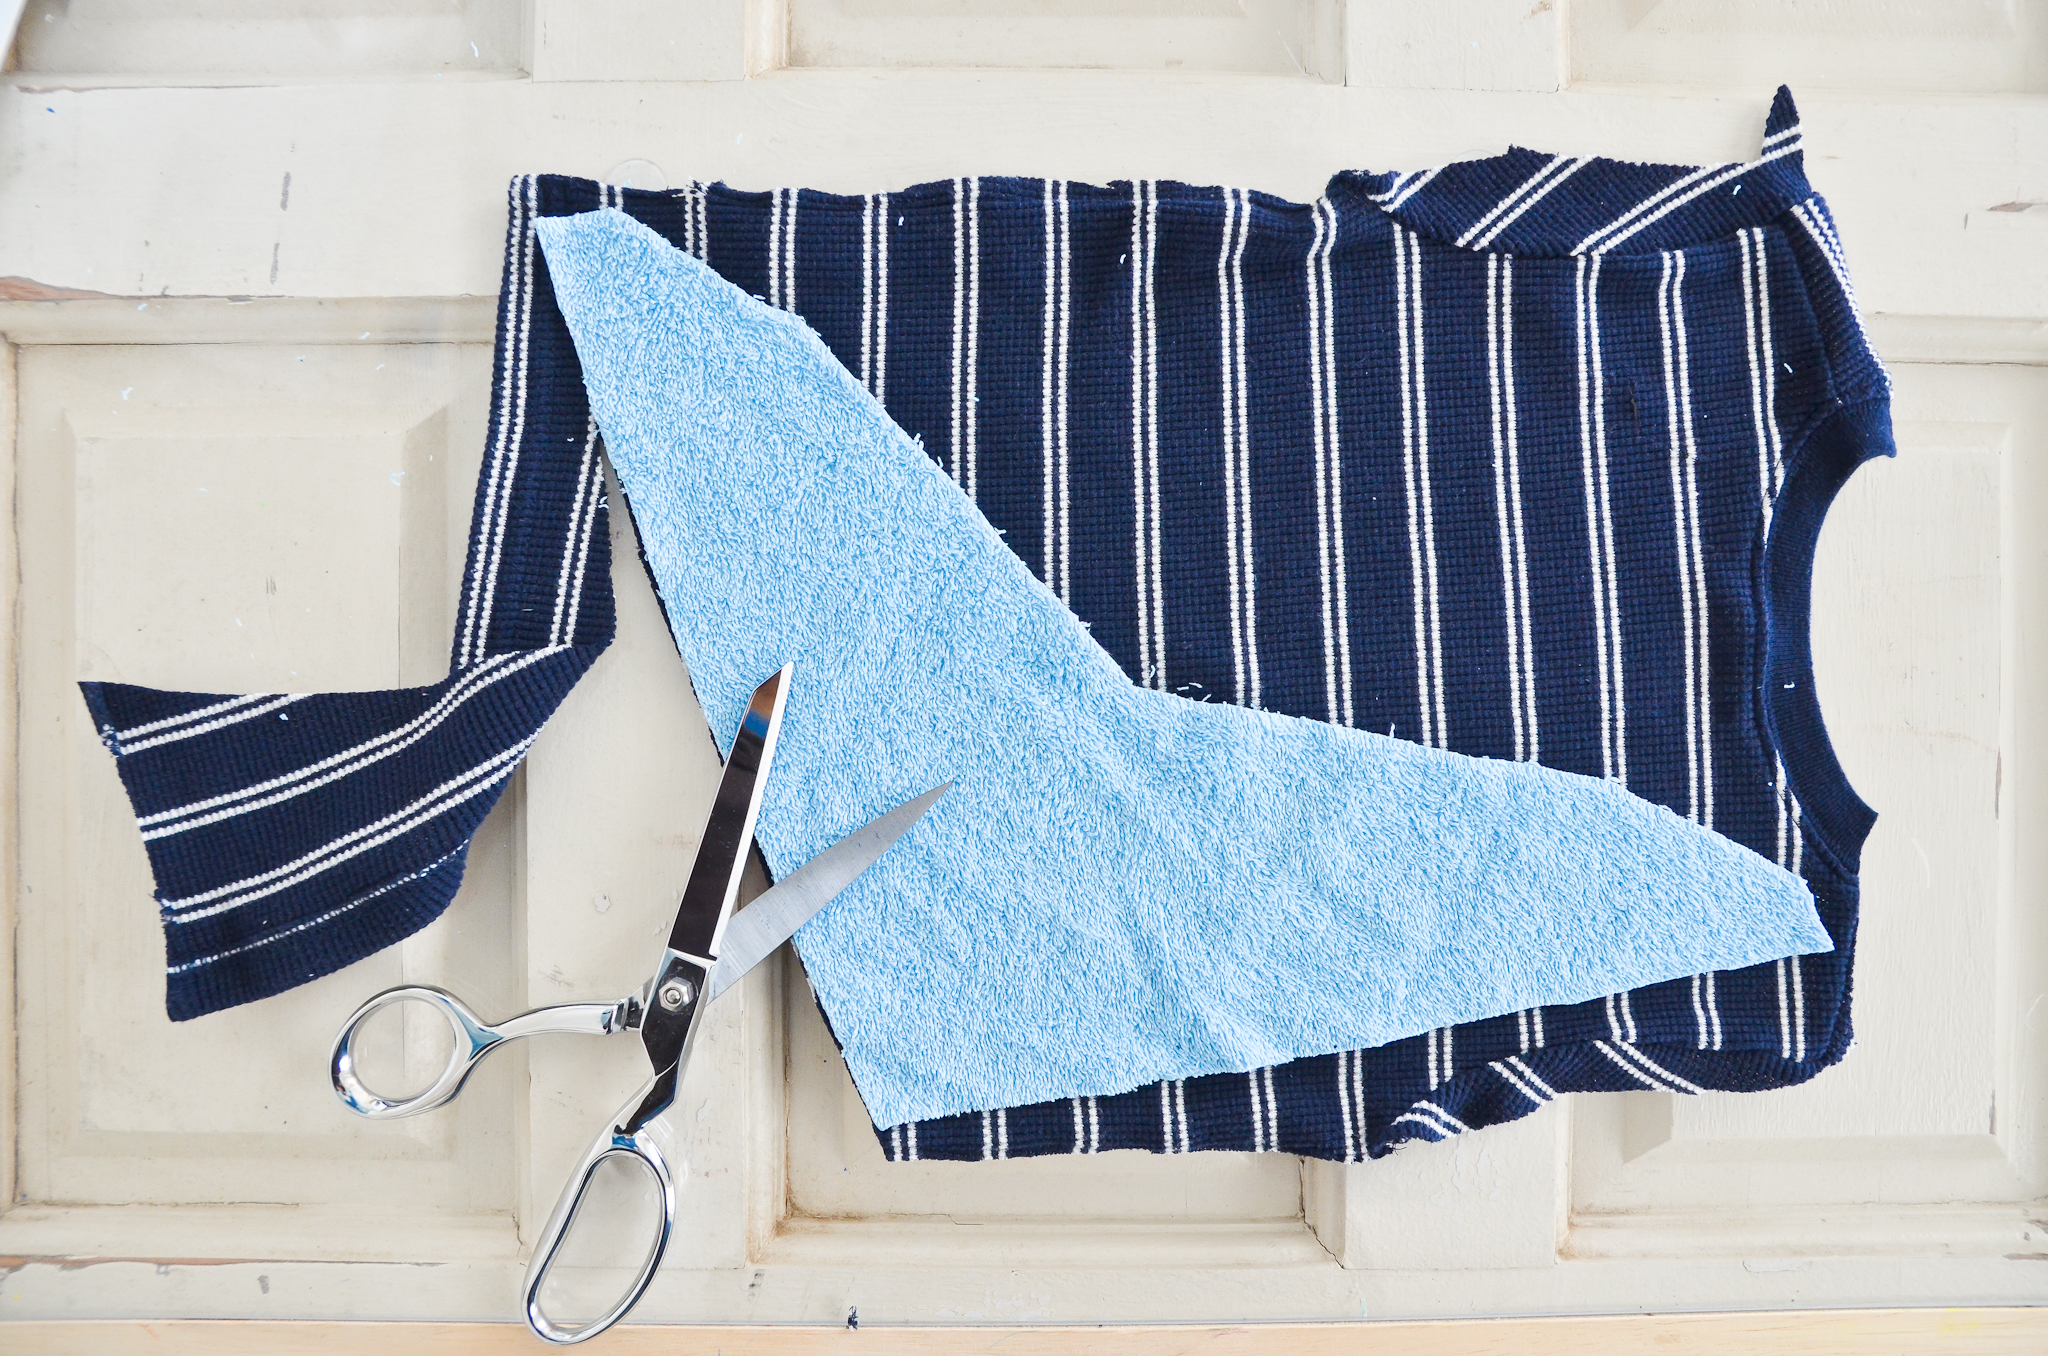
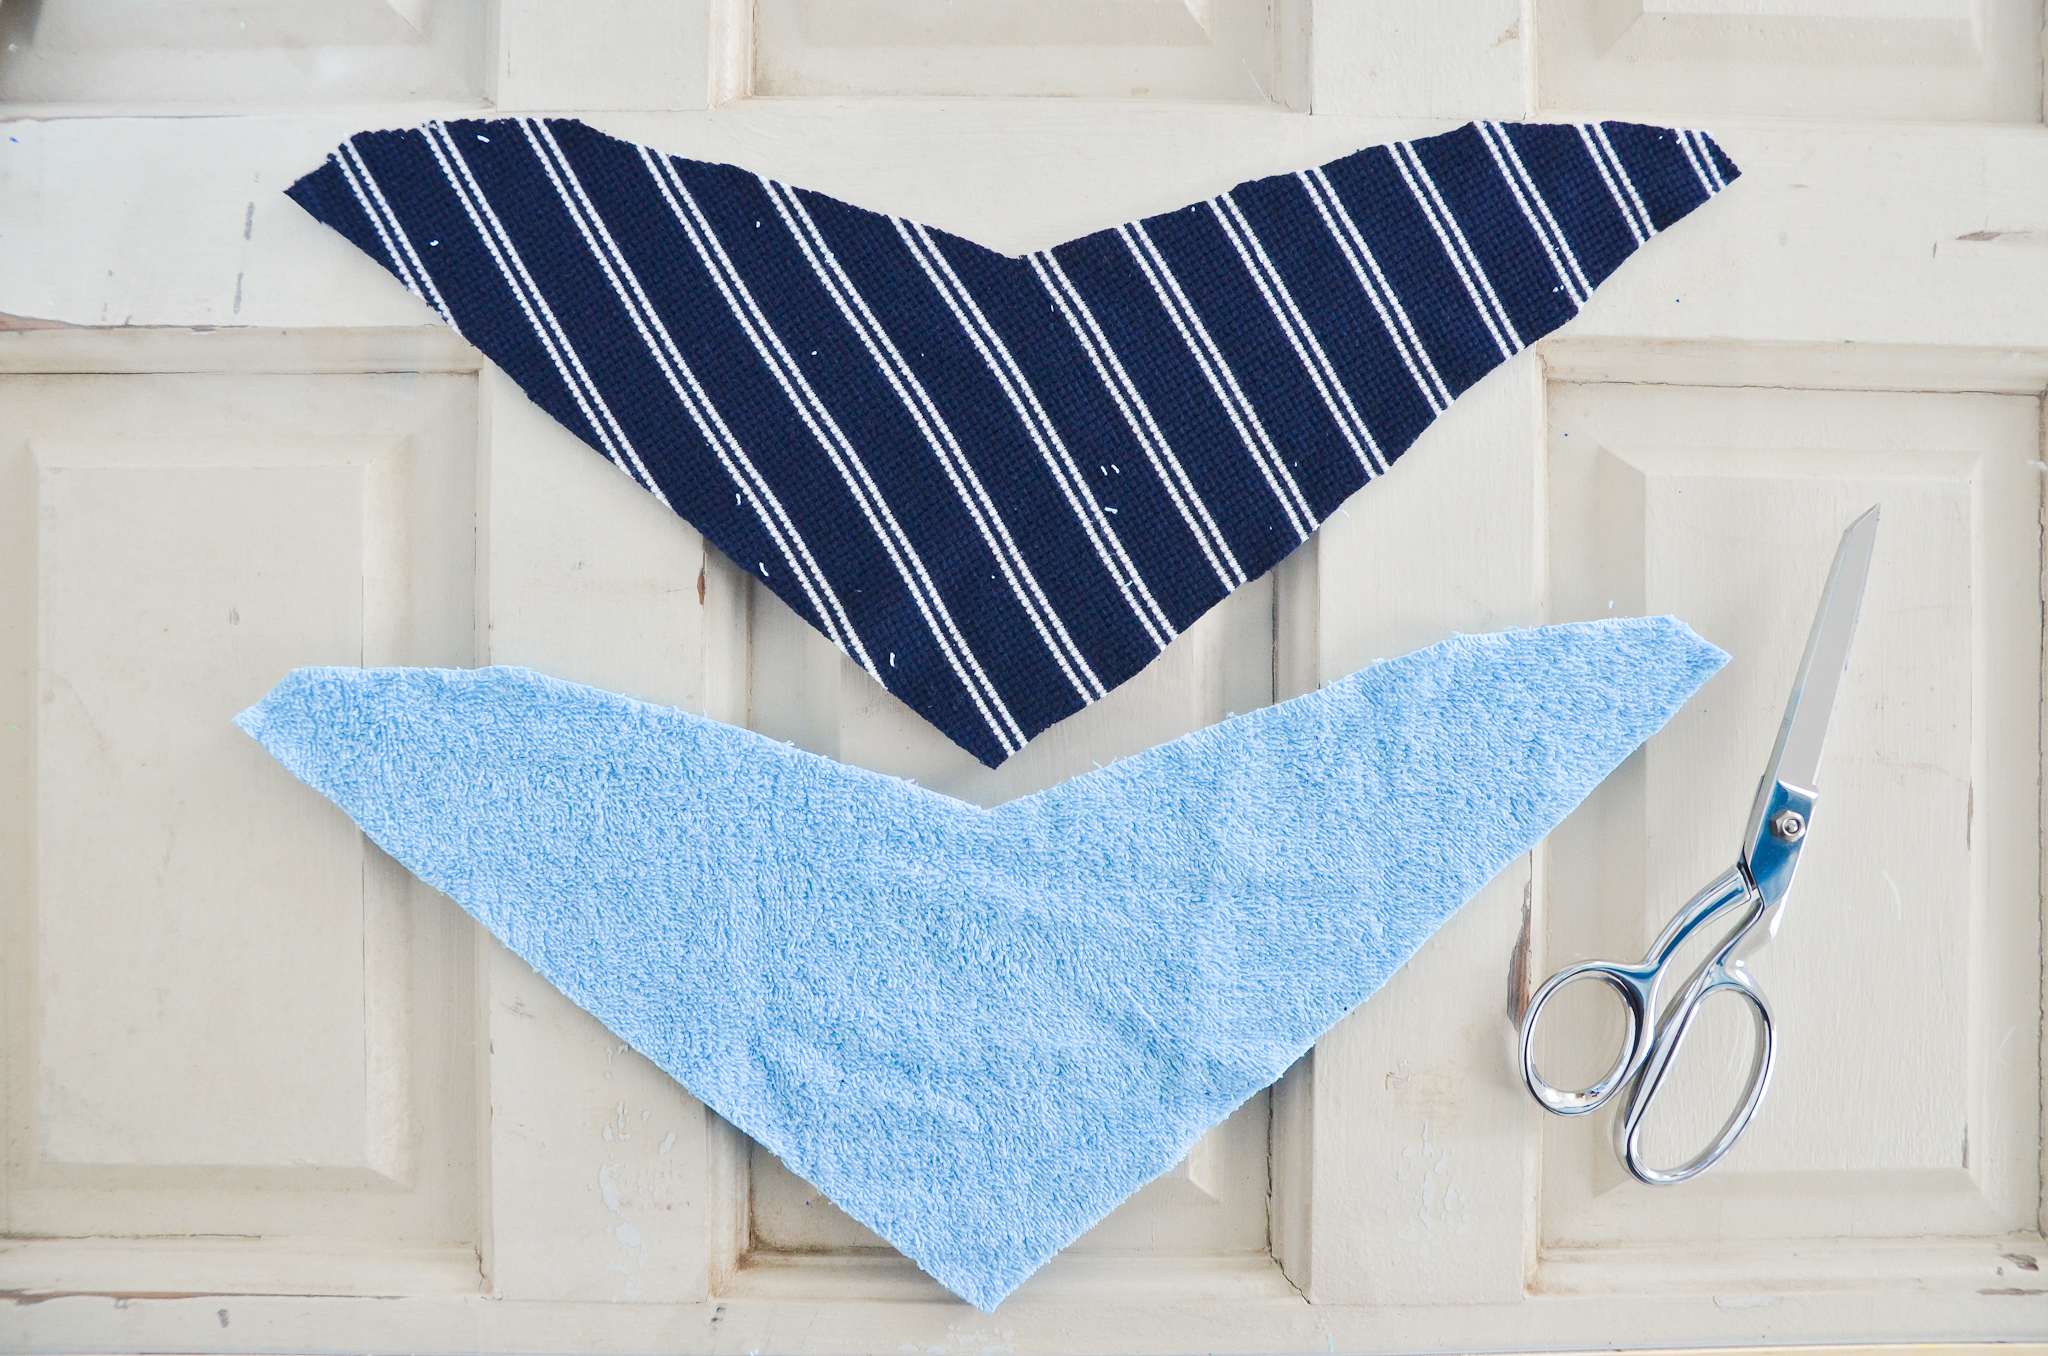
You should now have two bib pieces the same size and shape.
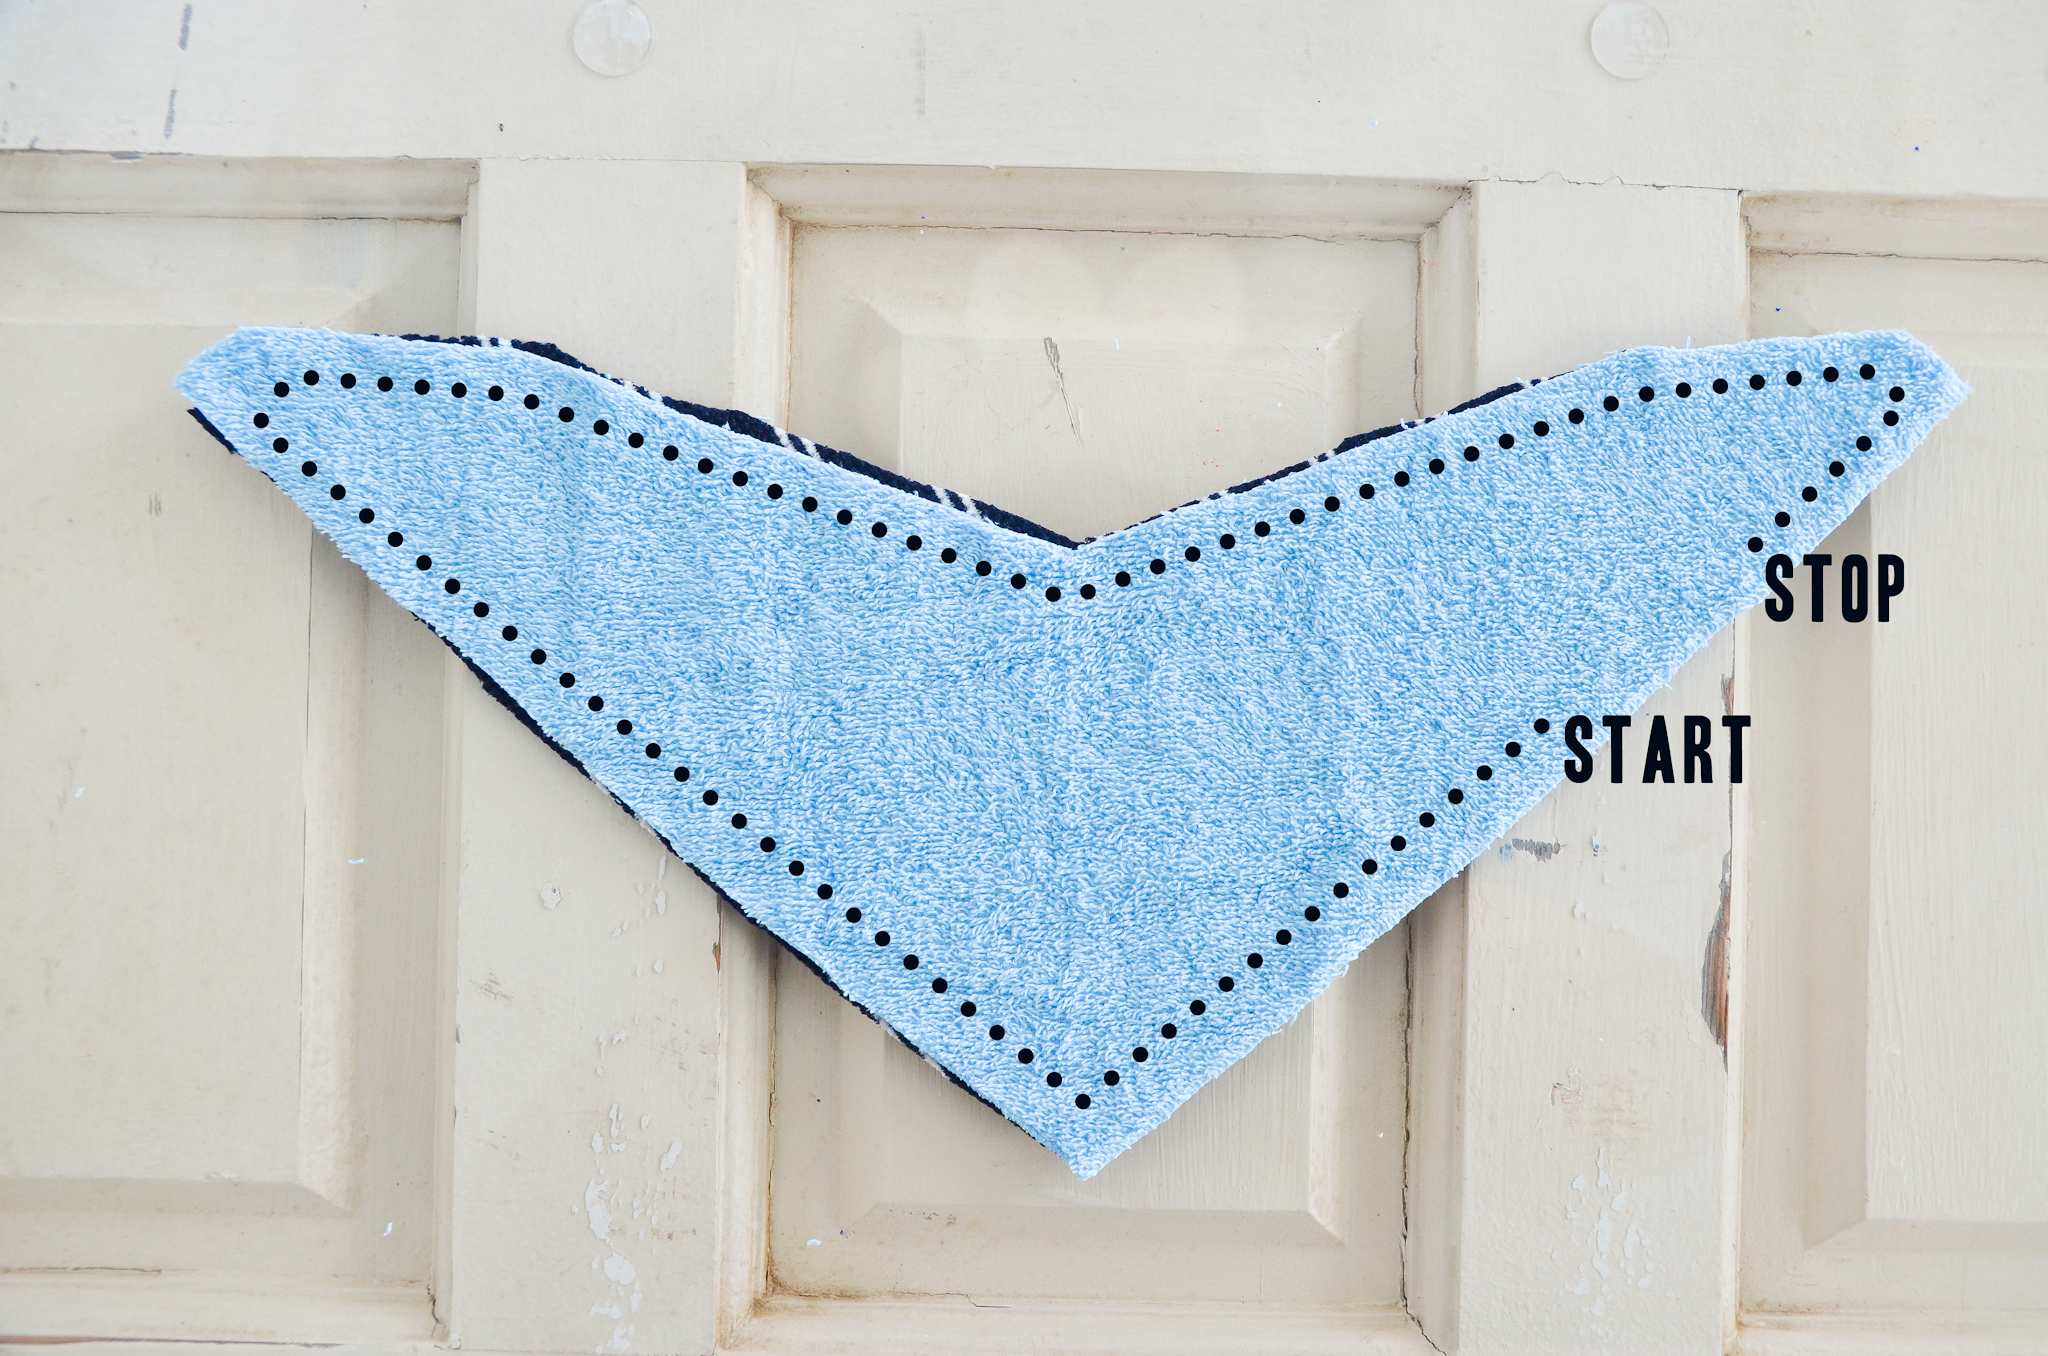
Next, pin the bib pieces with the right sides together. Starting along one of the bottom edges, use a 1/4″ seam allowance to sew almost all the way around the bib. Stop about 1.5″ from where you started, leaving a gap for turning.
Turn the bib right side out. Tuck in the edges of the gap you left for turning, and use a hot iron to press the seams crisp. Now you will use an 1/8″ seam allowance to top stitch a majority of the bib. You can go all the way around, but I prefer to leave the top edge a little softer because that’s where it will touch baby’s face.
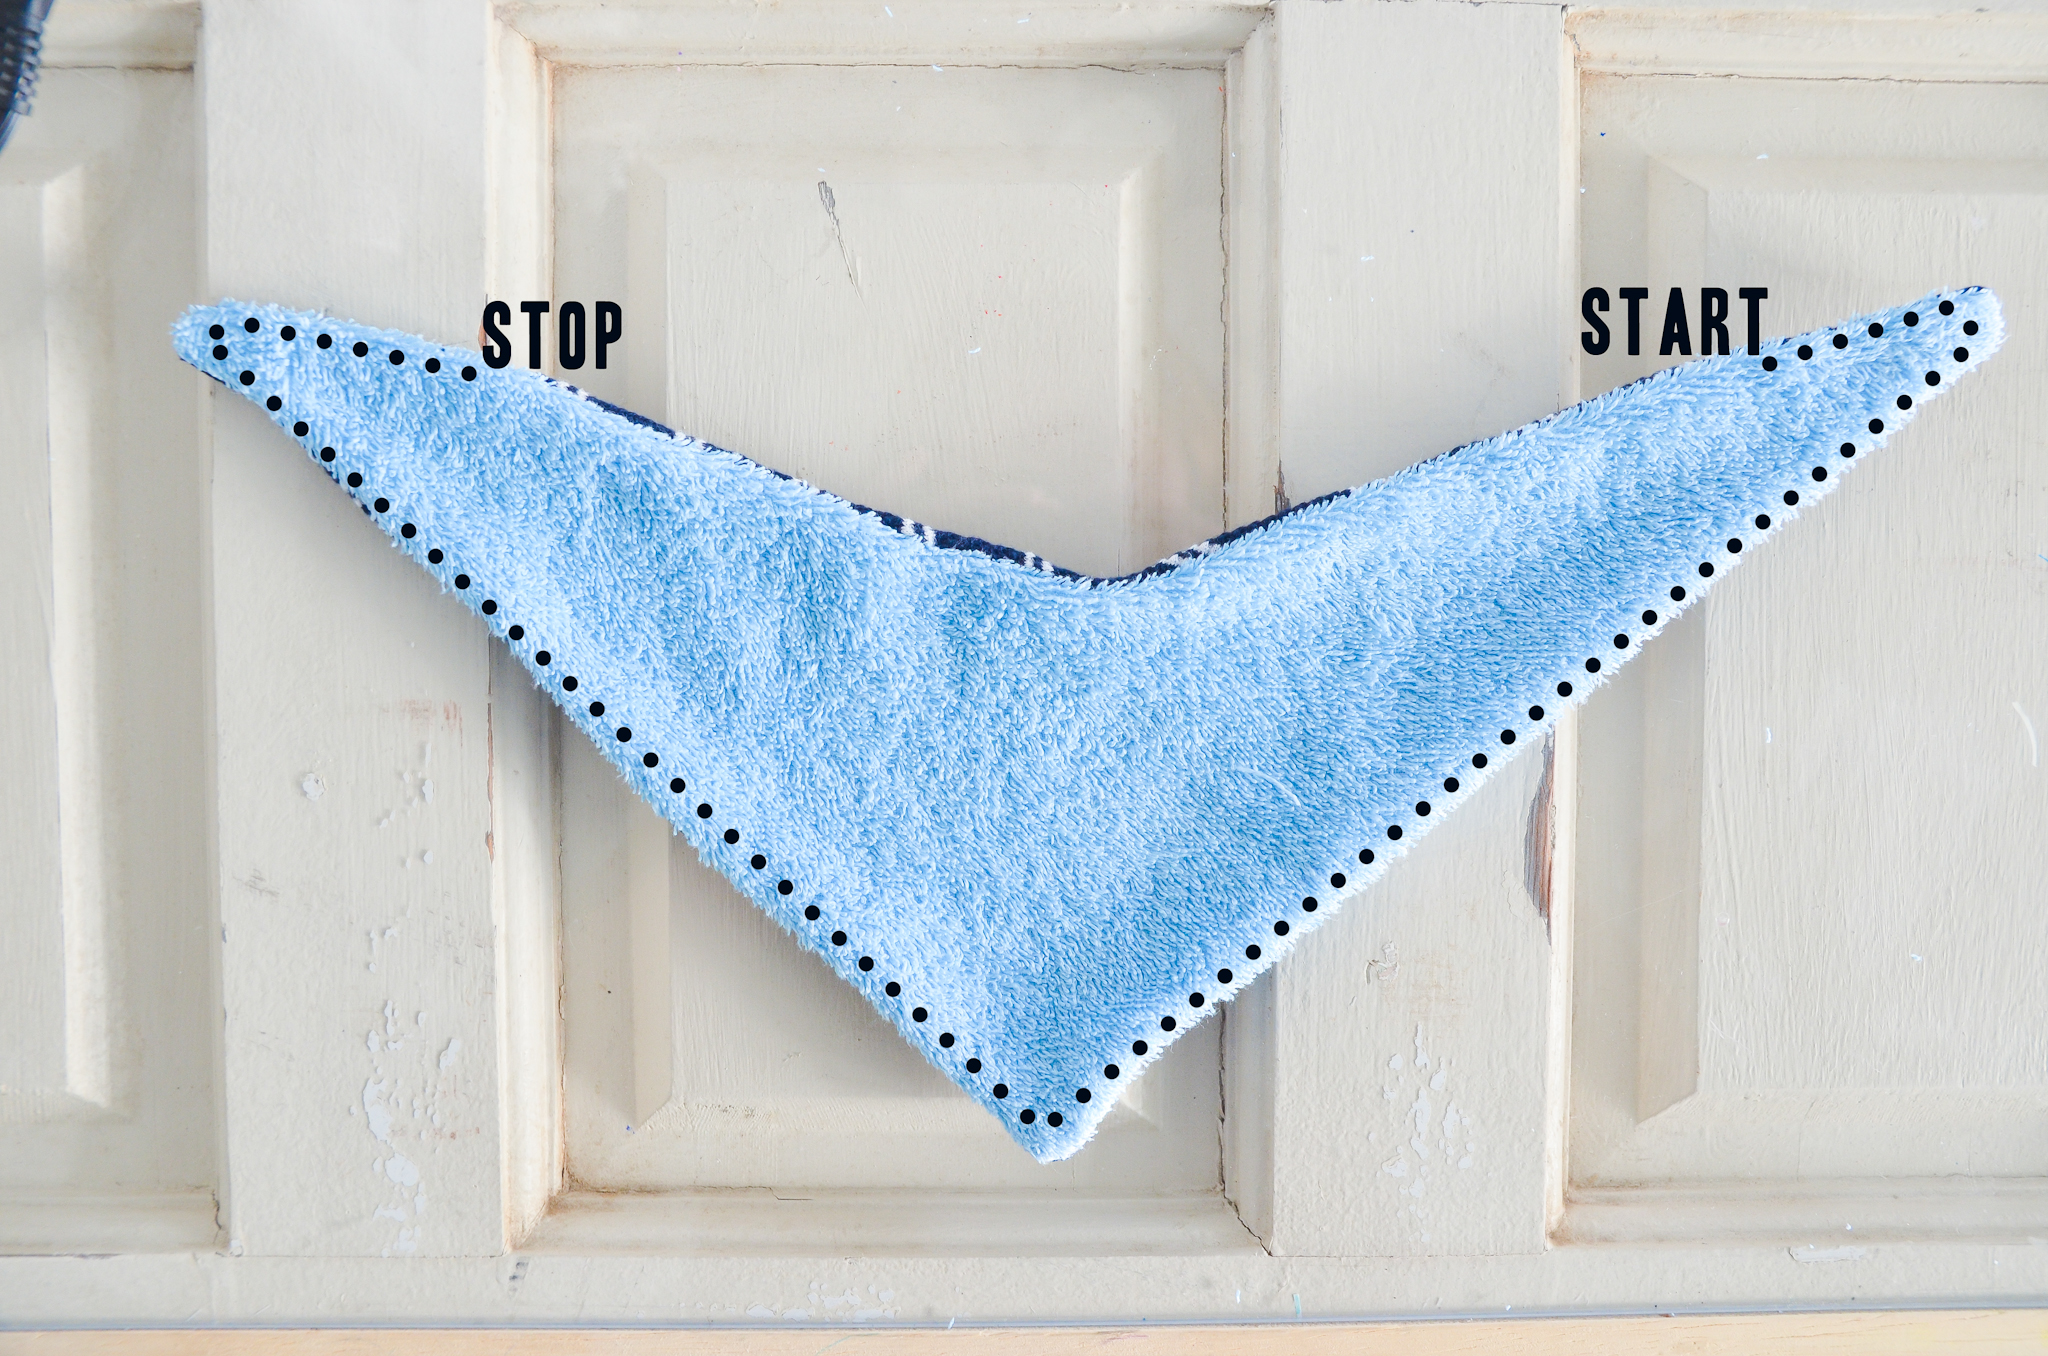
Lookin’ good…
The final step is to add some sort of fastener to the ends. I chose to use KAMsnaps, but Velcro or a real button and buttonhole are great options too. If you choose Velcro, be sure to sew the loop side on the inside so the hook side doesn’t scratch your child’s neck!
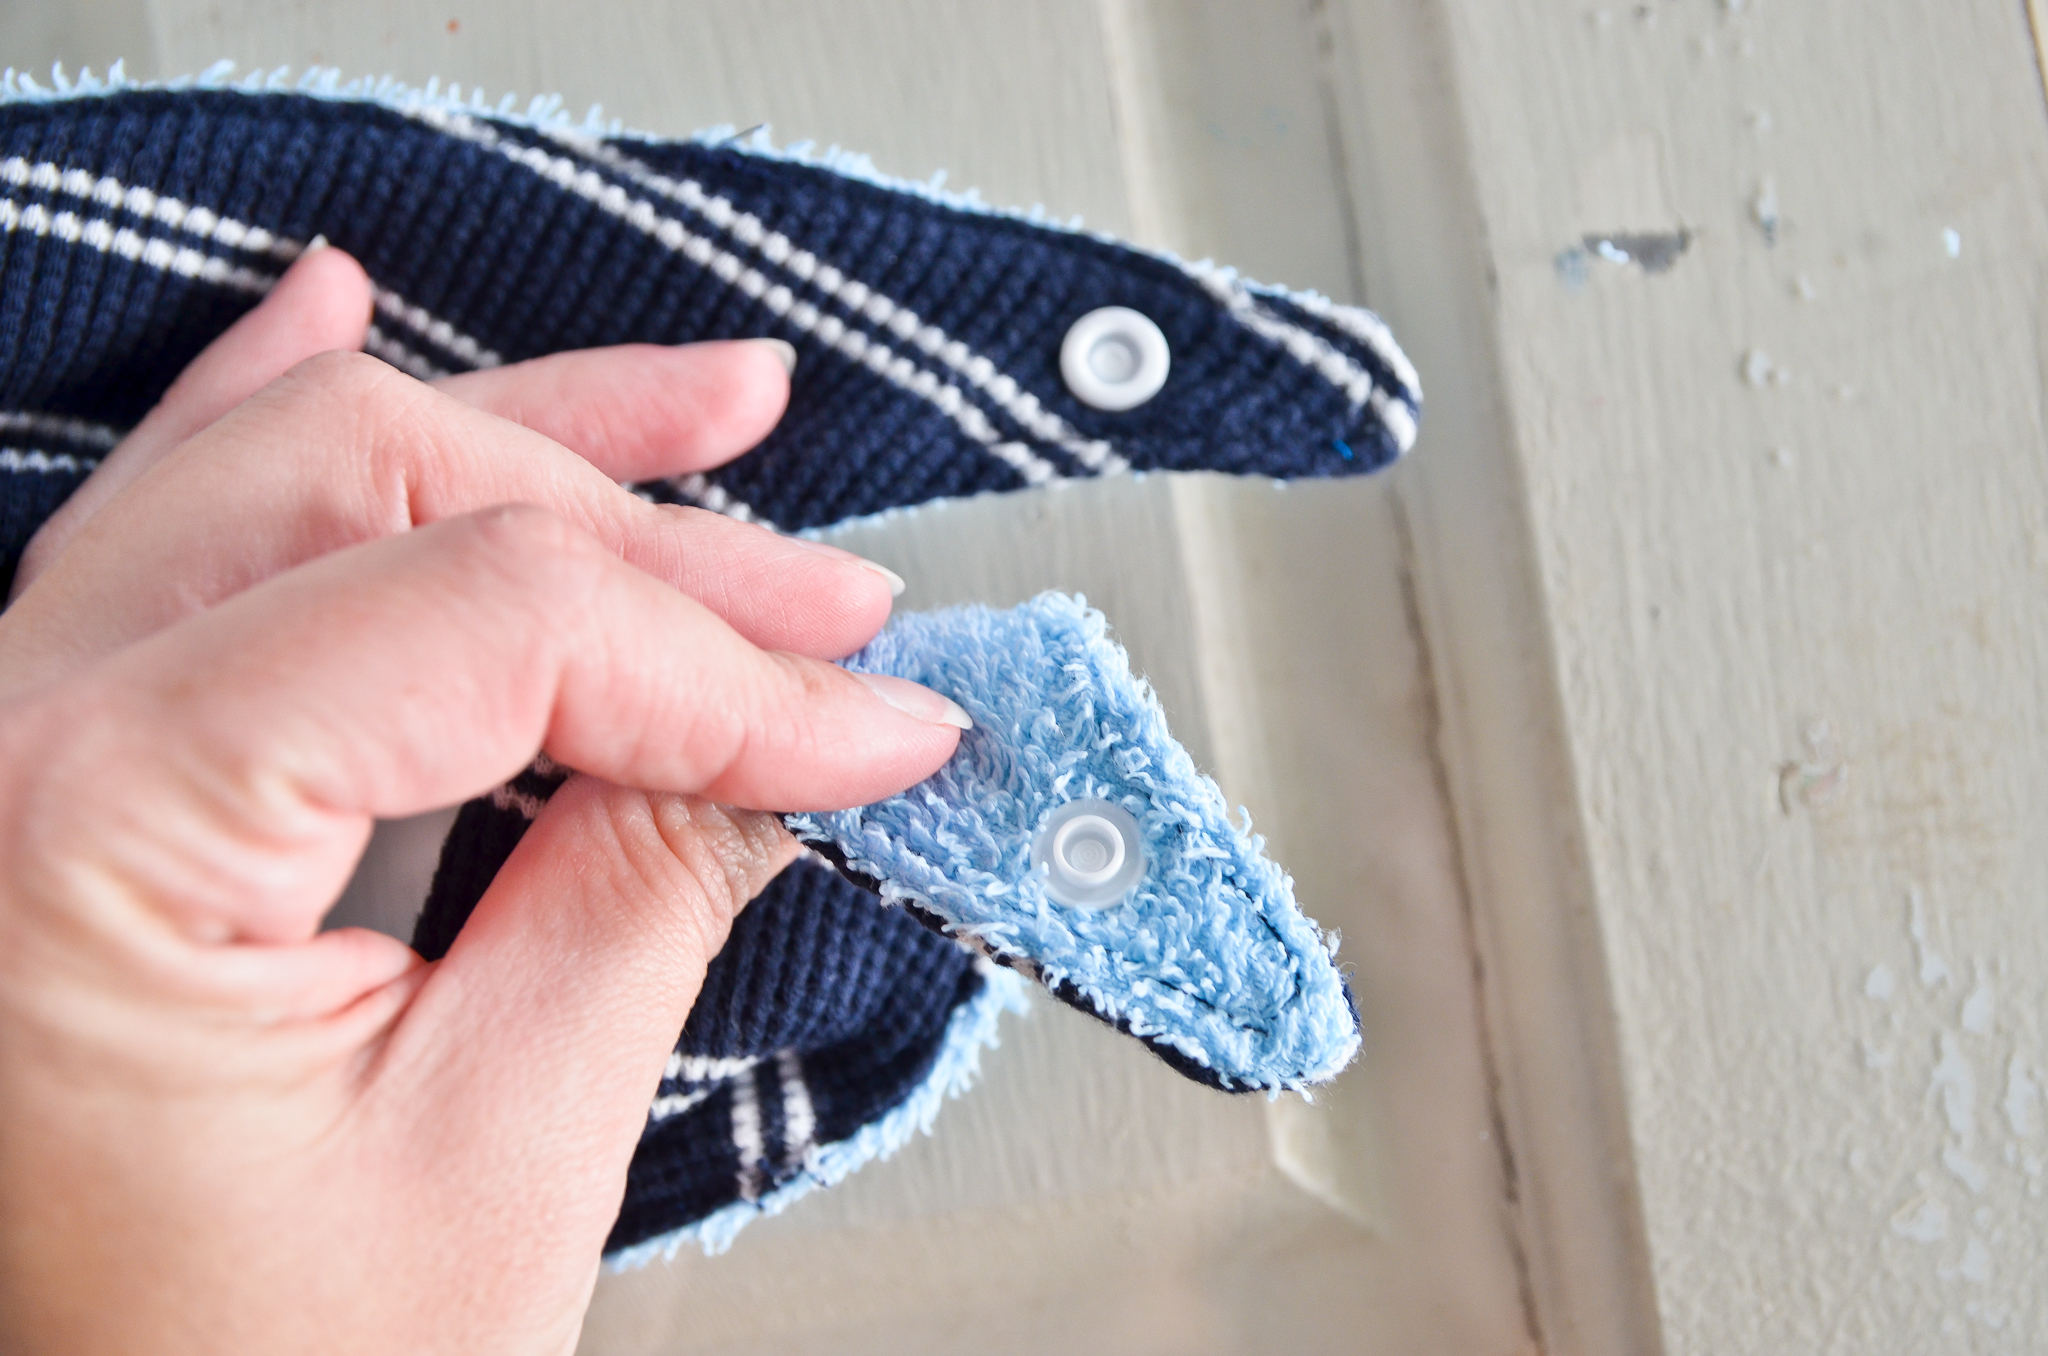
Attach your fasteners to the opposite sides of the fabric, so that the ends overlap.
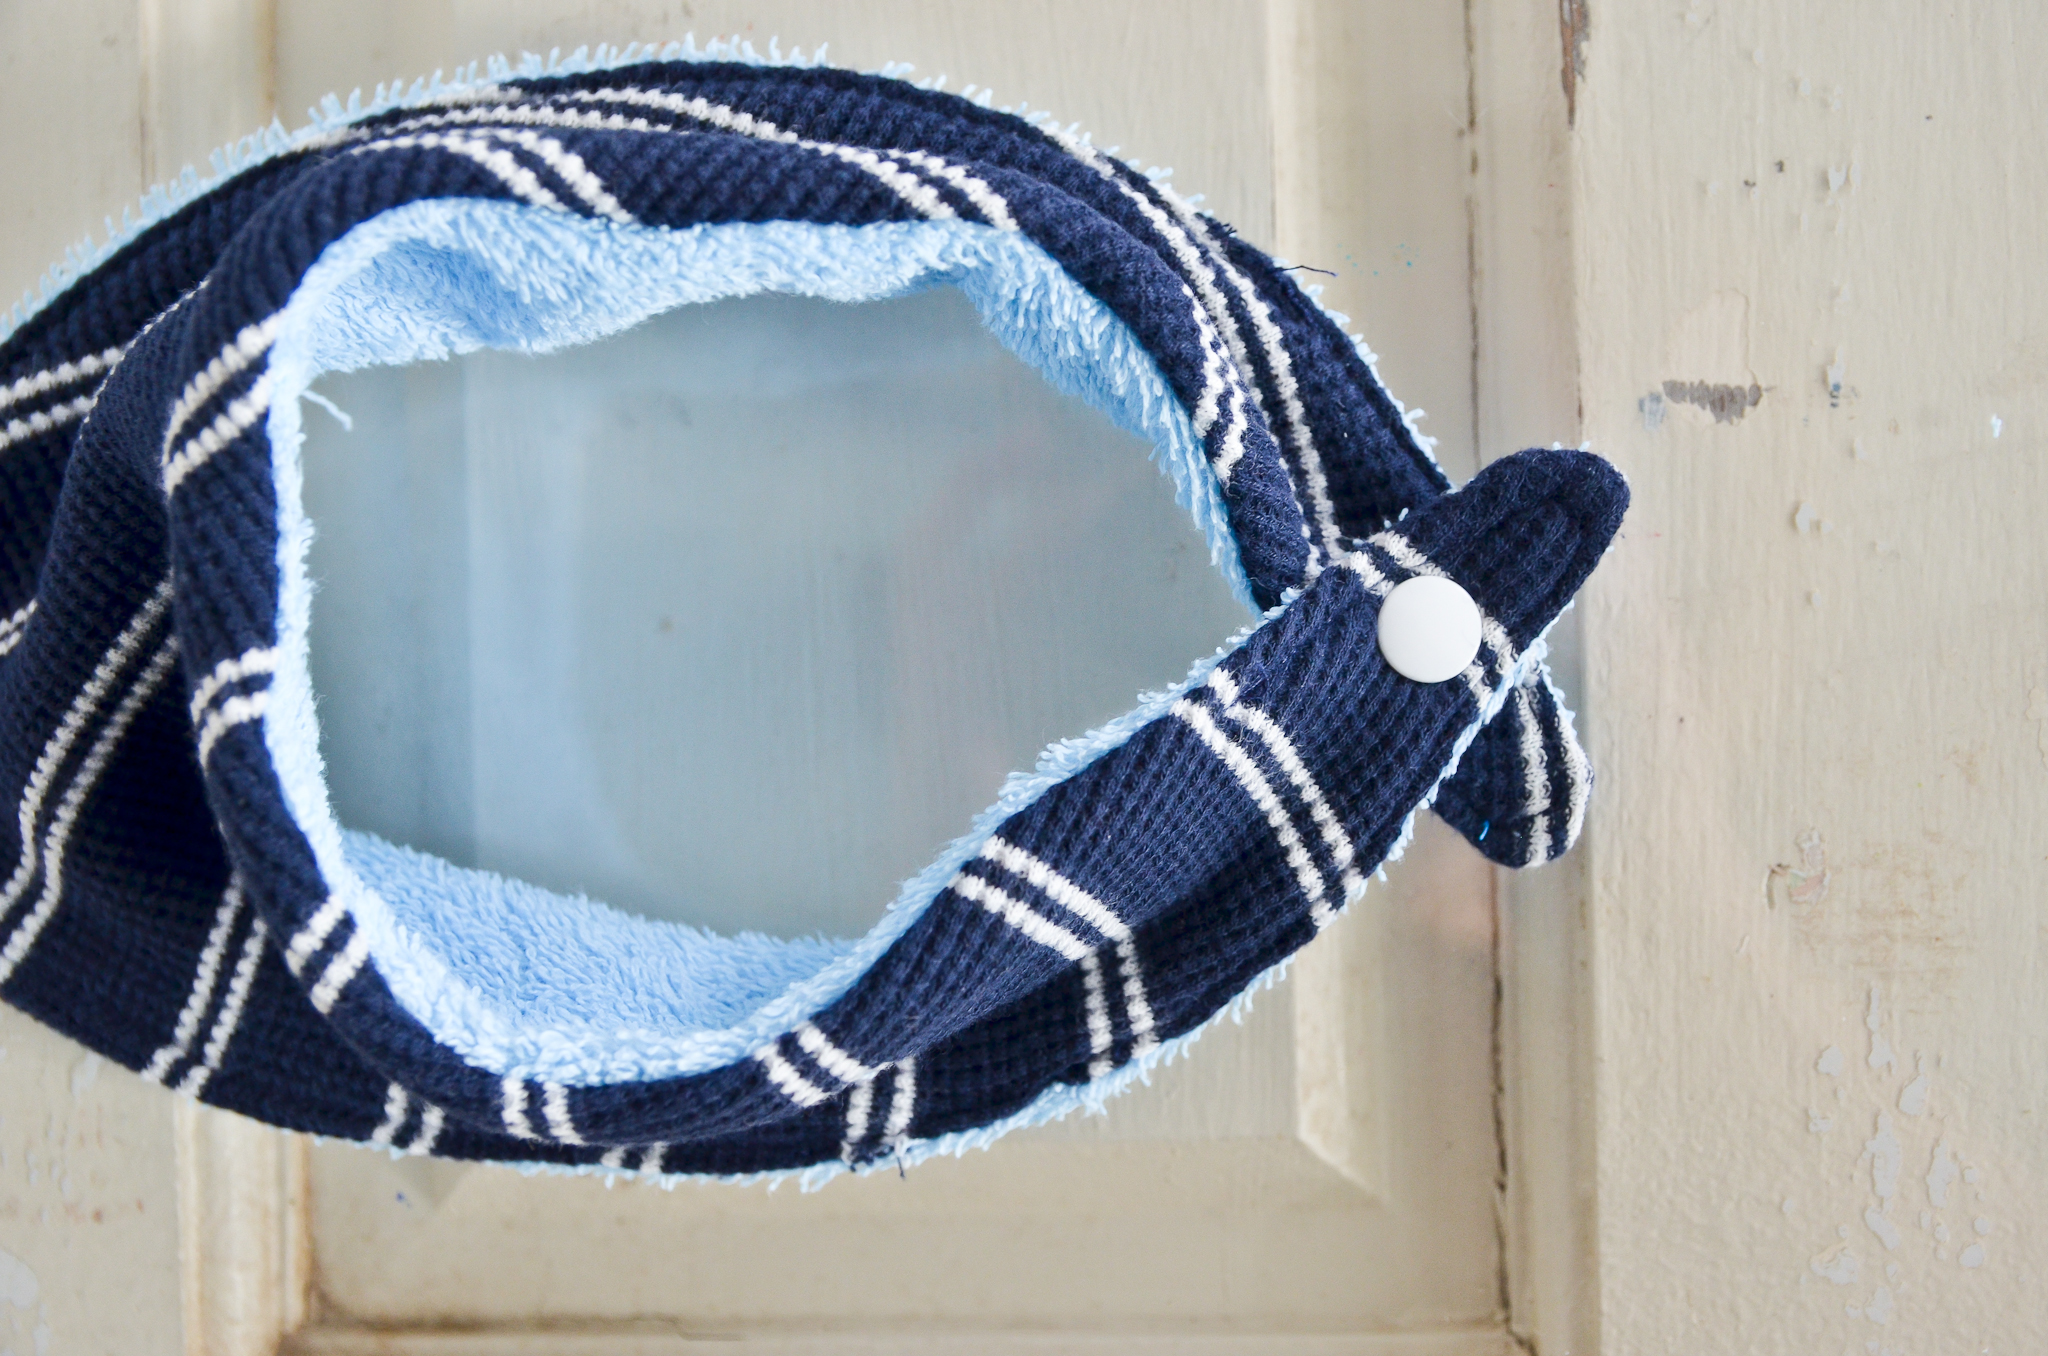
Congrats! You’ve just sewn your first bandana bib! Once you realize how easy it is, I doubt it will be your last.
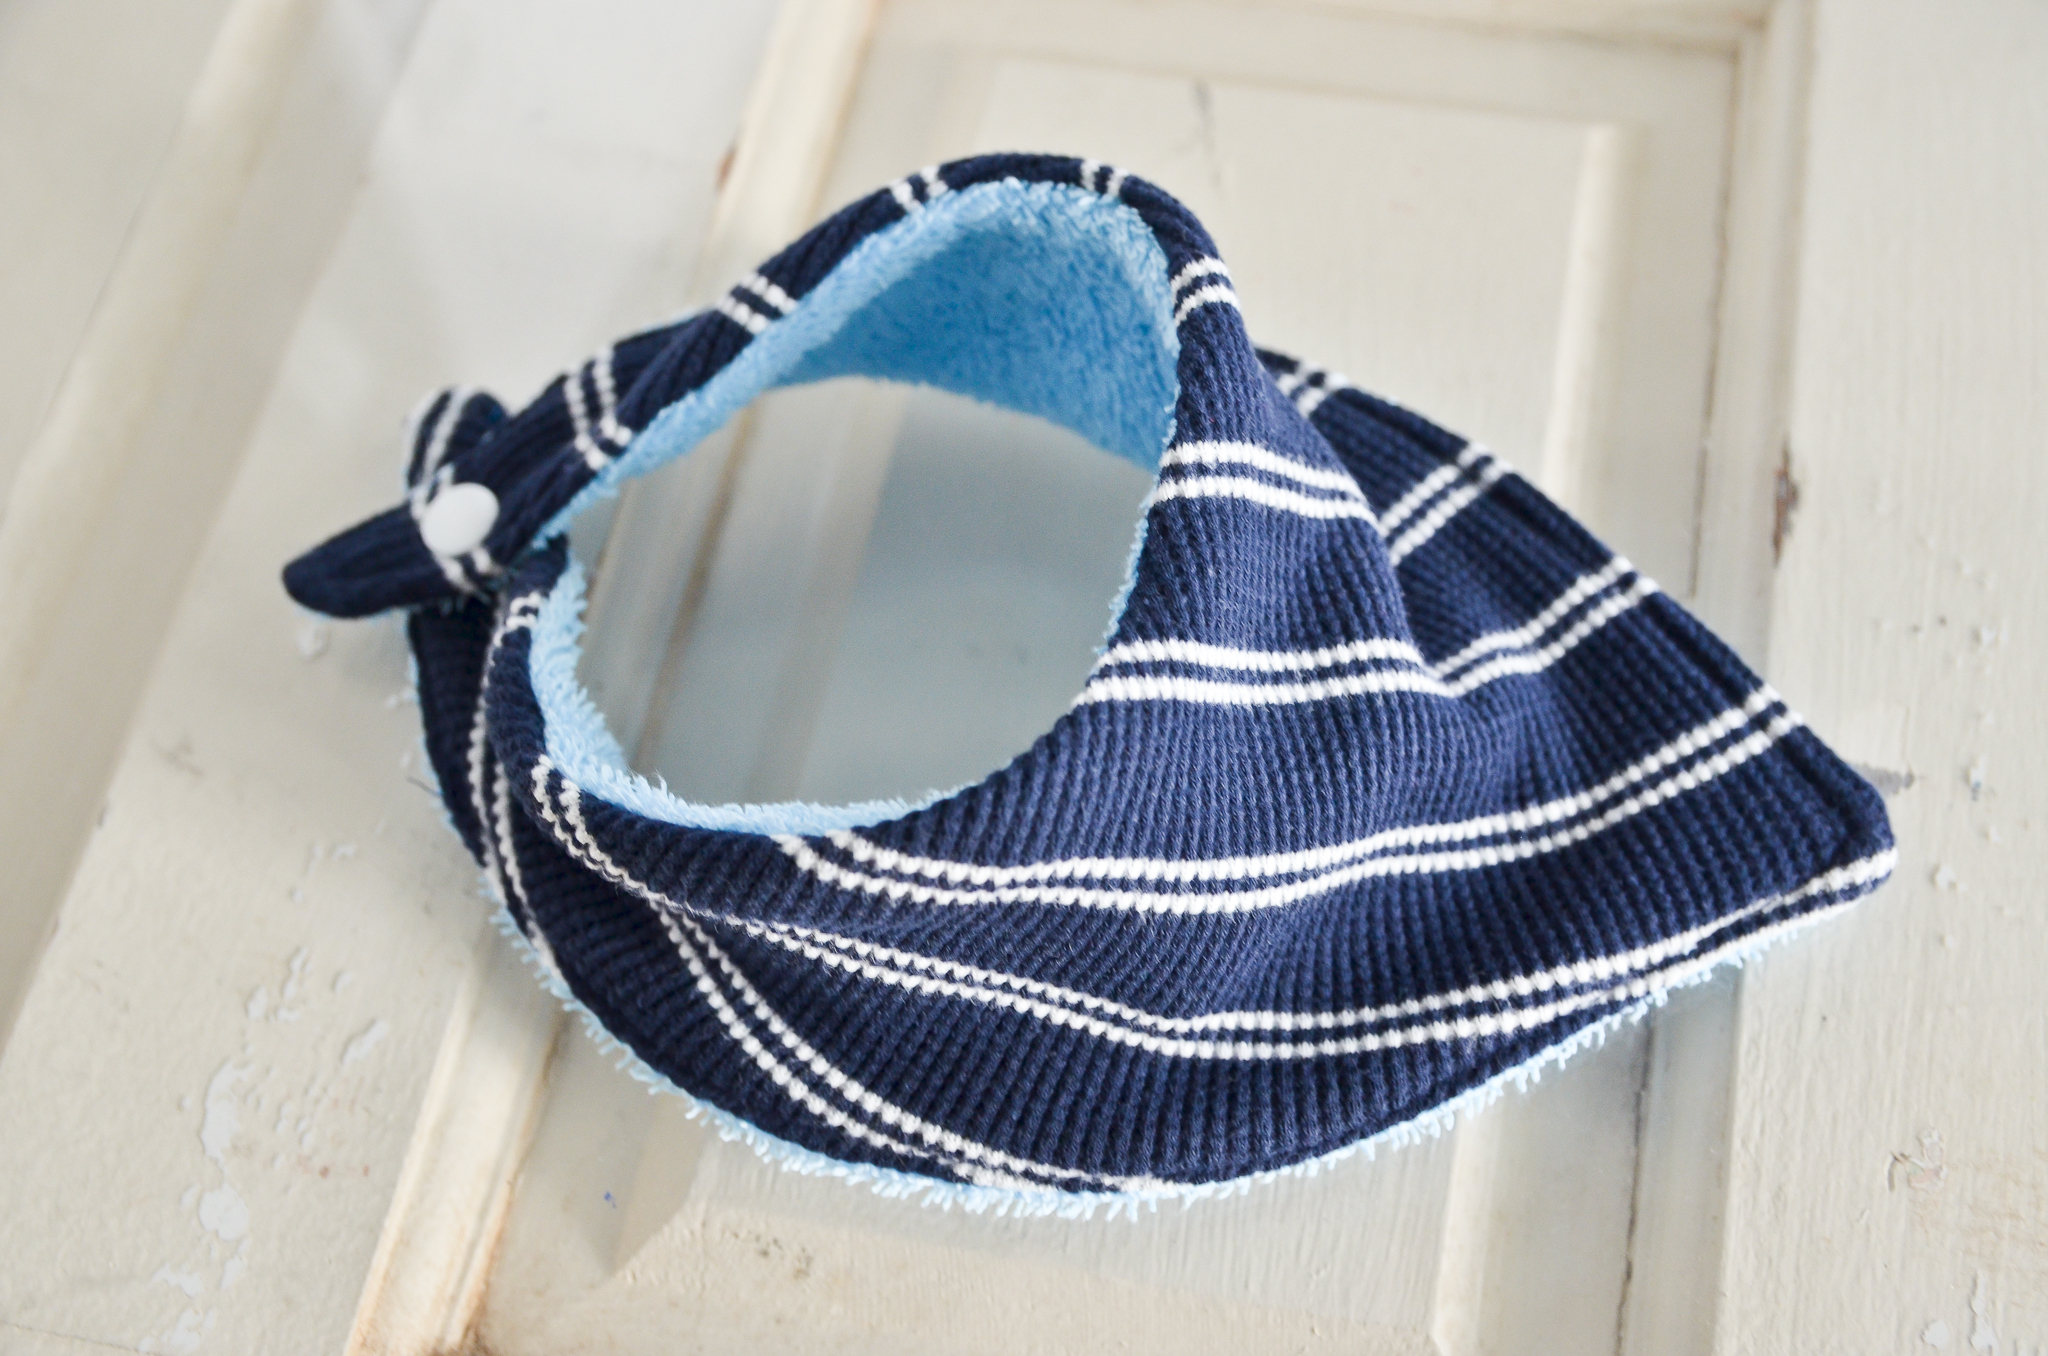
Perfect for little boys or girls, I like that these bibs are just as much a style statement as they are useful. They’re like an infant version of a cozy autumn scarf—and who doesn’t love that!
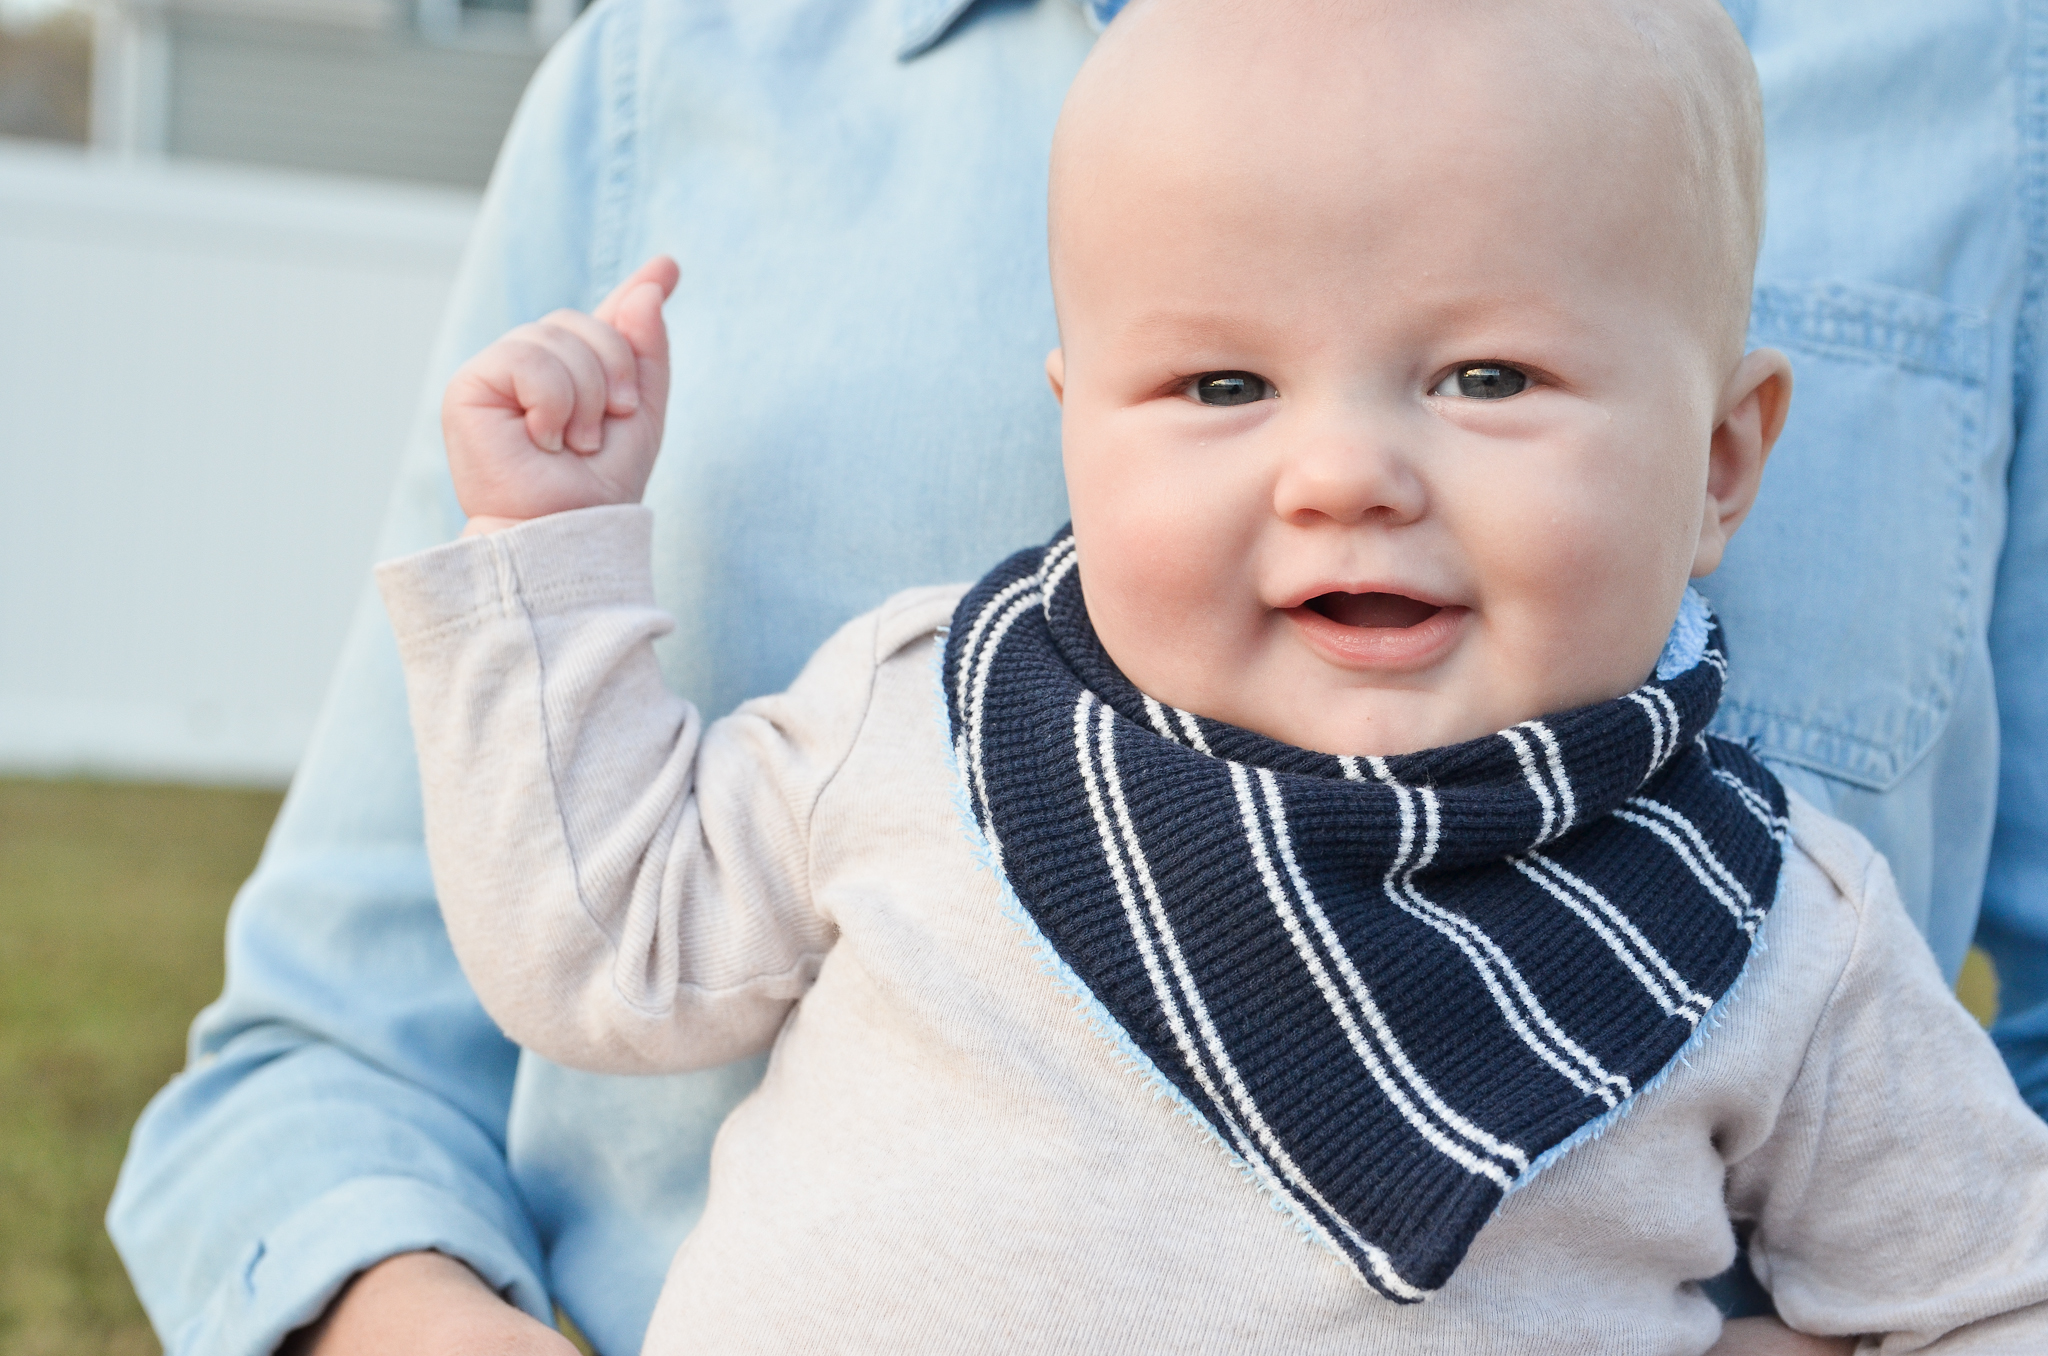
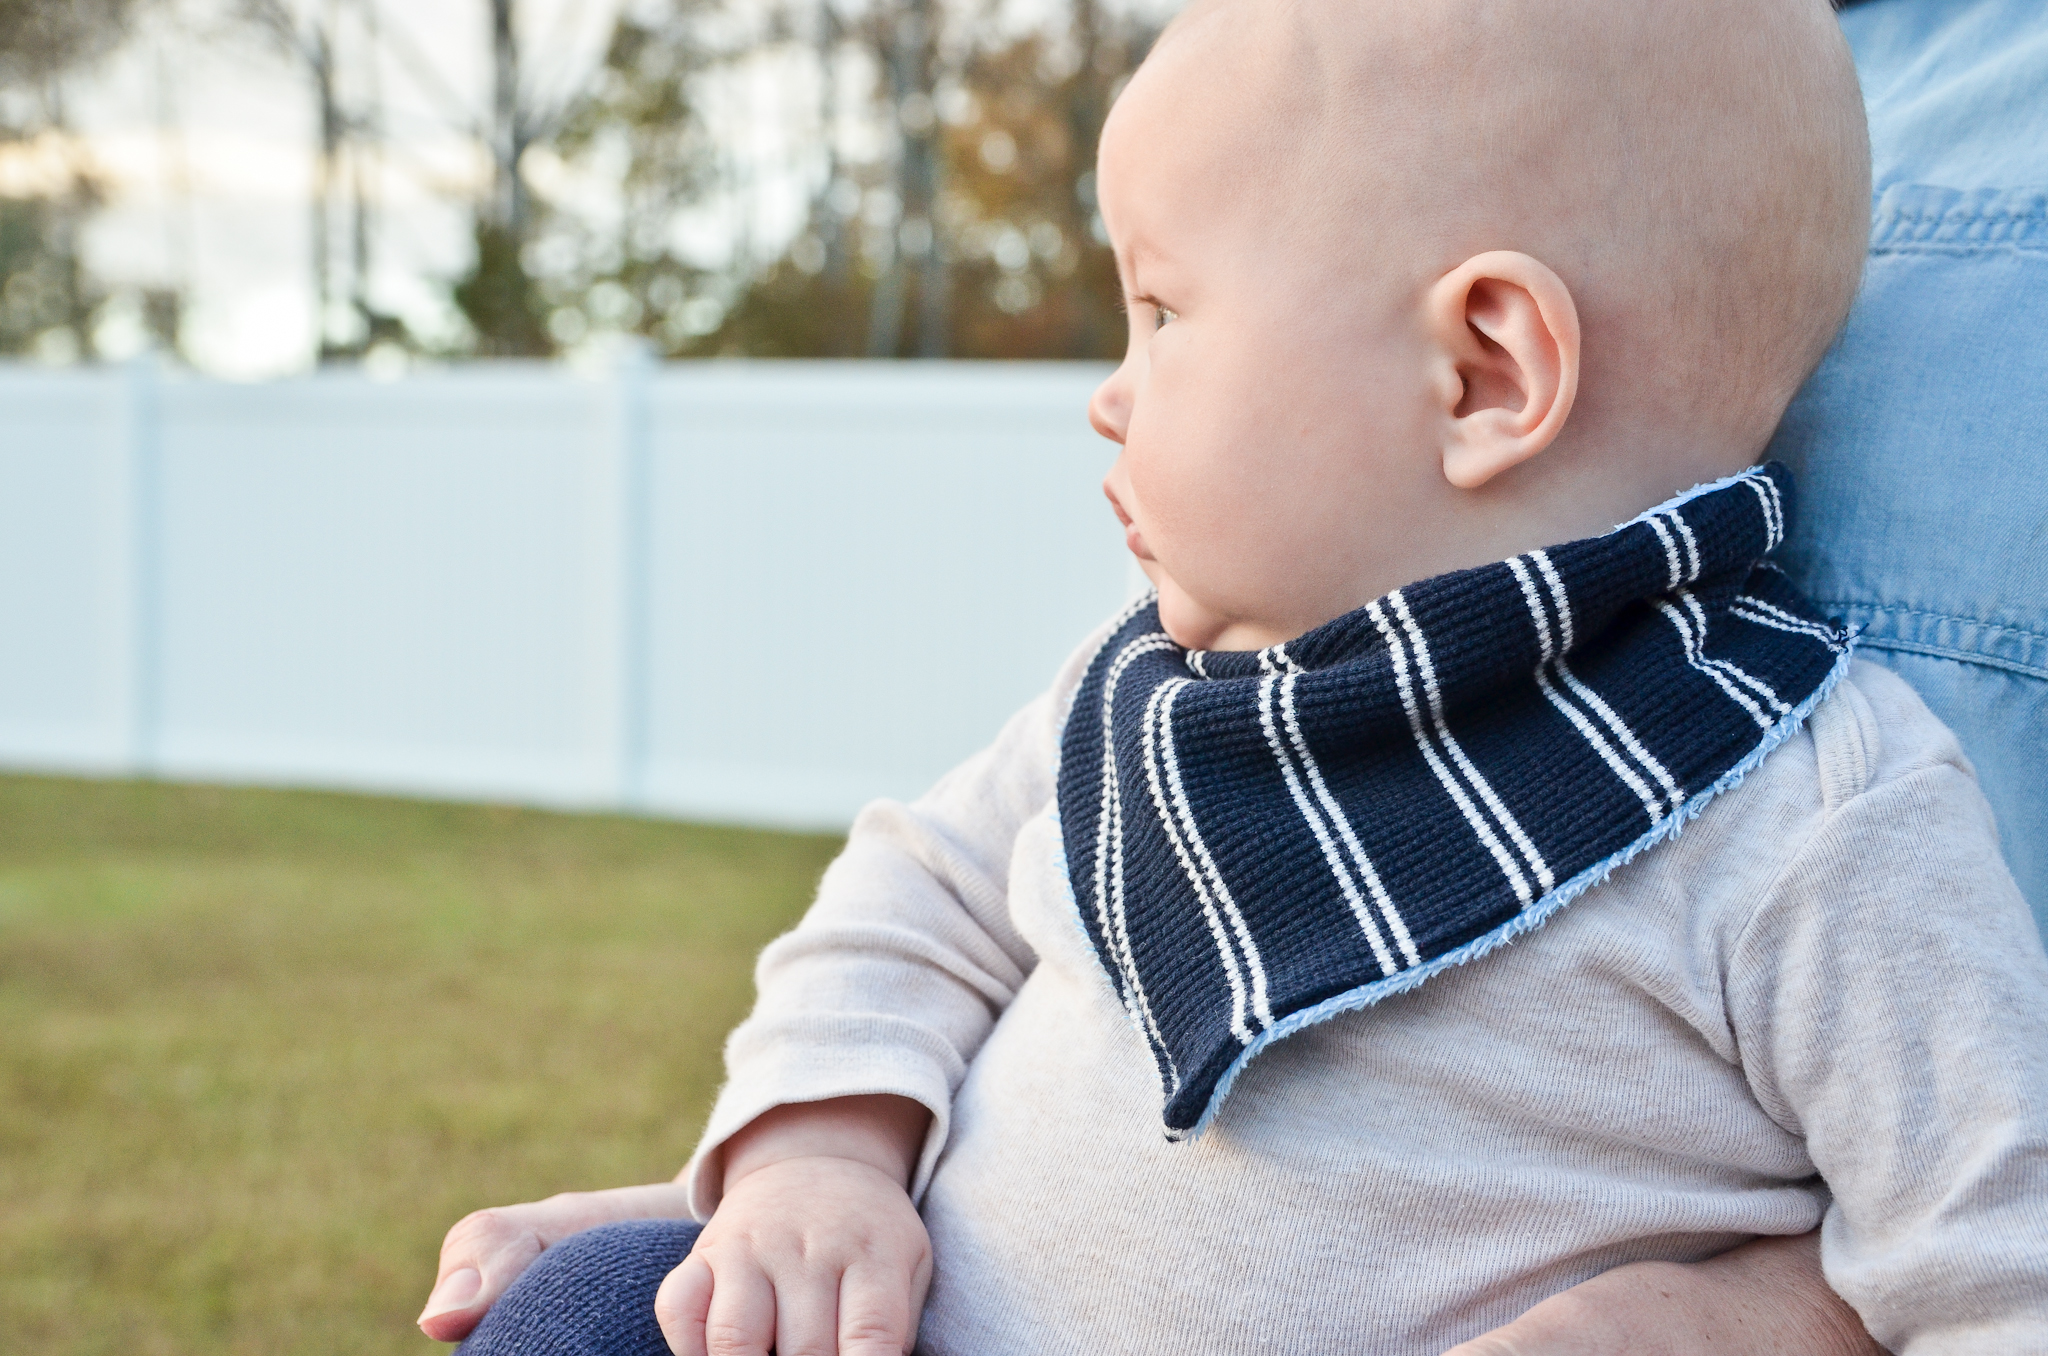
As with all infant clothing, wear the bandana bibs with care—use only on a child under direct supervision, and never leave one on a sleeping baby.
If you’re short on time or you’d rather just buy a cute bandana bib, you’re in luck! There are several adorable styles available in The Project Nursery Shop.
Save
SaveSave




Comments
lisawdegregorio
This is a great idea. I will practice doing it right now. Thank you for sharing useful information.
Leigh
There is no scale on the pattern and I am having a hard time telling if I have the bib printed and made in the right size.
Grey House Harbor
If you print the template on 8.5″ x 11″ paper it should be to scale… but, as a reference, the “FOLD” edge is just shy of 6″ and the longest edge should be 11″. Does that help?
Leigh
Thanks. It downloaded differently for me (firefox) and the first printing the long edge was 8.5″
Crystal
Thanks for the post. Looks like a pretty easy project. I will give it a try this weekend.
Kids Sewing
I am learning to sew a bandana bid. When searching on Google I found your post.
That’s a great post, that help me so much !
Thank you !
Carol
I just made this in about 20 minutes out of a flannel shirt and t-shirt. I put flannel on both sides and t-shirt in between like batting. It’s adorable! Thanks for the pattern. Have tried other patterns but the V in the neck lays nicer against baby’s chin.
Beth
Glad you liked it, Carol! Thanks for letting us know.
Ellie
Thank you for the printable pattern and the tutorial! I was having a devil of a time figuring out how to make a bandana- now I know it’s not a simple triangle shape! Thanks!
Grey House Harbor
So glad to help!
Nancy Barbata
Love this! Not sure where to put the snaps (i mean, how far in from the tips?) I tried it on my 6 month old grandson before affixing snaps 3/4″ in from tips (on opposite sides, as suggested for the overlap). The bib seems to “stand” higher than I expected at the back of his head. Is that how it’s supposed to fit? Or do I need to move snaps to 1″ (or more) from tips?
Grey House Harbor
Hi Nancy. My snaps were placed about 1″ in from the tips. But, yes, the bib will stand up more on their neck than a traditional bib will. The last photo in the tutorial shows a side view and you can see it’s fit is higher on the neck (like a bandana).
Nancy Barbata
Thank you for your reply! It helps me feel confident that I did it correctly. I think I could move the snaps in just a bit and it will fit perfectly. These are great, with the v-neck and perfect proportion for little ones. I’m making more!
Kimberley Anderson
If I were to buy fabric, approximately how much would it need?
Grey House Harbor
Hi Kimberley. If you only plan to use one fabric for both sides (and the fabric width is at least 44″), you only need to purchase 1/4 yd to make one bib. For two different materials, 1/4 yd of each will be plenty. Hope that helps!
Ashley Hemingsen
I LOVE THIS!! Thank you so much for sharing!!! I just finishes a green flannel one for my 3 mo drooly son!! SO CUTE!!! THANK YOU AGAIN! I love the simple design! It was so easy, my sewing machine is out of commission for a while and I sewed this by hand and it took 45 minutes from start to finish!!
Tawnee
I used your pattern and instructions to make bandana bibs for my brand new nephew. They turned out way better than expected. Now I’m going to make bib presents for all of my friends who have decided they are going to start popping out the wee ones again. Thank you so much!!
Barbara Davis
Thank you for this useful guide. Didn’t think that sewing a bandana would be so easy. I think i’ll actually make a few of them with different colors and patterns. Thank again for the info!
Grey House Harbor
Barbara – So glad you found it… you’re welcome!
Abby
I am very new to sewing. I have pinned the 2 pieces together, how do I turn it right side out?
Grey House Harbor
Abby – With the two pieces pinned right sides together you sew ALMOST all the way around the edge. But leave an unsewn hole about 1.5″ along one side. Then you take the bib off the sewing machine, turn the whole thing right side out through that hole you left, and again sew around the entire edge to finish – this time leaving no opening. Does that make sense?
Laura Burke
If you’re a newer Gramma like me, and you don’t have used baby clothing or towels, you can always find them at Goodwill stores. This is an easy pattern. Thank you so much! Very cute!
Michelle
Change printer settings to landscape so it prints the right size, took me a couple tries ha
S Harrison
My bandana printed on landscape at 5 1/4 in on fold edge and 10 1/8 in on longest edge is that correct or do I need to enlarge it
Grey House Harbor
S Harrison – Thanks for checking in about the size. Ideally, the FOLD edge should be just shy of 6″ and the longest edge will be 11″. Not saying it won’t work like you’ve printed it – it will just be a wee bit smaller than pictured. Hope that helps!
Elizabeth
Thank you for the pattern, I increased its size for my 5 year old son. He has autism and chews his T shirts neck leaving holes, I often end up buying 4-5 a week this way I was able to turn his damaged clothes in to bibs for him to chew. Saving me quiet a bit of money. This is the first thing I’ve found that’s working. Can’t thank you enough for it.
Grey House Harbor
Elizabeth, This comment just made my whole week. On my bad days, I sometimes feel like what’s the point of spending my time doing DIY tutorials for things that aren’t really all that meaningful. But the fact that this is helping with your son’s ability to cope (and your wallet to boot…) just made me believe that maybe there really are bigger purposes for these posts – ones I hadn’t even considered.You’ve encouraged me today, so THANK YOU!
Johns
Lovely pattern and easy to learn
Michelle
I just made this for my 10 month old and it’s WAY too small. My measurements are correct when printed so I don’t understand why. Fits fine around the neck but it.seems too short?
Ken
Well this might fit a baby DOLL!? I just made it and the template is way too small. Maybe my printer, but I printed both landscape and portrait and it’s same size. Long side is no where near 11inches. I wish I would’ve read the comments before I made it.
Beth
Hi Ken,
Did you click on the link to get the template or did you try to print the image? I’m trying to track down the technical problem that is leading some people to see it the correct size and others to receive it smaller. Thanks!
S Harrison
Can I ask can this pattern be used for commercial purposes please
Beth
No, it cannot. Thank you for checking with us!
Louise hinks
Hi I’m looking to make bibs for my special needs granddaughter she is 7 normal bibs are two small and I have tried triangle ones which are not suitable for her can u help me.
Melissa Hendricks
One of the problems many people have when printing is the setting “fit to page” or scale to fit in the Printer Settings. Depending on the platform you’re printing from, either unclick the Fit to Page radial Button or choose None by Scale to Fit. Also, as stated, make sure to download the file and then open it to print. This will ensure exact sizing. :-)
Beth
Thanks for the tip, Melissa!
Witproit
This is nice pattern and really helpful
Sarah
The tutorial directions are great and I quickly made a cute bandana bib but never checked my scale/size. Mine is tiny lol – it printed in portrait mode – it fits my daughter’s sock monkey pretty well. I can’t believe I didn’t realize how small it was. Looking forward to trying it again in the actual size.
Beth
Oh my goodness! I hope the monkey is enjoying an adorable bib! :)
thelma
thanks so much for the free pattern,ive been sewing bibs for my first grandson like crazy.than you.
Mrs pickles
Great tutorial.
My snaps ripped through my fabric when i went to open them. Any tips?
Grey House Harbor
Bummer! I haven’t had that happen, but maybe you could try sewing a mid-weight interfacing in between the two fabric layers just at the corners. This would give them a little more “toughness” to combat snaps going through. Either that or make the closure with sewn-on velcro tabs instead?
Cathy
What size KAMsnaps did you use?
Shaz
Silly question – I don’t have a sewing machine. Can these be hand stitched?
Grey House Harbor
No such thing as a silly question! ;) In all honesty, I don’t know how to hand stitch… so, maybe? I don’t see why not. It’s a fairly small project, so give it a go and let us know what you think!
Baby Bandana Bib
Helpful post, easy to understand. I Didn’t think that making bandana would be so easy. I made bandana in less then 20 mint. Thanks for your guide.
Grey House Harbor
I used size 20 KAMsnaps (12mm or 1/2in).
Cath Pollard
Hi – I’ve been asked to make some bibs for a 13 year old so i’m going to try your pattern. Have you any idea how much bigger I should make it
Linda Staebler
I know this pattern can not be used commercially, but I am hoping to make some for a craft show. Is that permissible? The comment to Elizabeth regarding her autistic son was priceless. I make bibs and burb cloths and bring some to life choices for the precious newborns. This would be a wonderful addition. Thank you for the pattern.
Deb
Thank you for the clear instructions. I made one today for a grandchild.
Joan
Hello I know this may sound silly but I don’t have a computer to print off pattern, or know of a place close by to do so, would you be able to email me measurements of your pattern. Thank you for your time. Joan
Elaine
Thank you for this useful guide. I didn’t think sewing a bandana would be that easy. I’m thinking of making some with different colors and patterns. Thanks again for the info!
Kate
Hello,
Thanks for your video. I’m wondering if you use normal fabric or old shirts on the top layer, what material do you use for the bottom one? I think I saw a post about a towel. Do you cut up a towel for the bottom part?
Thank you
Fae
Hi and thanks for a great pattern! One question; you said you don’t top stitch the edge closest to the neck so it will be softer. So, did you just skip that section entirely? Maybe I need to reread it. Any input will be helpful. Thanks again!
Charmaine Pratt
The pattern is tiny. It would hardly fit a newborn, nevermind 3month to 2yr olds 😖
Increase the size of the pattern if printing straight from download option on here!
Beth
Hi Charmaine, So sorry you had trouble with the pattern. Did you try clicking on the pattern link? When you do that, it opens in a new window in its full size. You may also want to check if your printer is printing it at 100%.
Gillian
Hi, I just made some of these, with the correct scale, and they’re big enough to fit around my neck… did I do something wrong or are babies just that chubby?
Mireille
Great bandana pattern! fits well on my 2 months old
Beth
So glad you liked it!