
Shop Suggestions
With surprisingly little time and expense (but a lot of help), we were able to transform formerly unused square footage into a third bedroom on our second floor, perfect for a nursery. We used some old, bought some new, and got creative with the theme—one that morphed from arrows to geometric shapes to a mixture of the two plus others.
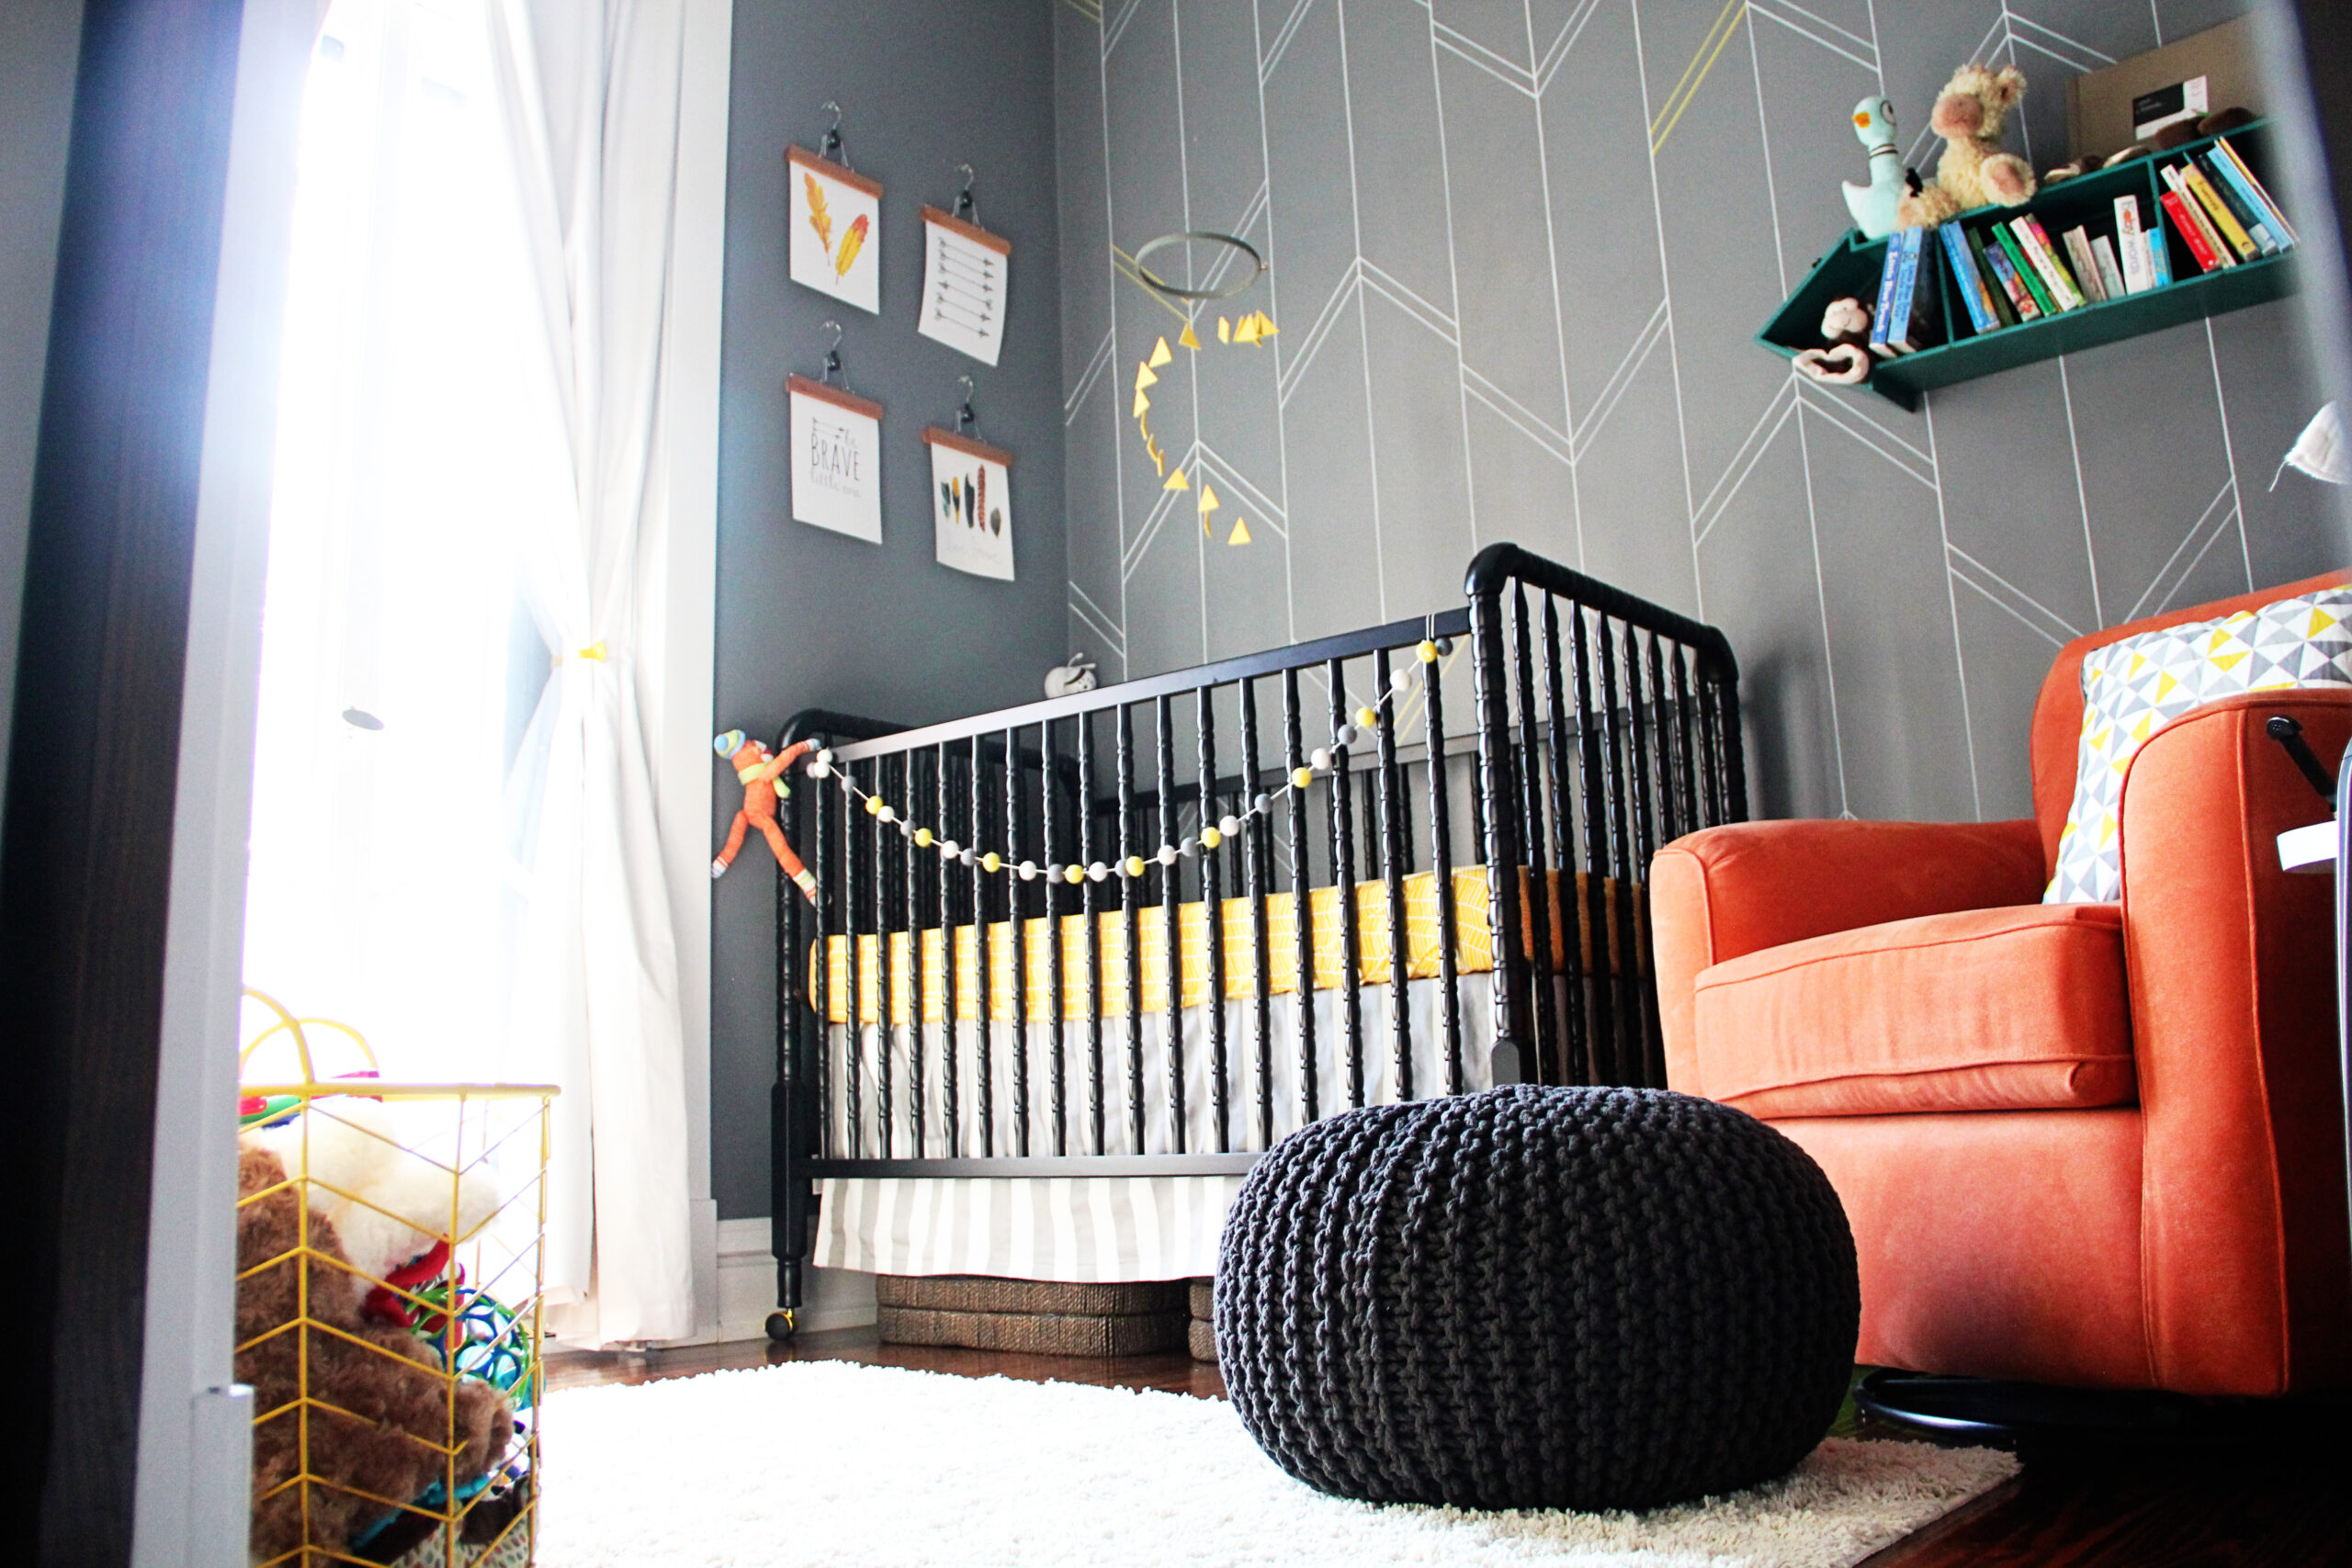
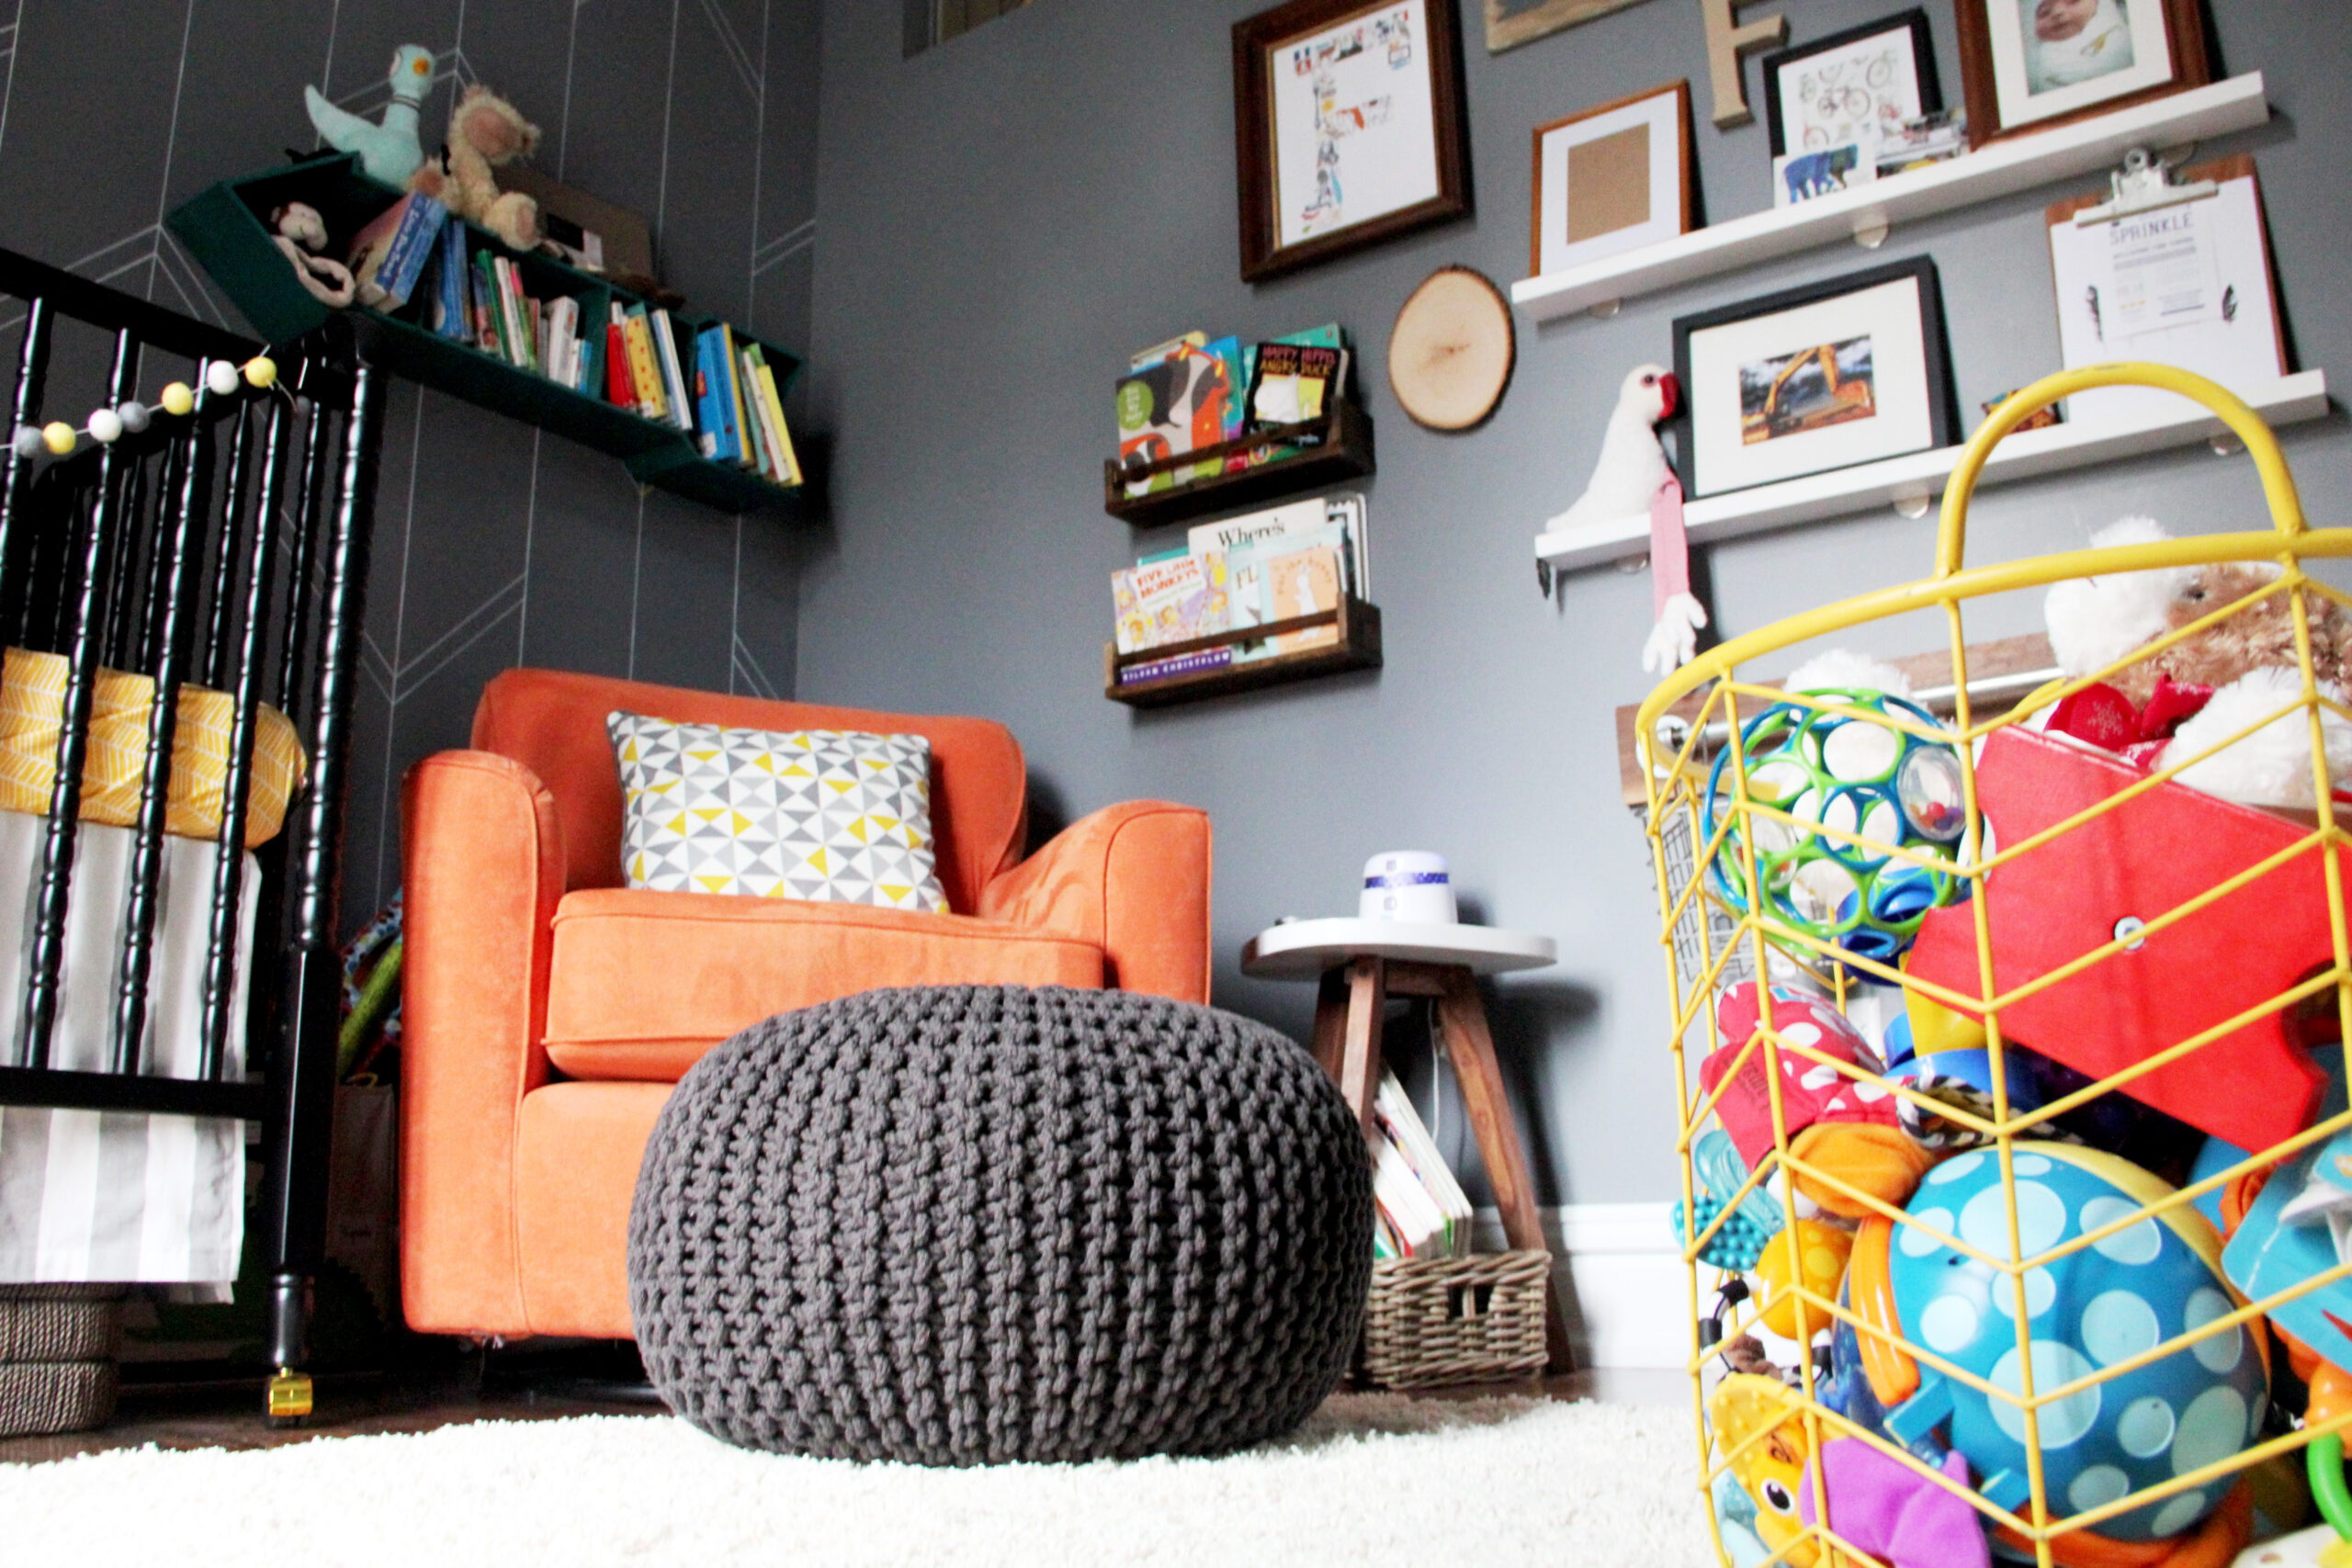
We just added slowly, layering a patterns, textures, and colors. After finishing the Sharpie paint pen wall design, I was on a roll. The rug was tough, didn’t want it competing with the wall, but ended up finding the perfect simple shag rug, one smaller than the edges of the furniture, anything bigger looked wrong. Next came the big gray pouf and adorable hex table…both are still used every day.
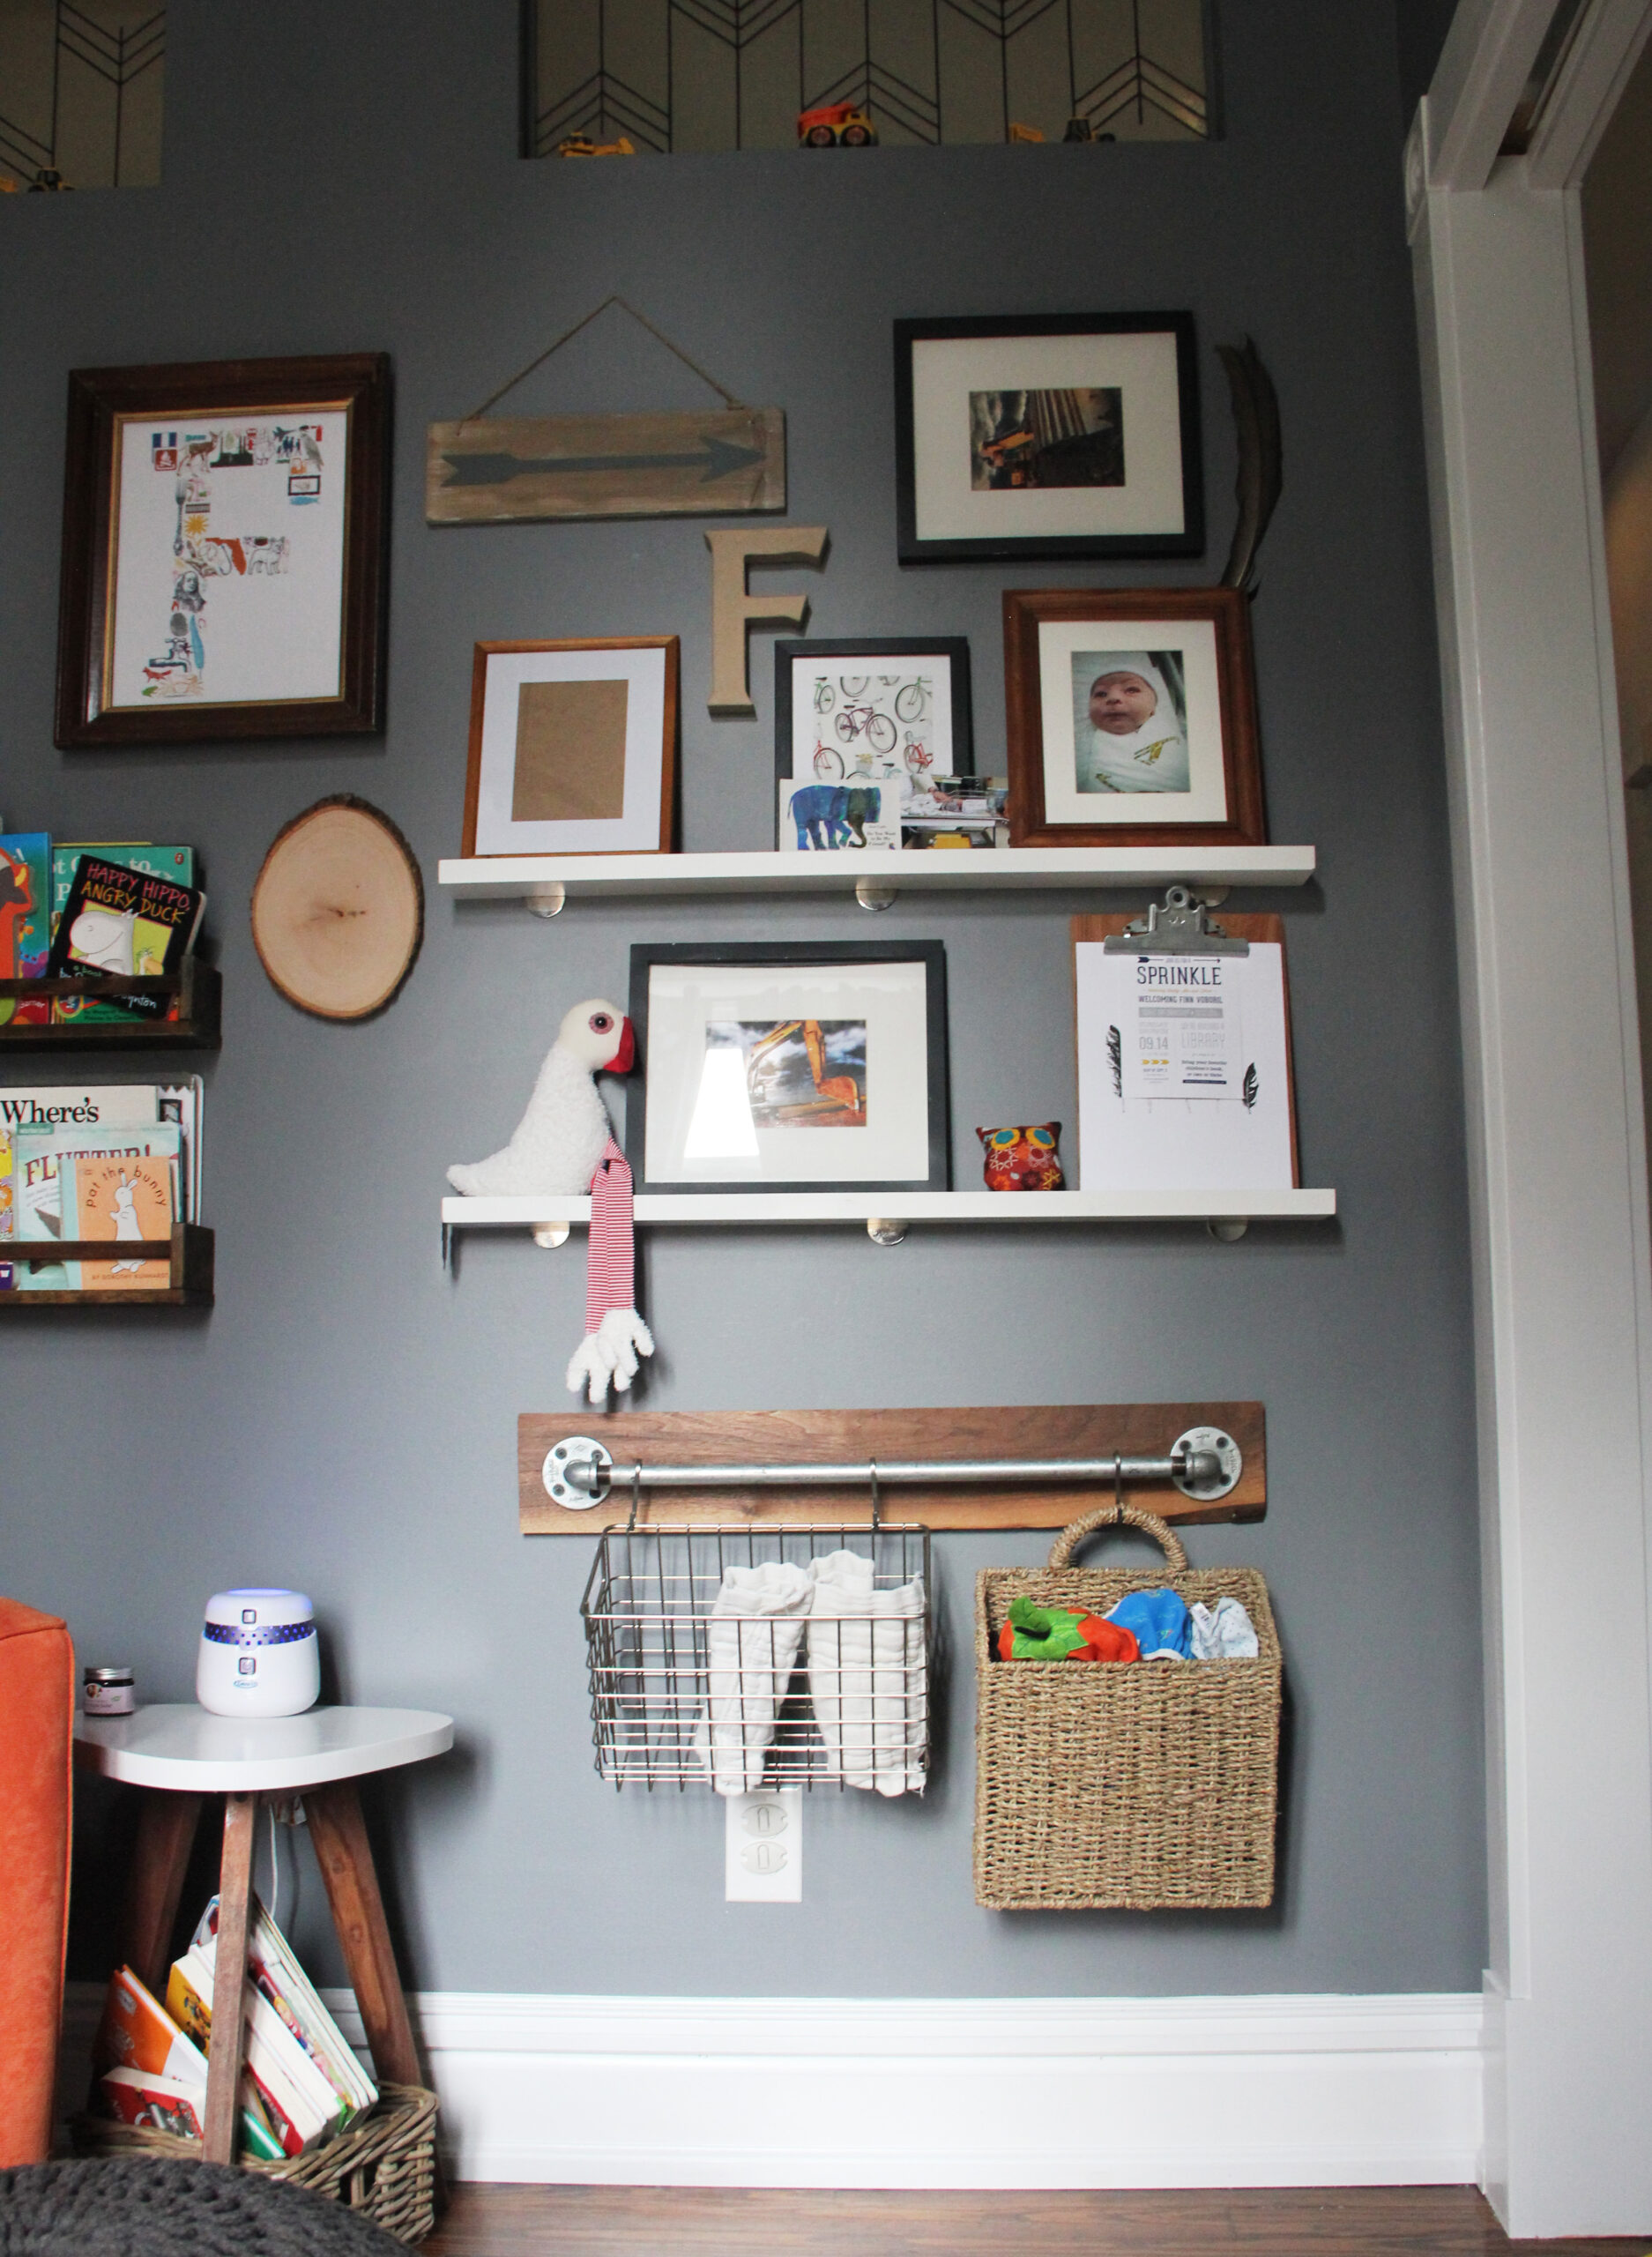
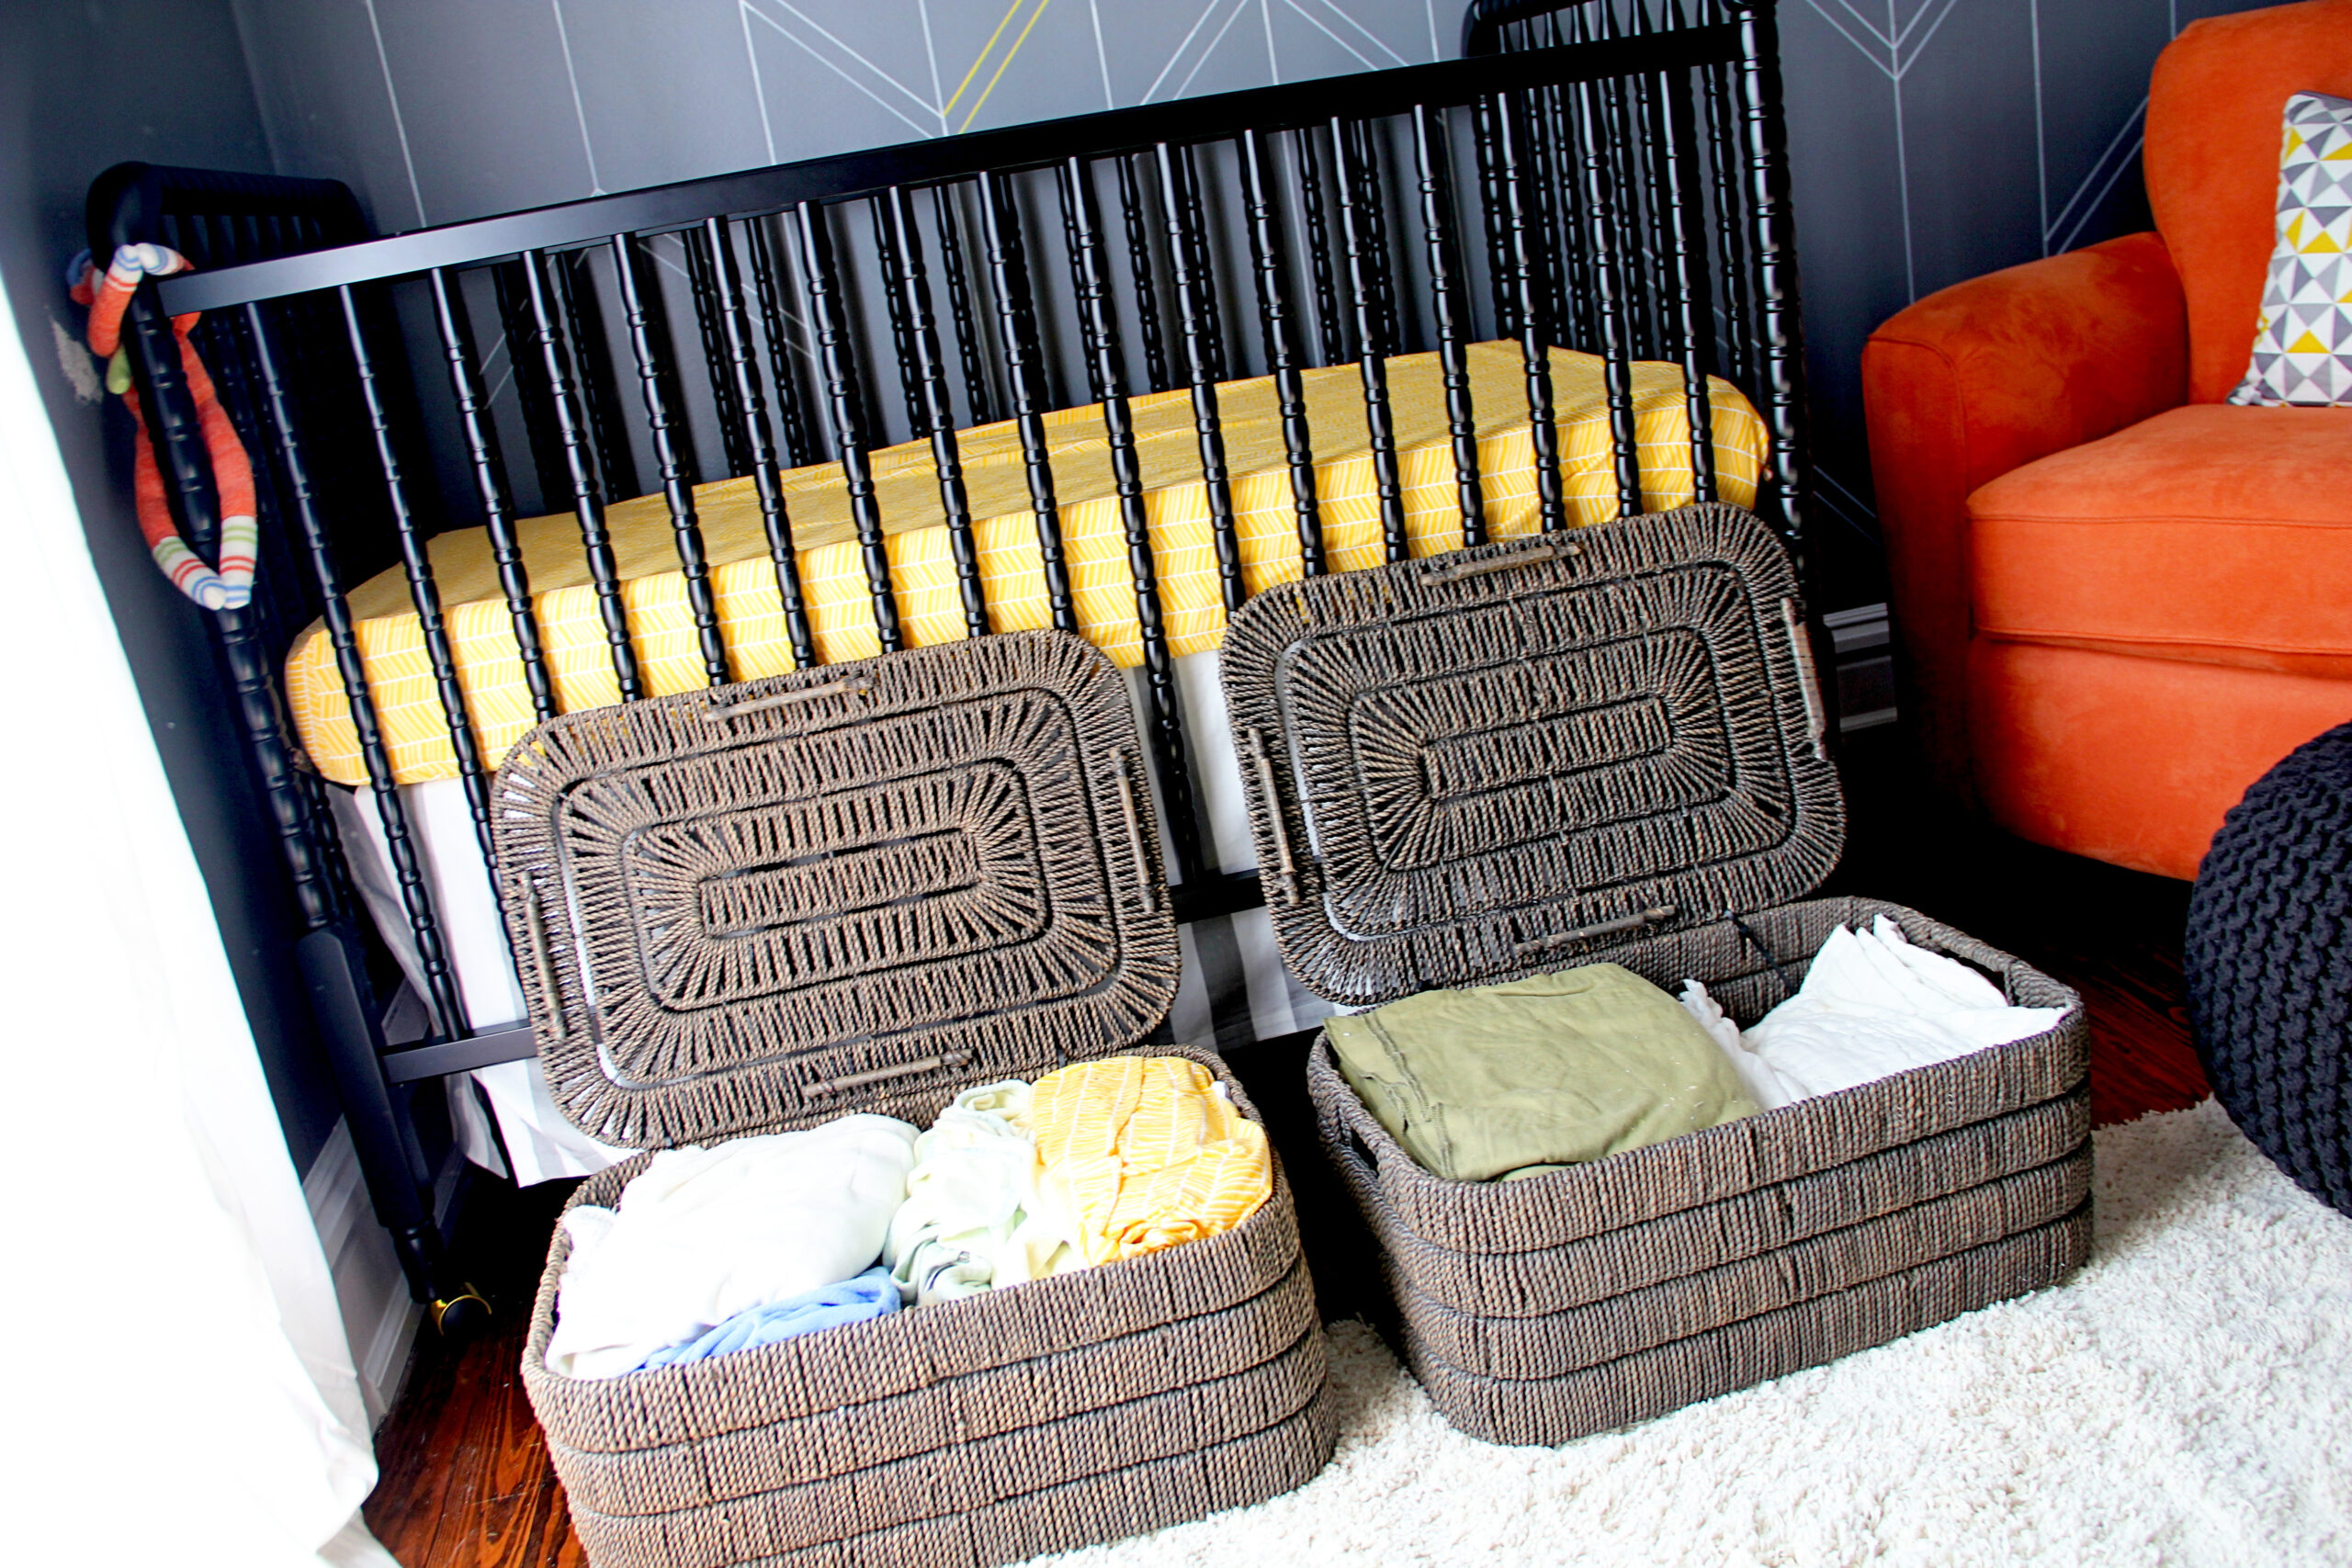
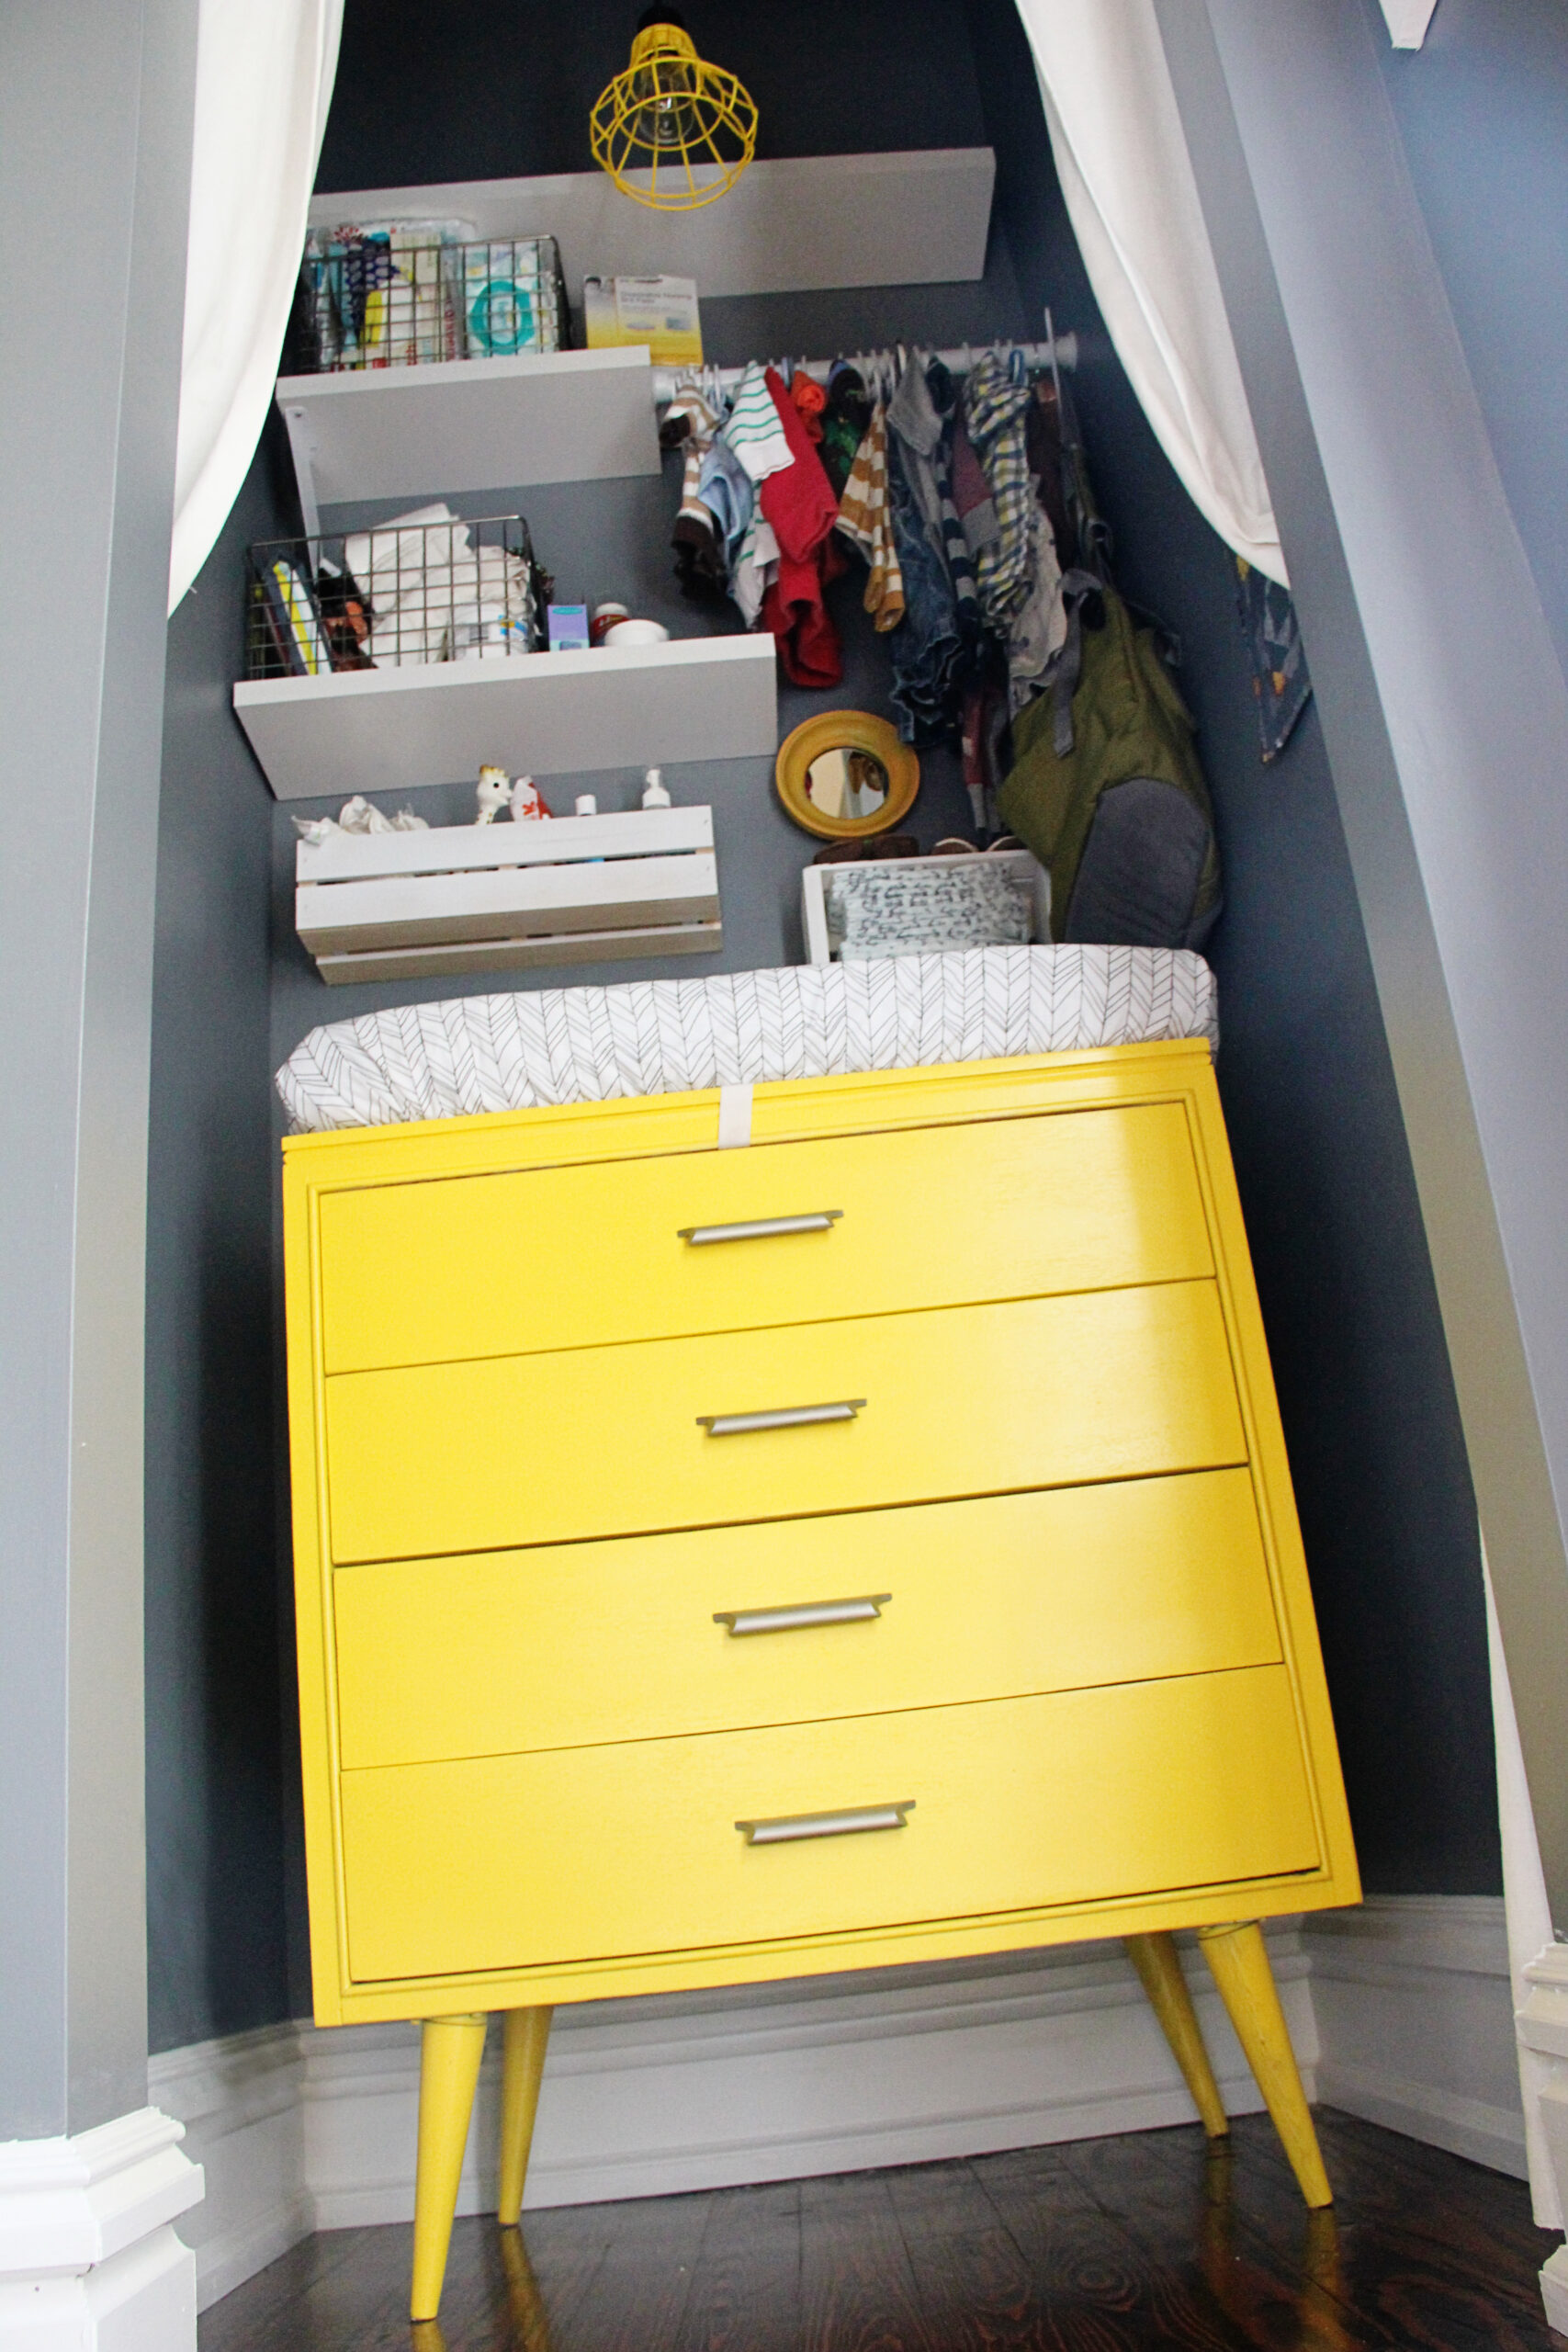
Storage was top on our minds when designing the room so anywhere we could sneak it in without ruining the fun, we did. Like the Ikea spice rack book shelves next to the rocker. The ledge shelving for pictures, and the industrial pipe rod down below where we’ll hang baskets and other hang-able items. We snagged the blue arrow shelf at Home Goods for more book storage…we have a lot of books and without good, close storage they pile up quickly. The under-the-crib real estate was too valuable to pass up so I found these two large baskets to store all kinds of bedding, burping, and pumping supplies.
Other than actually building the room, the changing table was probably my biggest “project”. When I was about one minute pregnant I randomly fell in love with a simple little mid-century-ish dresser at a local consignment store. It was in rough shape. Once the nursery plans started to form I realized with a little work, it would make the perfect changing table for our tiny room—we left the closet door-less for just this purpose. I think the fact you can see under the dresser, due to the tall legs, opens things up a big in the small space. Plus it’s just really fun seeing those angle mount tapered legs!
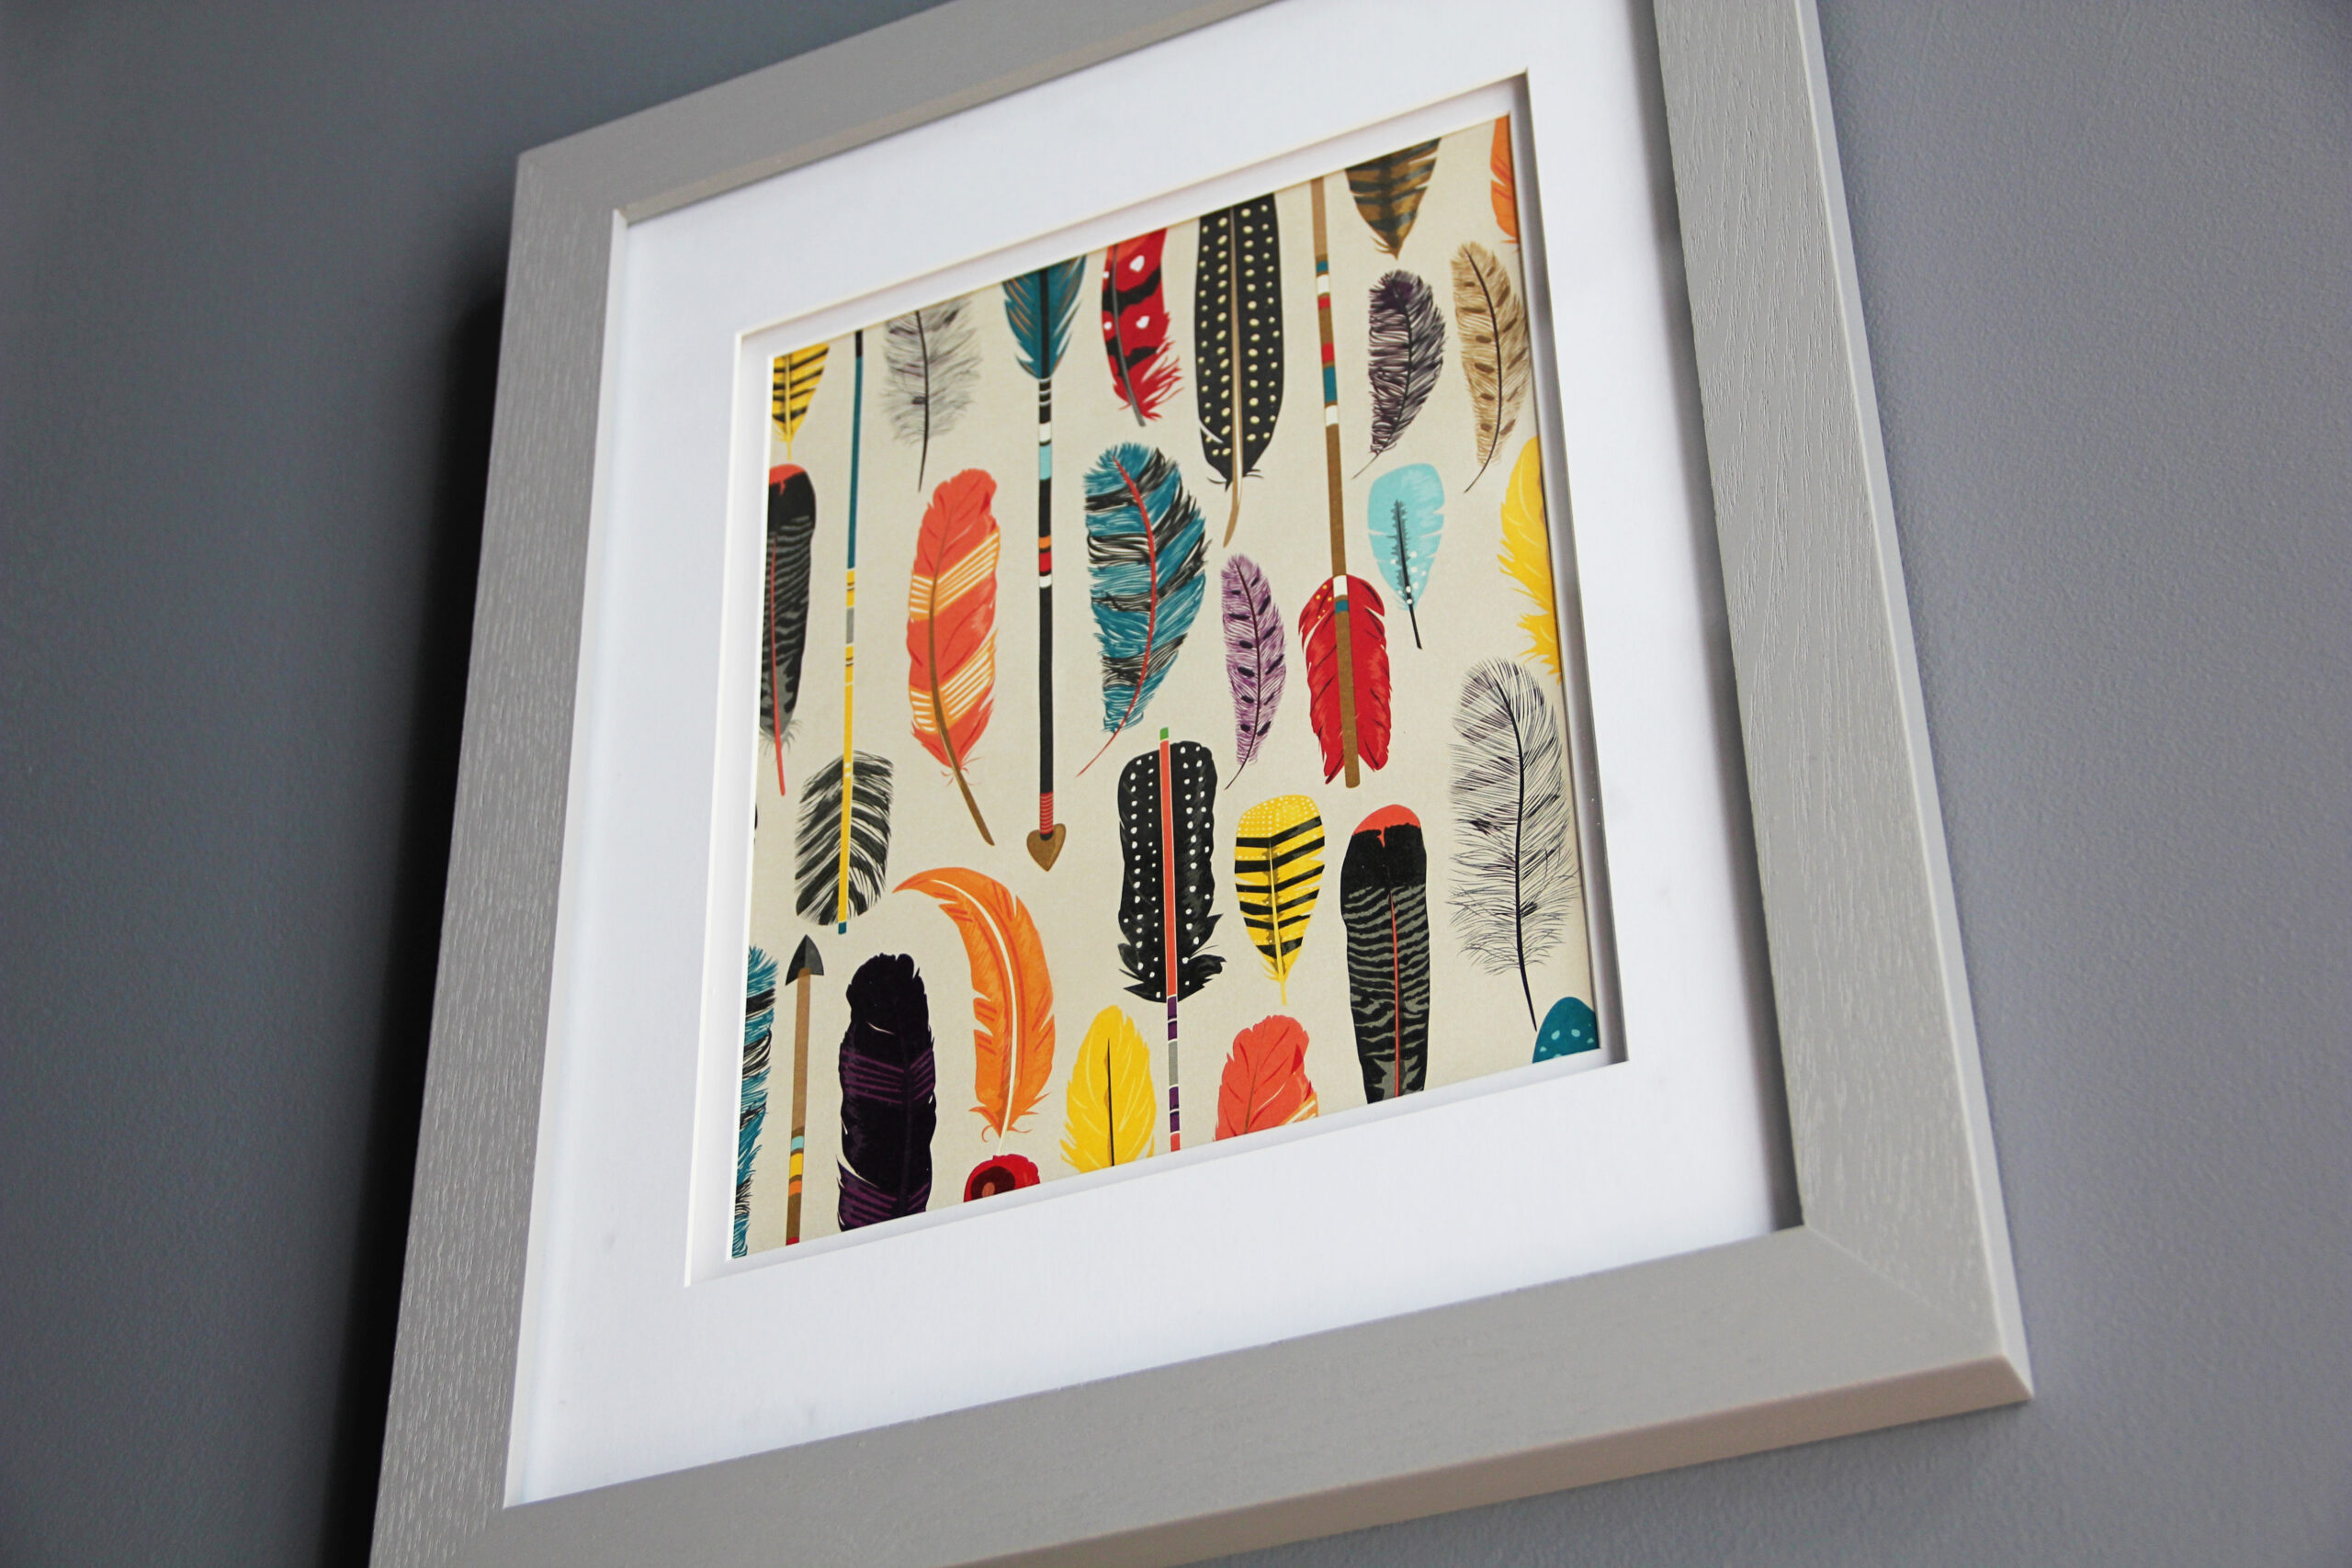
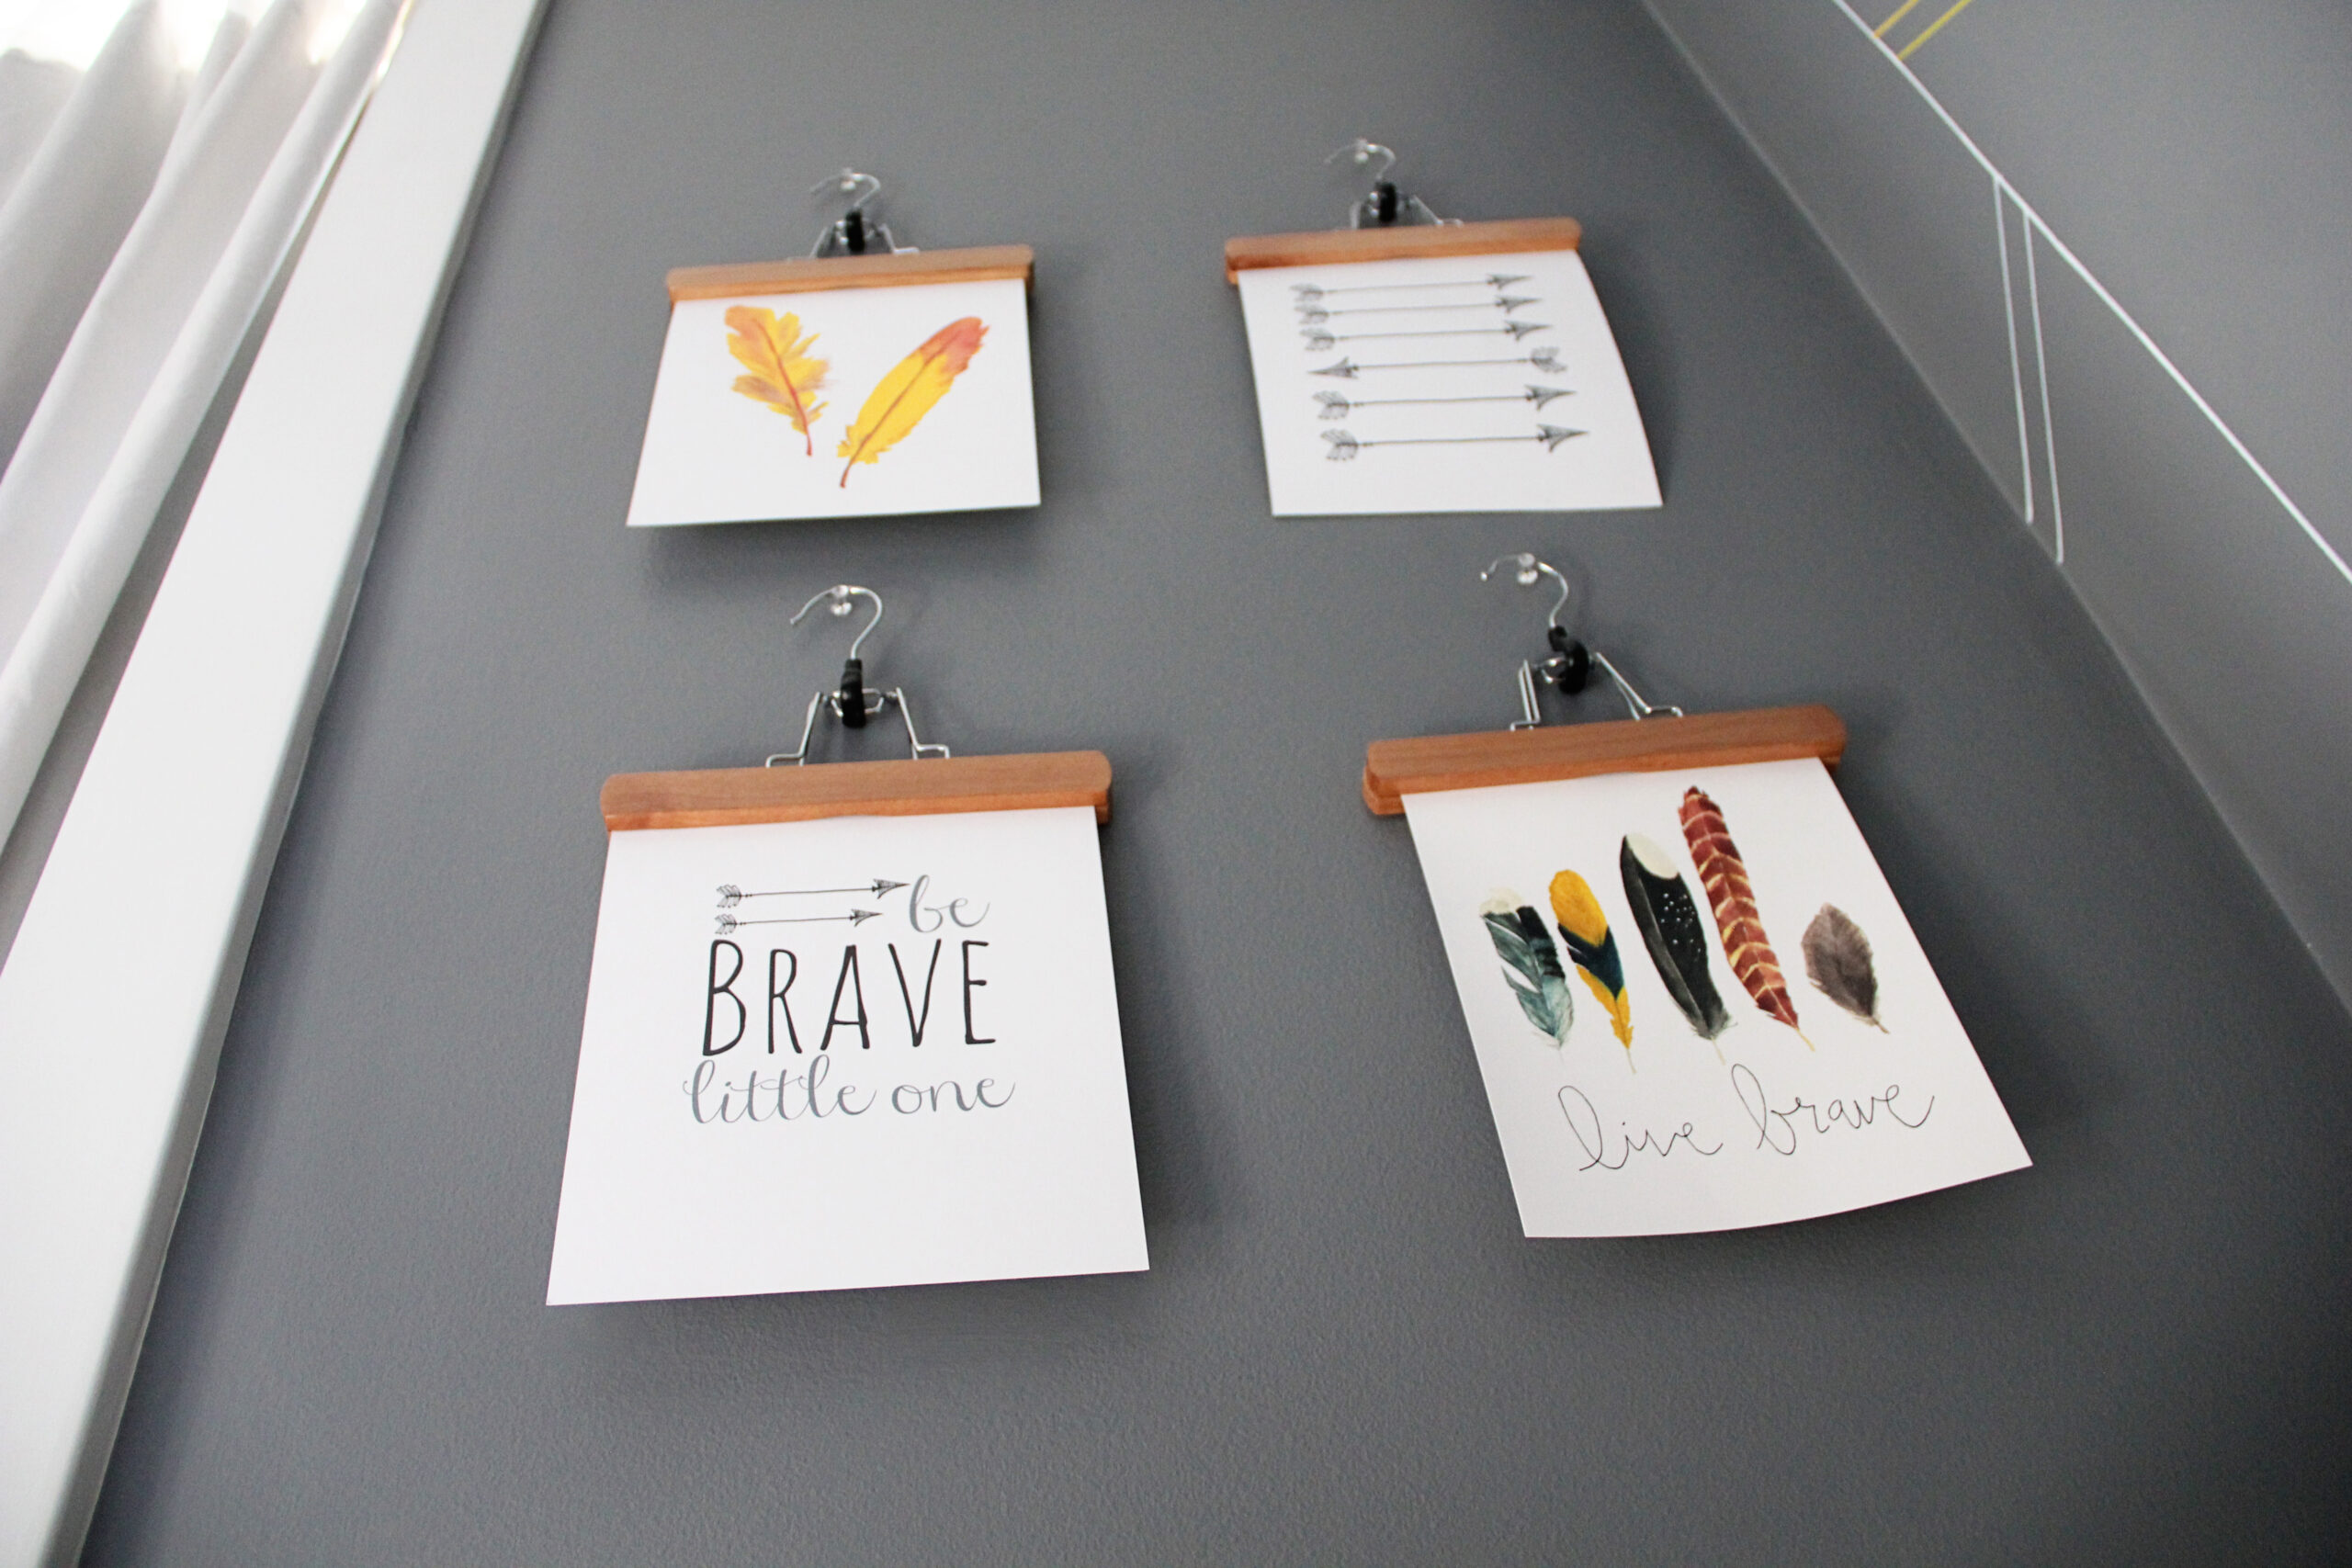
Artwork for the room popped up sporadically. I’d see a cute print on Brickyard Buffalo (a great flash sale site everyone should check out!), then I’d find a free printable or some wrapping paper I thought may work. The pant hangers were a fun addition to hang some of the prints while others got stuck in old frames I found long ago at Goodwill. Feathers, arrows, and, for some reason, antlers were the end result. The “F” print is amazing and by a local artist. I picked it up at City Sprouts and love when Ethan tells me about all the little images, always emphasizing the “F” sound. I even made some art! When I saw this geometric stitched elephant art I just had to give it a try. Once I had my canvas and some embroidery floss leftover from our felt alphabet project, things went very quickly. I followed the instructions exactly and it was enjoyable to spend a few evenings stitching away. The result is pretty adorable if I do say so myself
I made Ethan’s mobile so when I saw this little ditty on Design Mom, I knew it was the perfect solution for Finn’s nursery. I picked up some air-dry sculpting clay on one of my million trips to the craft store and gave it a try. Ethan even had his own little clay project going on while I worked. After a couple hours of rolling and cutting, a few days of drying, and another few minutes of painting, we had a beautiful mobile I think Finn will love.
Last but not least, there’s the bedding. I considered for a minute paying a premium for a crib sheet from Etsy, but after finding this ridiculously easy tutorial, I decided to order the fabric I wanted—adorable yellow herringbone—and make one myself. My sewing perfectionist mom was doubtful about the simple instructions, but we gave it a try and it worked perfectly! The cost for fabric and elastic was about $22 per fitted sheet and they took maybe 20 minutes to align, cut, and sew. As for the skirt, I ordered enough of this simple grey and white stripe fabric to make three rectangles, one for the front and one for each end (I figured why do the back?), hemmed them, then secured them to the mattress support with ribbon. We were able to easily shorten the skirt when we lowered the mattress by just tying it higher on the mattress support.
So there it is! Our itty bitty nursery perfect for our itty bitty Finn. He’s turning 2 next month (!!!) and we still love the room, it works perfectly for him and has plenty of storage to fit all his needs. The space is fun and visually stimulating in the daylight streaming through that big window, but peaceful for a good nights rest.
See how this all came together on my blog www.preparingforpeanut.com
