Pallet walls have been trending big time in the Project Nursery Gallery, which had me dreaming of endless design possibilities the moment my eye caught this eclectic wood-paneled inspired nursery.
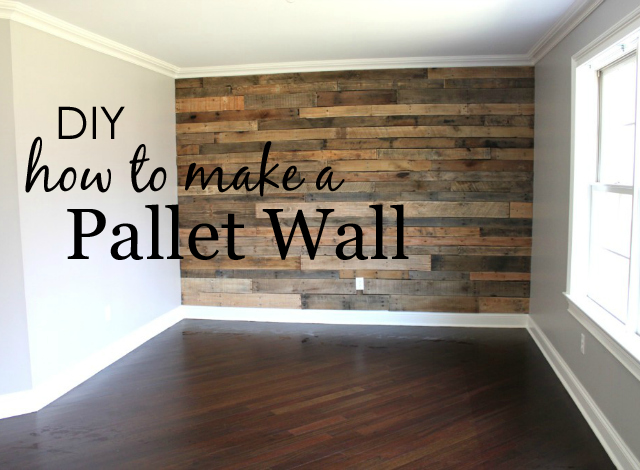
So when it came time to create a big boy room for my little man Chase, I showed my husband Josh a few samples of pallet walls created by adventurous parents. Part of me thought there was no way Josh was going to agree to this. To my surprise, he took it as a challenge and jumped at the chance to make his own pallet wall. After two weekends of some serious elbow grease, we made it happen.
It starts with the hunt for pallets. I’ve gotta admit that it was kind of a thrill driving around town and throwing abandoned pallets from the back of stores into the car. Some places charged five bucks per pallet while others said, please take them away!
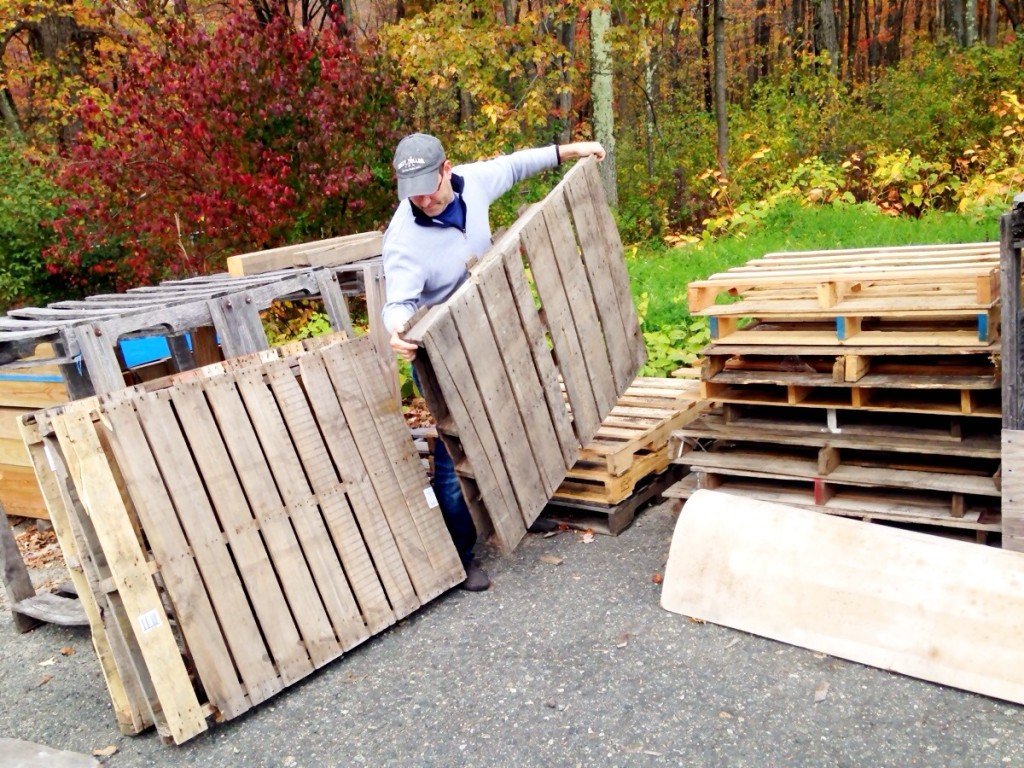
The beauty of this cabin-inspired look is that the more distressed and wrecked the boards, the better. My father was in town one weekend and helped with sanding down each board after Josh used a crowbar to disassemble each pallet slat and remove its many nails. I am not going to kid you—this part was crazy time consuming. We filled an 11 x 8 foot wall and required approximately seventeen (17) pallets to make it happen. You must remember to account for waste because some slats will inevitably get damaged in the process.
Once the slats are stripped and sanded, it’s time to prep the wall for installation. Adhere thin pieces of plywood to the wall by attaching them with wood screws directly into the studs.
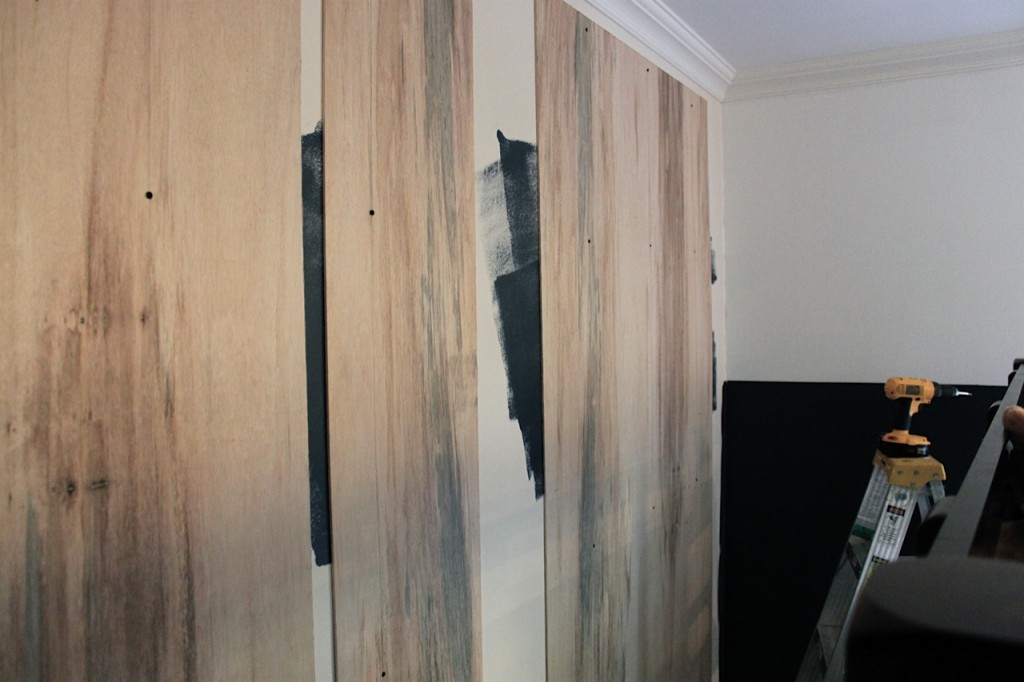
Place the first pallet slat at the top, in the center of the wall. Using a drill, screw each end of the slats to the wall with two to three screws. Repeat, working from the center out, staggering each piece of wood.
Due to the unevenness of the pallet wood, not all pieces will perfectly match one another. To avoid seeing random gaps in trouble areas, simply stain the plywood behind the seams before securing a wood slat over it to disguise the gaps. The results are seamless, promise.
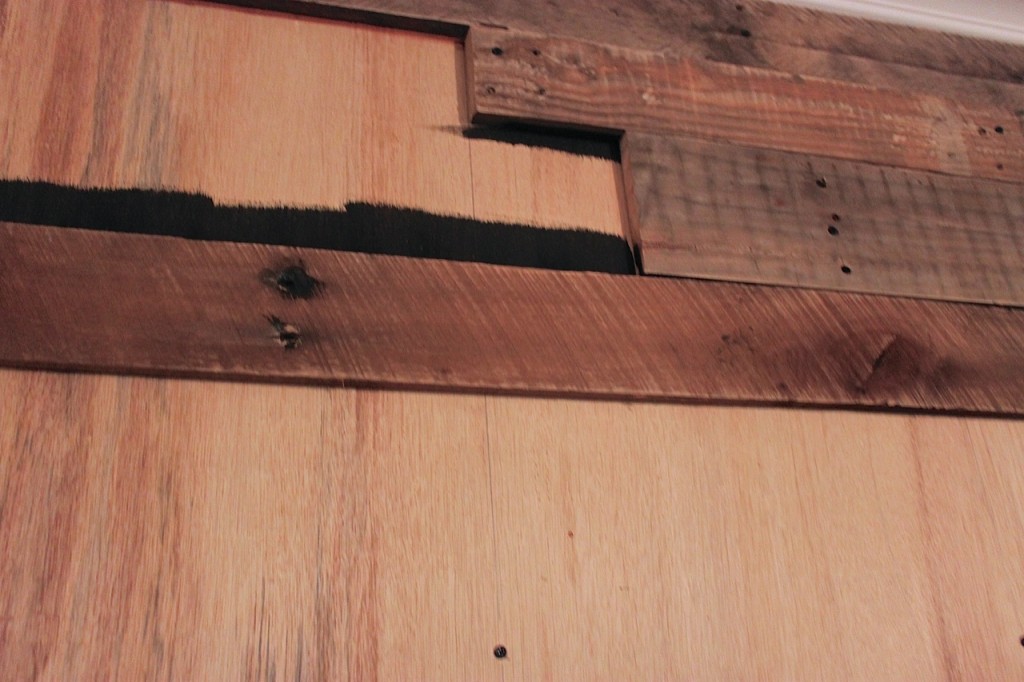
I think it’s important to note that we did not lay out the boards and plan in advance. I’ve seen other DIYers lay the boards out perfectly and number each one prior to assembly. Quite frankly, we didn’t have the patience for something like that.
And in the end, my pallet wall dream became a reality in the form of an industrial-chic growing boy’s room.

Check out our roundup to see how wood accent walls look in a variety styles.




Comments
lisa bolduc
I love this!!!
Leah
Cute…but not very safe. Used pallets are dangerous to use. Those that have been heat treated are generally used for food. They may contain food based diseases. I worked in a grocery store and saw everything from meat juice to rotten produce leaked on the pallets. Then there are pallets that are treated with chemicals. I know a woman who got arsenic poisoning from using these. Cutting and sanding bring all the bad that might be in used pallets into the air. I love the idea of reusing pallets but would never do it…especially in a child’s room. Not safe!
Mary Ann
sorry to burst your bubble….
pallet wood is NOT free….it belongs to various companies that pay to have it made, use it to move their products….and someone steals it and
then makes a profit by selling it as their own. The result is that ALL consumers pay more for products because of the thief.
Elyse
If you go on craigslist there are lots of people giving palettes away– they actually want people to come haul them away. Look under ‘free stuff’!
doug
I would highly recommend pressure washing the pallet boards before installing them. Yes, chemical residue may be on them. I would think that a person would be smart enough to check what material was being stored on them before just throwing them on a wall. Use common sense people. Pallet ideas are great, and very cost friendly and universal. You just need to be aware….. Happy building!!!
doug
And as far as stealing pallets, no one really does that. I have maybe 200 pallets lying around from shipping seed and grain. If someone wants any, I just charge what the seed company charges me for them. Its definitely not free, but I would rather someone put them to good use than burn them because the company wouldn’t buy them back…. Repurposing them is awesome.
andrea
Hi! I LOVE your wall! I am currently in the process of putting up my own pallet wall. I just finished the sheet rock and realized that I did not bring out my outlets far enough so that they would be flush with the finished wall. I noticed you have an outlet on your wall. Did you have to use some sort of spacers to nudge it out a bit? Thanks, and love your wall again!
Melisa Fluhr
Hi Andrea,
Truthfully, we got lucky and didn’t have to use a spacer to bring out the outlet. Outlet extenders found at your local hardware store are however really inexpensive and easy to use. Good luck with the wall and I hope you show us how it turns out!
Best,
Melisa
Tara
Hi!! I love the wall! I am currently planning on doing this for one of the walls in our half bathroom. Did you stain the wood at all? What color would you recommend for the other walls for a 3.5 ft x 8 ft bathroom with no window. I was able to score 7 pallets today from Craigslist and can’t wait to get started! : ) Thanks!
Melisa Fluhr
Hi Tara, We did not stain the pallets at all. One they were sanded down with an electric sander, the color was perfectly natural and rustic. For a small bathroom with no windows I would keep your paint color light and use a pale gray or beige.
We have two great colors in our shop that could work nicely –
Canyon Tan – http://shop.projectnursery.com/collections/baby-safe-paint/products/canyon-tan-wall-paint
Touch of Gray – http://shop.projectnursery.com/collections/baby-safe-paint/products/canyon-tan-wall-paint
Best of luck!
Melisa
Jessica Combs
Did you seal or stain the wood after attaching? Thank you!!!
Jesse
Lot of silly comments. There are a lot of FREE pallets because a lot of the time the damaged or very old ones are not worth sending back. Sometimes they wont even take them. Your best bet is to go to a pallet yard. They have mountains of old pallets that are junk. They will probably let you take them. I went to concrete companies and other places that have old broke pallets. I just picked up 19 of them in 30 mins. All legitimate. No stealing.
As for health concerns. Get construction used pallets. Not ones used for food. Plus the construction ones will have a more rustic used and worn look to them. Buy a filter mask. $30 or so. Small price to pay for a fantastic product in the end. Sand outside. When you are done seal the wood with a clear matte finish. This will be safer and contains any potential “diseases” inside. Yes, if you build this wall you will turn into a zombie. Dun dun dun
Mark
You mentioned using a pry bar to take the pallets apart and that it damaged several of the boards. An easier way to separate the boards would have been to use a saws-all (otherwise known as a reciprocating saw) to cut the boards away from the 2x4s. Saves a lot of time, headaches, frustration, and wasted wood. If you’re worried about the nail heads that are left in the boards, use a small punch to knock them out.
Melisa Fluhr
Thanks all for your feedback and great tips!
Stacie
The comments here are crazy….but other then that the wall looks amazing! We did this as the focal point in our living room and using them to reface kitchen cabinets. Now some palettes are unsafe those that are unmarked use with caution and those with MB do not ever use! If they are marked HT they are completely safe to use but you must be cautious about where you are getting them from….washing palettes should always be done regargless.
Marcel forette
Do you need to aply the ply wood behind them or can you just nail them to the sheetrock?
Lonna
Hi! What is the source for the rug? Love it!
Beth
Hi Lonna, The rug is from RH Baby & Child, found here.
Justin black
Did you have to take off the crown molding?
John
How did you account for extending out the wall socket. I’m assuming the plywood plus the pallet added another 2.5 inches extension, so how did you compensate for getting the socket cover back on ?
Charity
Love this idea! Some companies have broken skids they have to pay to have hauled off and will give them away for free so this would be inexpensive and cute. Also u can find ways to clean the wood before use. Always safety first tho! Use safety glasses and face masks when sanding, and treat wood with a nontoxic stain/sealant before putting in a kids room. Im sure you guys did this and didn’t put every little step into the article, but just in case some ppl don’t know.
Amy
Melisa,
I read that you did not stain them but did you wash the pallets prior to sanding or applying them to the wall? Just curious. We have a huge stack of pallets that we are planning to breakdown and use for a wall in my living room, but I am concerned about any residual chemicals that might be lingering still. Any tips?
Thanks
Amy
dave
How did you cover the old nail head holes or did you just put screw back in the same holes to attach to wall. Wood filler etc?
Melisa
Surprisingly Dave, we felt that the holes ultimately added character and left them open. However many actually went into the open spots since they were located at the ends.
dave
Thanks for the response Melisa . Both my wife and had said the same thing leaving them open will add character but not having the wall up yet it’s hard to picture what it will actually look like plus the dark stain we invision will certainly add to the aged look . The wall looks great!
Darren
Do you happen to know how “thin” the plywood backing for your wall was? We are in the beginning stages of a similar project and were planning on white-washing the wood. After seeing the natural color, I’m torn…. Thanks A LOT!
Great job!
Morgan
I’m curious as to what you used for screws, since I cannot spot them in any picture, in assuming that they blend in rather well. What size and perhaps color? Also, I have to second the question left by Darren, how thick was the plywood which you used?
Melisa Fluhr
Hey Morgan and Darren, Happy to answer your questions –
We used black 2 ½ inch, flat phillips head screws that went into the very thin plywood. The plywood was attached to the studs so everything was solid. We also put the screws in the old nail holes that were part of the original construction of the pallet. Also to note, we stained the plywood along each of the seams so that if there was variation in the slat you didn’t see the natural color of the plywood backing.
Good luck with your own Pallet project! – Melisa
Stephen Tompkins
One other thing: pallet wood can be a carrier of wood-bourne insects and their larvae. Really not something you want to bring into your house. This wood should be heat-treated before use.
Tracie
Your project is the ONLY one I could find where you put this up with existing crown molding. How did the boards fit under crown molding?? I want to use 1inch thick boards but that would make them stick out slightly from molding. Yours look perfectly flush to molding.
Melisa Fluhr
Hi Tracie, It was pure luck and they aren’t all totally flush. The variability is what makes it look authentic to me. We did have to cut some of the boards lengthwise to make the puzzle actually meet the baseboard. We also had varied widths of the boards so you can start to plan when you get close to the bottom (and they should start at the top especially if something is in front of it like chase’s bed b/c it covers some of the bottom where it might get a little dicey – it didn’t for us but I suppose it could) by playing with the different sizes to see what would end up fitting. Overall, it looks great in person!
Pamela
Local newspaper company gives their pallets away, all you need to do is haul off.
Becca
So many naysayers. I think it’s a great project and want to do it in my home. Yes, you need to be careful with pallet. Wear gloves when handling them. Before starting your project, use an inexpensive pump sprayer to spray them down with diluted bleach and then hose them off with a the jet spray or a pressure washer if you have one. After they dry, disassemble, create your project and then seal them with some polyurethane. Do your sanding and cutting outdoors, and wear a mask. Essentially, you need to handle them much the same way you would any other treated lumber, especially old lumber that was treated when they used arsenic. New wood is not treated with arsenic.
Angela Jameson
We are planning to do this in our nursery as well! I love the look of yours very rustic! Did you stain the wood after sanding it before placing it on the wall? Is the ply wood simply to hide the gaps in spaced areas?
Thanks!
Melisa Fluhr
Hi Angela, We did not stain the wood but instead power washed and sanded each piece. We used the plywood to hide the gaps and we also stained the plywood inside those gap spaces so it didn’t look entirely white. Excited to see the end results!
Laurie Schakosky
You can easily create a wall like this with Stikwood, which are different colors of wood that you literally stick on the wall. They are super cool. You can gt them at Stikwood.com or West Elm has some of them. We talked to them about creating a wall and since we live in a loft they recommended that we get plywood put it on the wall with the stikwood on top, so when we move into a house we could take it with us.
Mandy
Hey. I am hoping you may still reply to this. I have sanded and have all my pallets ready. I was getting ready to hang when someone asked if I sealed them. I was not going to. Did you if so what did you use. Did it change the wood. The more real and rustic the better for us.
Melisa Fluhr
Hi Mandy, I actually choose not to seal the wood. I too went for a more rustic look and felt that the wood looked great after a really good sanding. Good luck with your project and hope you’ll share the results with us!
Jyneal
As far as I can tell Stikwood is extremely expensive. To do a wall like this it would be around $1000.00. I don’t know that seems very expensive to me. I am worried about how permanent a wall like this would be. As fast as things come in and out of style. This will be tacky in a few years. Is that why you put the plywood underneath?
Melisa Fluhr
Hi Jyneal, The plywood was used to help secure the screws into the dry wall. Removing the pallet wall will indeed be tricky and we will need to fix the wall when we are ready for a change. But our labor of love for this design is worth it.
Bonnie Freeman
I would like to do this in my rental, but wonder if the damage to the wall would be extensive, or if it would only need to be repaired where the plywood was secured to wall? Also, what color did you use to stain in between the seams? It looks black, but I’d like to know for sure. Thank you.
Melisa Fluhr
Hi Bonnie, the stain was a dark brown, just what we had handy. I have to say I would not recommend this type of wall for a rental. It will definitely do damage to the wall so you would have to be comfortable with repairs when you are ready to move out. Best of luck!
Julie
Hi Melisa, I LOVE the wall and the room. I have thought about doing this in my basement but have too many other projects so it is on the bottom of the list. My question is where did you find that bunk bed? It is amazing as well! Thanks!
Melisa Fluhr
Thanks so much Julie! The bedding and all the furniture is from Restoration Hardware Baby & Child. Here’s more info on the room – http://projectnursery.com/2014/05/industrial-vintage-boys-room-makeover-reveal/
William verdaguer
If people are afraid of chemical on the pallets then i suggest fence wood, it works great and its inexpensive.
Pecker
Good effort but I just don’t like the color of the wood. Thanks Leah for the word of warning
Sarah
First off.. The wall is beautiful. 2nd I called my local pallet company today & told them I was looking for pallets to make a wall, they asked me if I would like a bundle of pallet board with the nails removed and any nails that couldn’t be removed are sanded off flat and not sharp. So…They sell a bundle which includes 400-500 single boards for $20.00… I think my mouth fell open.. Single pallet boards already taken apart.. Call you local pallet company’s and ask!! I cant wait to start our pallet wall.
Kendra
Hi there! It looks like you have had your wall up for a few years now. We are just about to hang ours in our future nursery. We have sanded and stained the boards and we got our pallets from a furniture company. I have read a lot of articles about how dangerous it is to make a wall w pallets bc of chemicals, but I have never read an article about anyone getting sick. It’s not like we are eating off of it! Have you had any issues with your wall with smells or your little one getting sick?
Melisa Fluhr
Hi Kendra, Thanks for reaching out. I’ve had no issues thus far on our pallet wall for our son. He’s now 7! Like you, I did my research and made my decision based on that research. Good luck and I hope you’ll share your finished nursery with us in our gallery!
Tool Man
For even boards you could rip on a table saw
Tracie
Hi! The wall looks great! Do you have an idea about the total time (sanding and prying and assembling etc.) that it took to finish this project?
Melisa Fluhr
Hi Tracie! So all in all it took two weekends. Most of the time was spent searching/purchasing pallets and breaking them apart. Installation itself only took half a day cause once you get going, it’s pretty easy actually. Good luck!
ADAM
I appreciate the article. The end result is beautiful. I might be doing this in my recording studio in the near future. I’m surprised by some of the negative comments though. I hope they don’t discourage people from doing this because I think using pallets is wonderful. So, for the naysayers and those discouraged by them…
1. If you are going to use pallets in your home, don’t get them from a company that packages food or something. You don’t want a gross pallet in the house. It’s that simple. It SHOULD be common sense too. And you might want to think twice about the ones that are weathered. They may look naturally cool, but make sure they aren’t infested with any sort of insect. There are millions of clean pallets to choose from though.
2. And YES, there really ARE tons of FREE pallets out there. You just have to think about who might have clean ones and then call and ask them. I worked at a garage door company in my early 20’s and I threw out pallets every week. These were clean pallets that met the dumpster. Warehouses will have STACKS of them. IF you know anybody that works in construction, like HVAC or something, you can ask them to save them for you. They may set them out somewhere for you to pick them up. I could probably make one phone call and have 30 clean pallets stacked up in my garage that same day. Pallets are perfect for DIY. Have fun everyone. :)
Steven
Not all pallets are stolen. There is a business down the street from me that has stacks of them all week that has a sign that says free
Brittney
I love this room! Question, where did you find that cool locker style cabinet? Thank you!
Melisa Fluhr
Hi Brittney, The locker style cabinets can be found at RH Baby and Child – https://www.rhbabyandchild.com/! Thanks for asking ;)
Gian Carlo
Hi, how do you check if the pallet is not rotten inside yet? how long will the pallet last when exposed to direct sunlight?
Kara
Hiya! Love the wall!!! I have a quick question and hope I didn’t miss it if it was already asked, but did you sand both sides of the wood?
Melisa Fluhr
Hey Kara, we just rough sanded the back side just to clean the wood a bit! But really just focused on the side showing ;)
carb cap
We are planning to do this in our nursery as well! I love the look of yours very rustic! Did you stain the wood after sanding it before placing it on the wall?
Melisa Fluhr
Hi there! We simply sanded and did not stain the wood for a natural look!
Brenda Jo Mitchell
I love this idea and it may be what I have been trying to figure out how to do myself for 5 years now! I live on the lake and it is one of my sunroom walls I wanted to make a wood wall. I want it distressed…like driftwood, since I’m on the lake. Kinda thinking old ship feel. So that means I would stain it. So do I stain the boards first? Or put them up and then stain the wall? Second – what stain color do you suggest to give me that driftwood/old ship vibe? Thanks!
Melisa Fluhr
Hi Brenda Jo! Sounds pretty! I would suggest sanding and staining the wood first. This way you get the edges covered and because the wood maybe old and weathered, each piece may take the stain a little differently. If you are going for a driftwood look, consider stains with a shade of gray. Again, this wall was not stained and already had a bit of natural gray after a good sanding. Good luck!
Craig
Re using pallets is Awesome!!! there are millions world wide just waiting to be repurposed. Crush the argument about theft, there are many companies that even give these away in industrial areas. I washed my pallets with a high pressure washer so the chemical and contaminate concern can be easily washed away. Enjoy doing your part to reclaim some wood that may otherwise ends up in the landfill. Let’s filter out the negative on pallets, It’s not theft and there are cleaning solutions.
robert
Great Post! Thank you for sharing usefull information. We are also provider of skid arrow boards. Visit our website for more info highway1.co.nz
Rick
im a diesel mechanic and i love doing wood work in my house and field. know your limits and all will be fine. im not paying for the price of lumber to finish my basement when i just spend $260.00 for 520 planks to get it started.
ROBERT
Great Post! Thank you for sharing usefull information. We are also provider of skid arrow boards. Visit our website for more info highway1.co.nz
Jonathan Schlehr
What types of glue and epoxy did you use
Norman Minnick
Since the pallets were acquired from various places, how do you ensure that they are not filled with parasites or other undesirable elements?