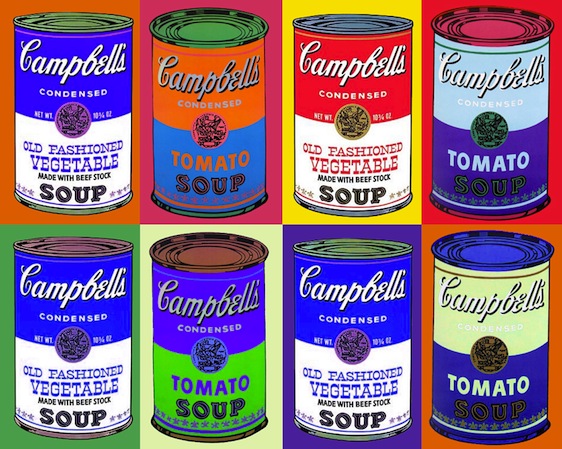
In design, repeating an image helps to strengthen the visual message. There is definitely power in repetition. I often think some of the best examples of this design technique come from Andy Warhol. The silver wigged artist drove this point home with his Pop Art masterpieces like his Campbell’s Soup Cans below.
The couple I was working with on a recent project wanted to design a gender-neutral nursery that was unique, cute and different from anything they’ve seen. They called me to talk design and come up with some fresh ideas for them. After brainstorming some animal motifs, we landed on penguins. Their graphic black and white shapes and super cute aesthetic made them a perfect choice for this modern nursery.
Exploring the principle of repetition, I created hand-cut templates, which would become my penguin pattern. In the center of the line of penguins, a large square penguin painting would hang. Read below to see how I made the stencil pattern. This same principle can be used for a variety of animals, flowers, cars or any image or composition you can think of. Repetition is the key!
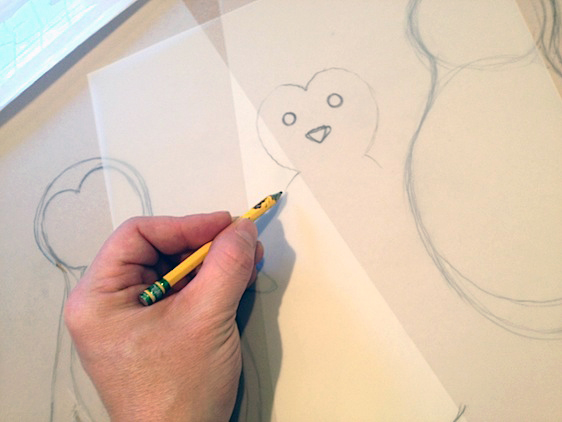
1. Sketch your image onto stencil paper or use acetate (available at most arts and crafts stores).
2. Separate the image by color or layers. For the penguins, I used dark grey, white and orange, so I made three stencils—one for each color.
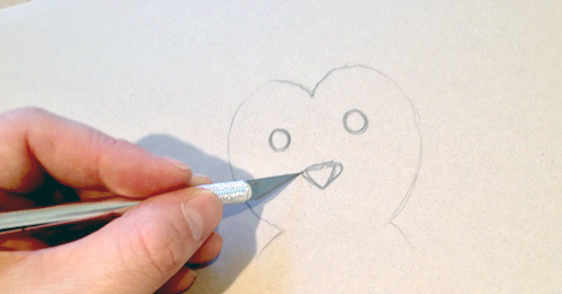
3. Carefully cut out the template shapes with a sharp Exacto knife. I used scissors for the longer cuts. Keep your eyes on your blade at all times, and make sure to put it away when the children are around, they are super sharp!
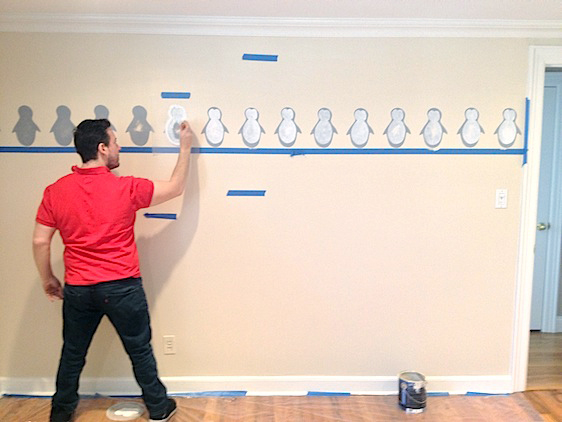
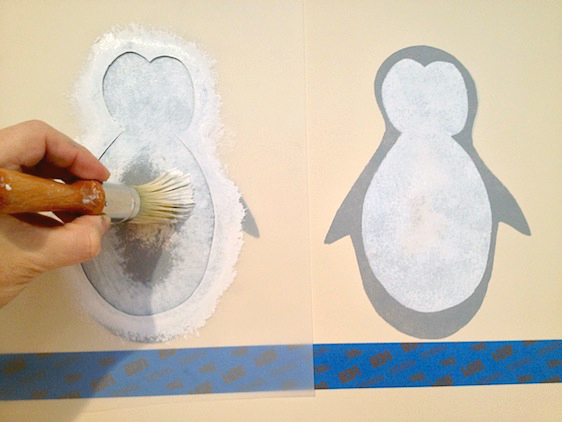
I wanted my penguins to be in a line, so I used blue painter’s tape to make sure that all my penguins started at the same height. Then put on some fun music and start stenciling!
The big “trick” with stenciling is to use as little paint as possible. I dab a teeny bit of paint on my brush, then blot the brush on a rag or paper towel to take some of the paint off, leaving just a little bit on the brush so that it’s almost dry. Then repeatedly tap the brush around the edges of the design and fill in the center. Tapping is better than brushing since the brushing motion can force paint under the stencil making the image messy. Stencil brushes are a must and are readily available at art stores.
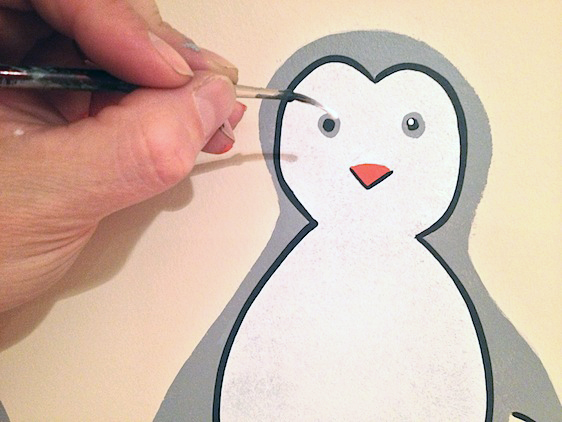
You can combine several details and colors within one layer. Below I used one stencil for the beak and eyes so they would end up consistent.
When all of the stenciling is done, I added some outlines and additional details (like the shine in they penguins’ eyes) using a liner brush and some very fluid black and white paint. This last layer of detail really makes the image look sharp and complete. With all of my artwork, I work big to small, leaving the tiny details to last.
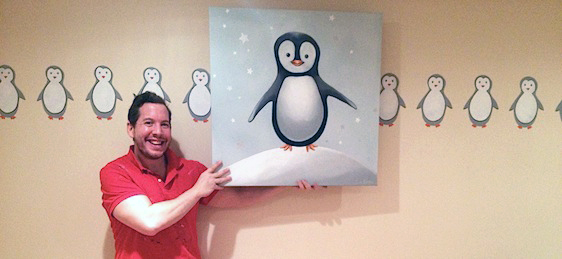
Then it’s time to hang the main 30″ x 30″ painting in the center of the wall. The background is sprinkled with metallic white stars that shimmer.
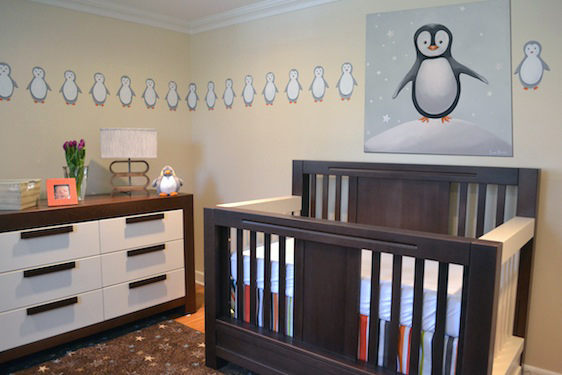
The graphic grey and white artwork was complemented by my clients’ choice of chunky modern furniture. The crib and changer’s dark and white elements visually nod to the dark and light elements of the penguin artwork. This turned out to be a super cute gender-neutral nursery! Penguin nursery complete!






Comments
Ross Neytiri
So cute! Penguins are such adorable creatures, so I say it’s the perfect animal choice. And thanks for sharing those stenciling techniques.
moira
How long did it take you to finish all these penguins? I would love to do something like this in my still-unfinished nursery, but I’m afraid it will take me longer than I’d hope and I might need to abort the project even before I get halfway. This pregnancy has made me lazy and sluggish, and that is the reason why I am already in my 7th month and still nowhere near a completed nursery for my baby :-(
Andressa
You are so creative, Sam! I look forward to more DIY ideas and tutorials from you!
Sam Simon
Dear @moiramoira the entire project took 1 day to finish. It was a breeze. The most important part is prep work. Feel free to email me directly for more specific tips on how to do it, and what you will need. My penguin stencil was a 3 piece stencil- you could simplify and use a 1 piece or 2 piece stencil and be done much faster! xoSS
Sam Simon
Dear @Andressa thank you so much! I look forward to doing more DIY projects! I love em! Let me know if there’s anything your interested in, and I will try to create something special! xoSS
Sam Simon
Dear @Ross I LOVE PENGUINS! They are adorable, and always ready for a black tie affair! I love a formal bird. HAHA! xoSS
Germaine
I’m not an Andy Warhol fan, but I love what you did with the penguins. Lining them up and then meeting above the bed with a big penguin art was a neat idea.
Andrea Lowe
I’d like to try this on my sons’ room. But I think I would do whales. At least I would only need to do white or blue, which are exactly the colors I used. The only problem is I am not good with an Exacto knife.
Lisapeck
Sam, I just have to say, you have a gift in creating beautiful things. So simple, yet very attractive! Thank you for sharing this one!
Sam Simon
No worries, just use a nice pair of scissors, there also might be a whale stencil you could find pre made-
Sam Simon
The entire project beginning to end took me 1 day. You could choose a design using just 1 color (vs 3) which would make the entire thing go much faster. XOSS
Sam Simon
Thank you @69ea70a5ba7ee4cf15578a5d88d03bd4:disqus ! I look forward to more projects too! Any ideas or requests, hit me up! xoSS
Sam Simon
If you are not comfortable with an exacto knife, then use a scissors. Whales are pretty simple shapes and would be easy to cut out using a scissor.
Sam Simon
Dear @Lisapeck:disqus thank you so much! I’m so glad you liked this post and project!! xoxoSS
Patricia
What company are the furniture from I love the furniture and decor!!!