How do you keep the nursery organized? Have you ever considered displaying some of baby’s cutest clothes or perhaps a couple of everyday items for easy access? We’ve created a simple but attractive DIY hanging rack that’s perfect for the nursery or toddler room. Read on to find out how you can make one yourself with just a few simple supplies!

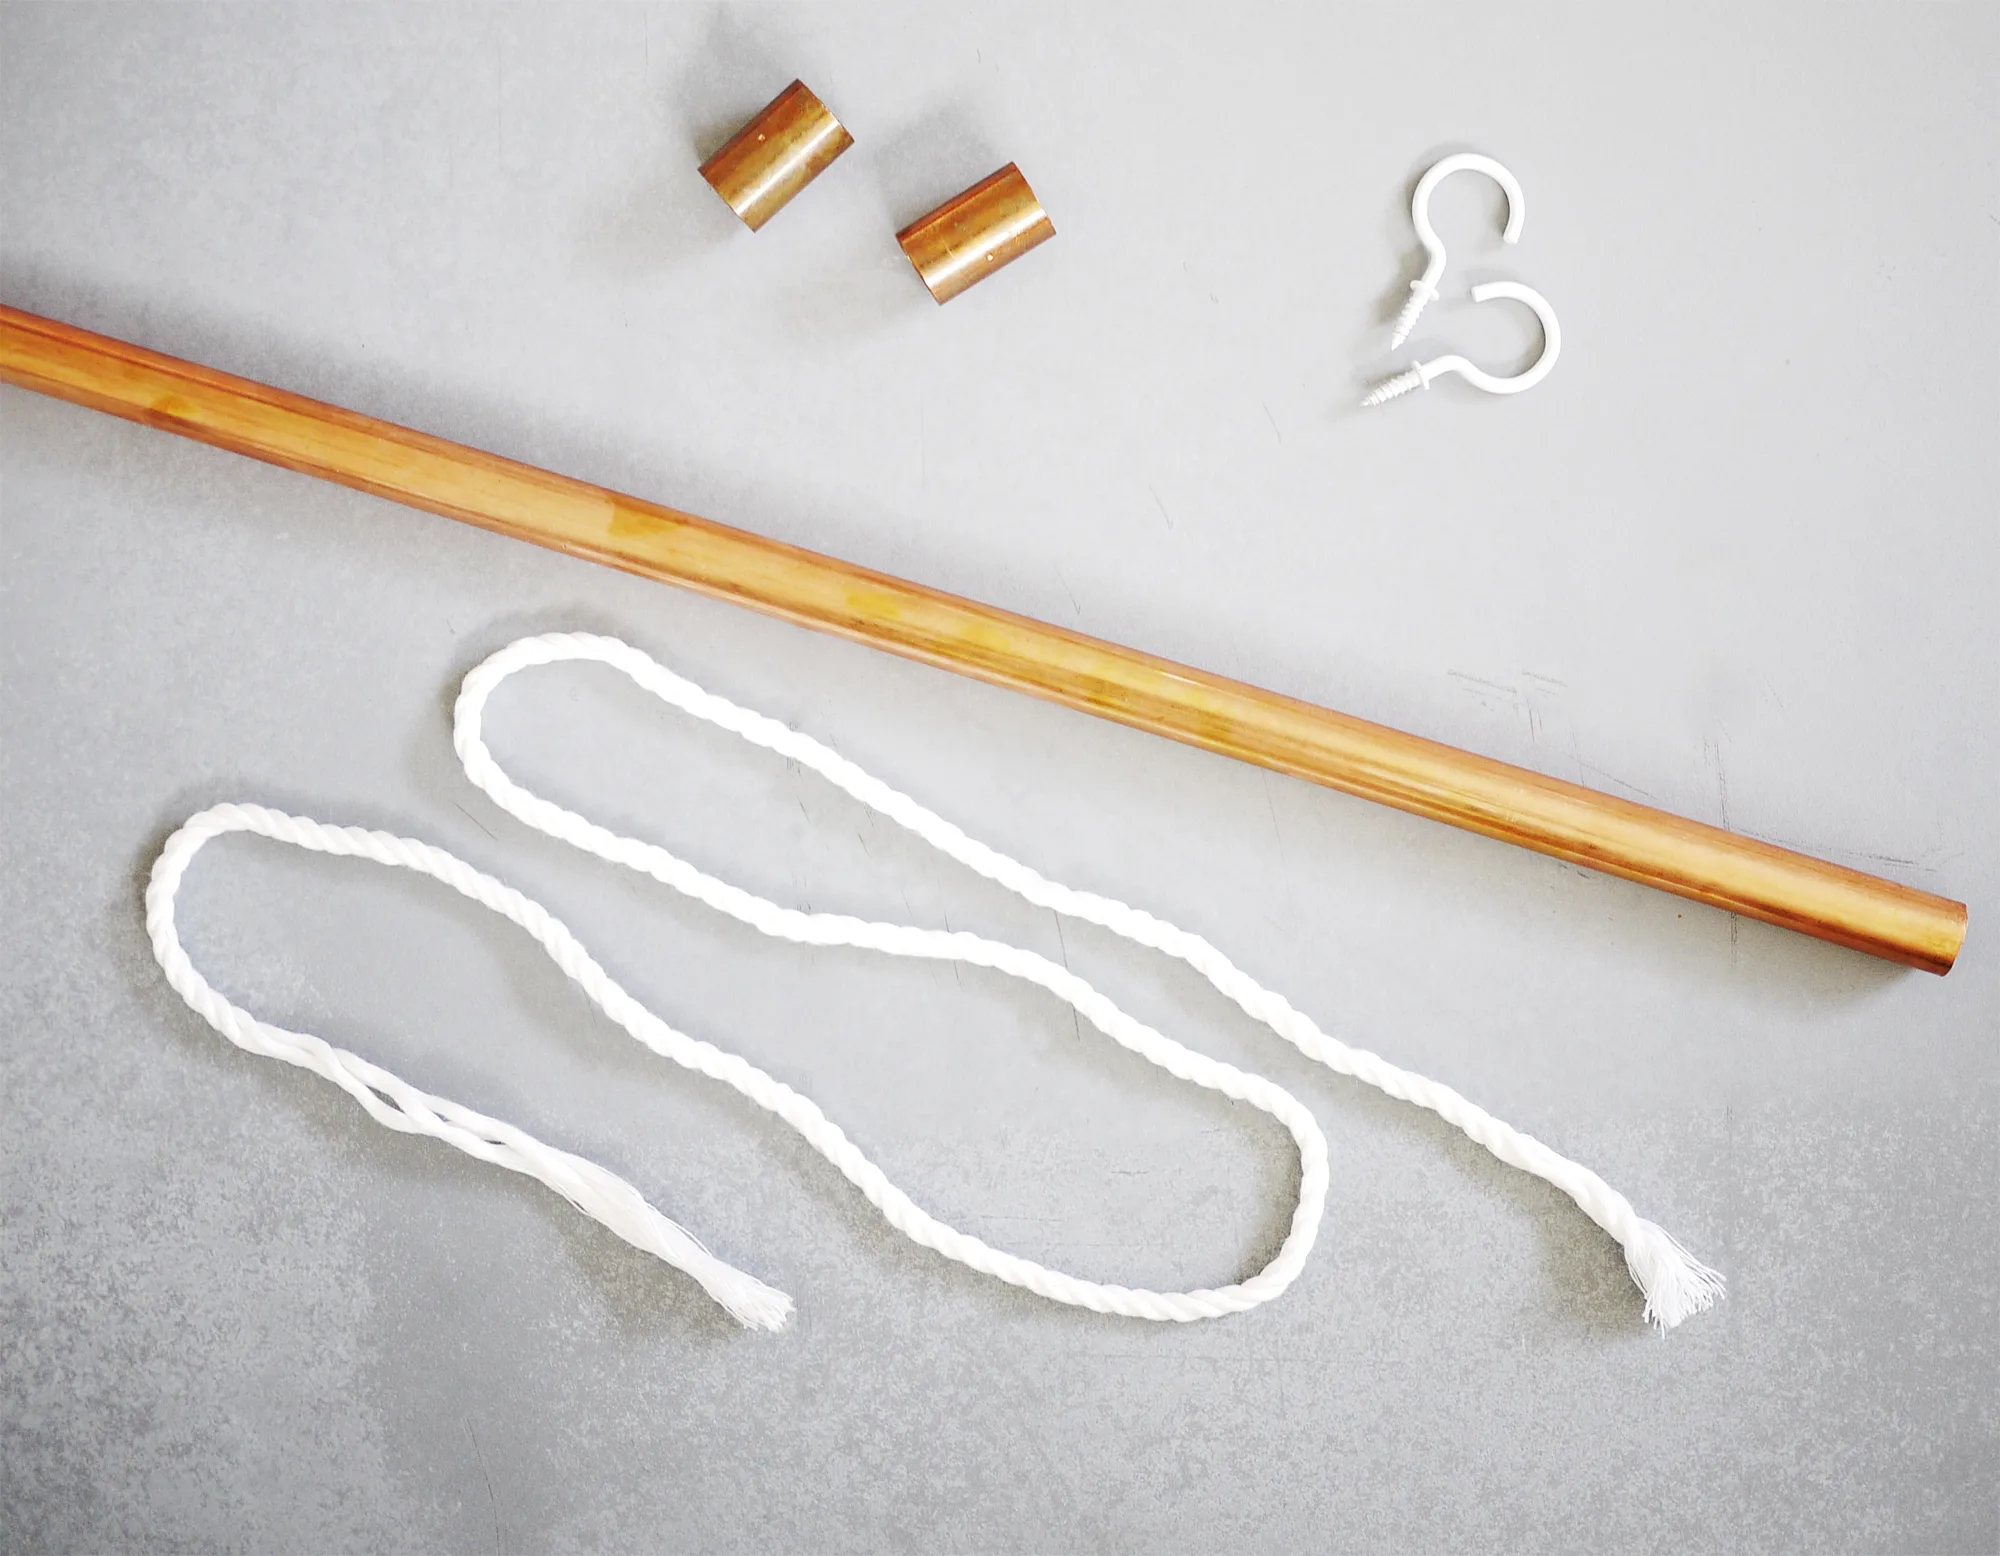
Materials: copper pipe, copper couplings, white rope, hanging hooks

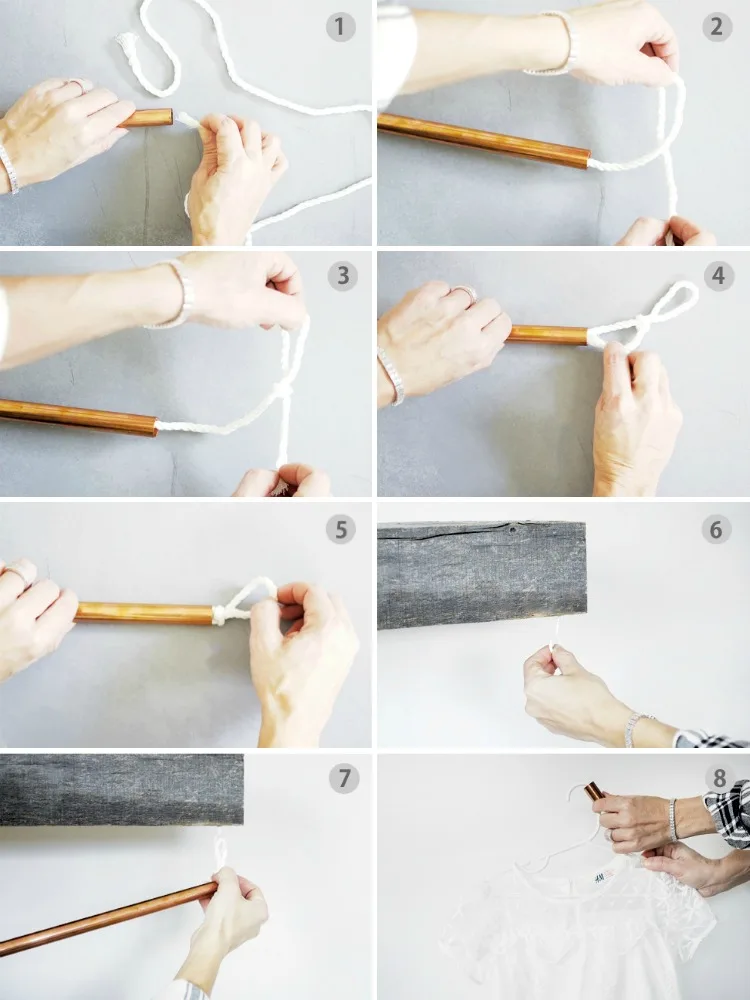
Start by weaving the rope into the copper pipe, as seen in figure1. Tie a knot at the end of the rope, leaving a loop for assembly. Thread the remaining rope back inside the copper pipe for a finished look. Repeat the same steps on the other side of the copper pipe.
Install the hooks onto a shelf or the ceiling. Note that if you decide to hang the rack from the ceiling, you will need a much longer loop. Hang the assembled rack on the hooks using the rope loops. Adorn the hangers with the copper couplings, and you are all set.

This DIY hanging rack is definitely one of the easiest projects we’ve put together. It is simple to make, it looks so darling, and it’s perfectly made to display all of your favorite things for baby. I believe that an exposed clothing rack can act as a unique decorative element in the room.
To see more DIY projects made with copper, visit here and here.

