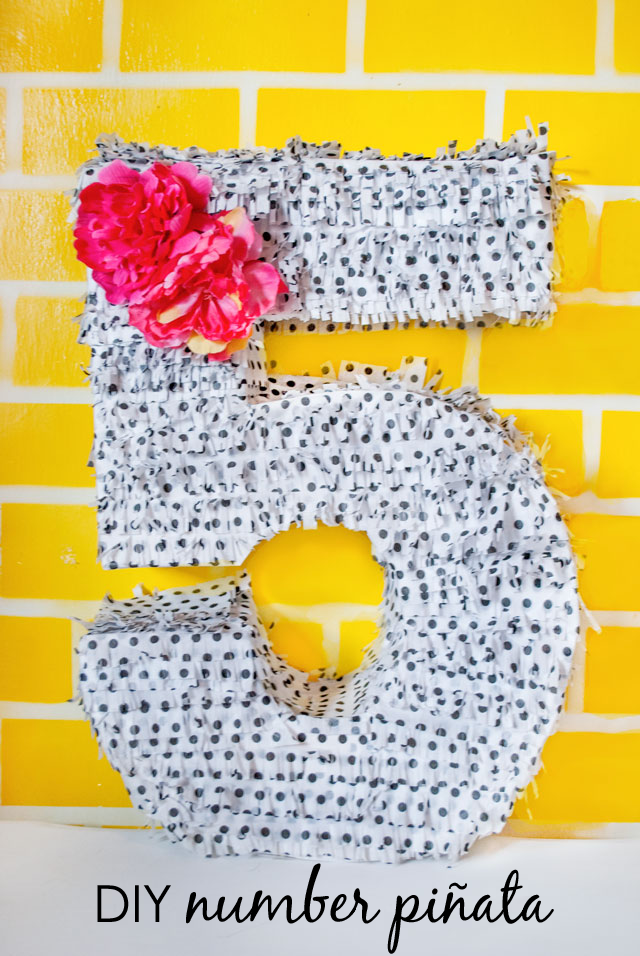
Piñatas are a hot trend in the party world right now. I’ve seen a lot of piñata tutorials making the rounds on Pinterest lately, and of course, I wanted to try making one myself. But as I was looking through some of the most popular tutorials, I quickly realized I wasn’t up to the task. Box cutters! X-Acto knives! Precise measuring and cutting! This was all looking a little too intense for me.
I’m not the most skilled person with a box cutter, and I really didn’t want to risk slicing my finger off when party prepping, so I decided to create my own version of a simple number piñata. Some might call it a slacker version, but my piñata doesn’t include intense cutting or a paper mache mess, so it was a perfect DIY project for me. This is a tutorial where all you need is a pair of scissors and maybe a paper cutter if you have one.
Materials: free printable 20″ number template, two large pieces of poster board, tissue paper (I used two standard packages that I picked up at my local Target), scissors, glue or glue stick, tape
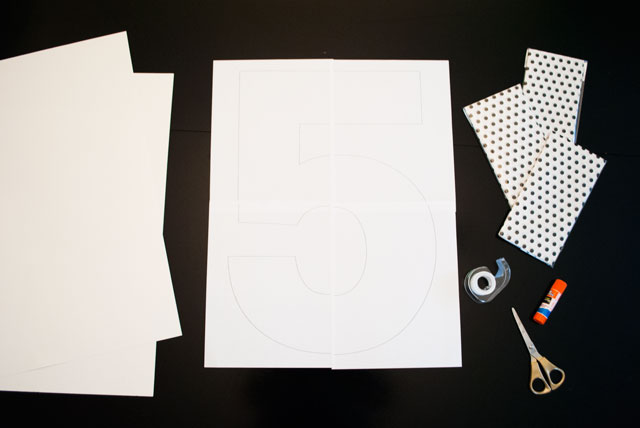
Choose the number you’d like to make, and download the template. You can print it at full size at a print shop or print it at home using the “tile” option in your printer settings. Make sure to tile the image with a slight overlap so it prints on four letter size sheets of paper. Print out and tape together the number template. Then tape the template to one piece of poster board, and cut out the number following the outline.

Use your cut out number to trace and cut another number on the second piece of poster board. Use the remaining poster board to cut consistently wide strips for the edges of the piñata. I didn’t use a ruler when measuring and cutting my strips—I simply used the edge of one poster board to mark the width on the other, cut it out and then used that strip to measure and cut identical strips from the remaining poster board.
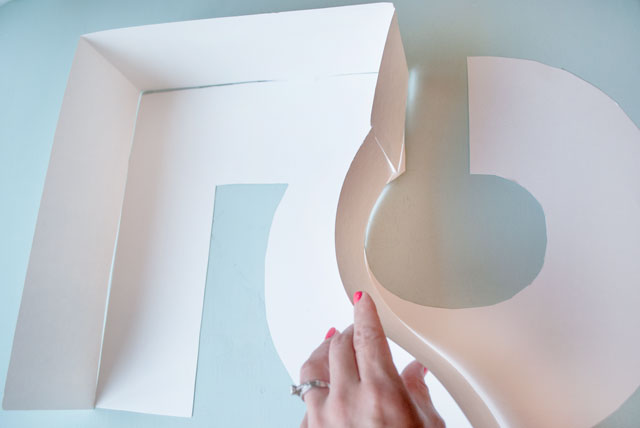
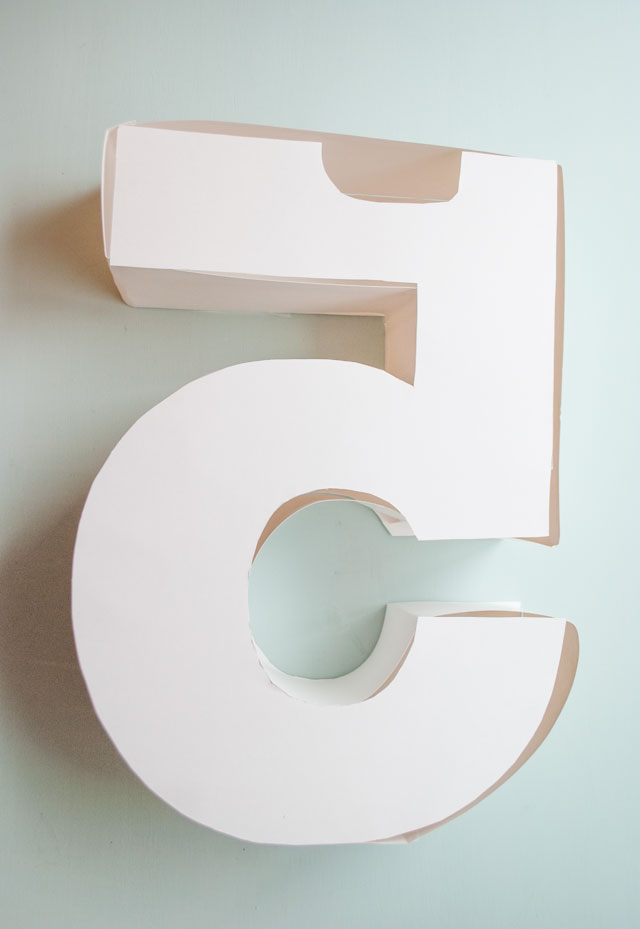
Tape the strips of poster board to one of the numbers at right angles, bending and folding where necessary until you’ve completely outlined the number. Place the second number cutout on top and tape it all together. I recommend using packing tape to really hold your piñata together.
Once you have your completed 3D number, cut a small hole on the back side near the top to allow you to fill the piñata with candy. At this point, go back over any untaped seams with more packing tape.
Cut the tissue paper into 2″ wide strips with scissors or a paper cutter.
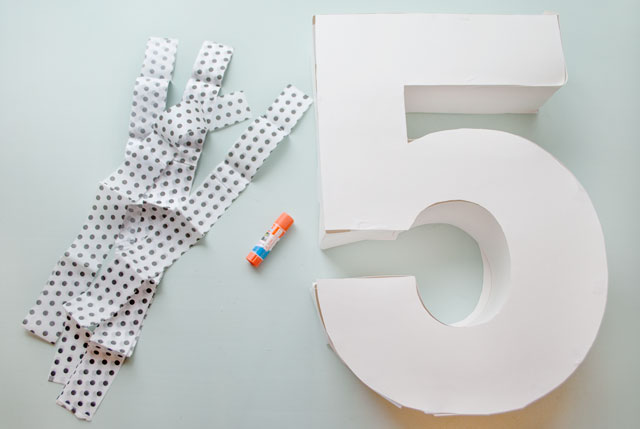
Using glue or a glue stick, attach the tissue paper strips to the piñata starting at the bottom and moving up, overlapping to create layers. Make sure you are only gluing the top edges of the strips—I left about 1/2″ of each strip exposed. Layer the tissue paper all the way up over the sides and top until your piñata is complete covered.

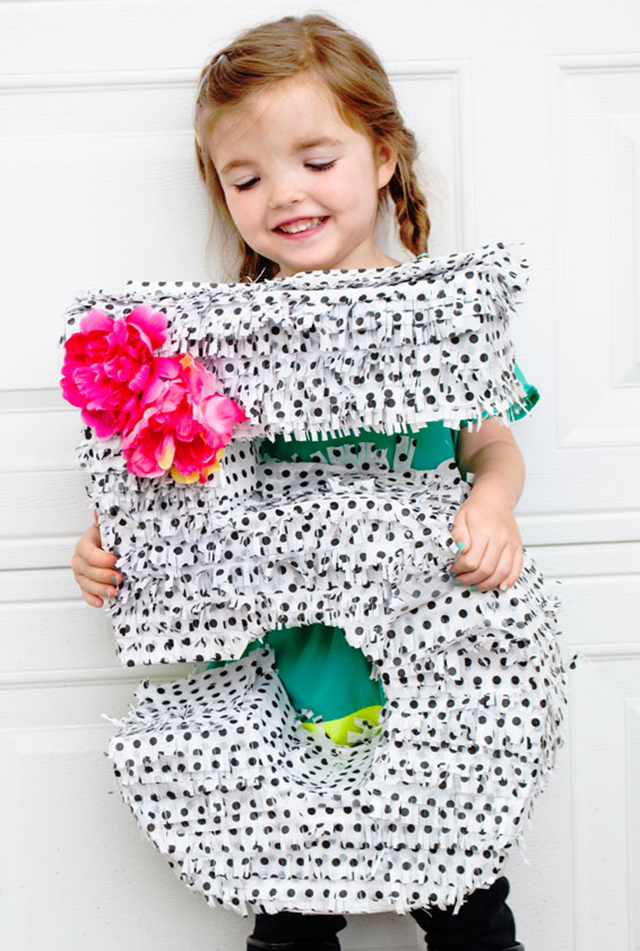
Starting back at the bottom layer, use scissors to make 1/4″ perpendicular cuts on each strip of tissue paper to create fringe.

Embellish your piñata with a silk flower or ribbon if you want to add a little something extra, and voila! You have a fun, unique and simple number piñata that cost less than $10 to create!
Have you ever made your own piñata?



Comments
Dana Andreasson
Made these and while they are simple, they are time consuming! I also used cardboard (free) They look great when finished and so much better than what you can find in the store, just be sure not to plan to make this the morning of the party. ;)
http://www.shophopscotchkids.com
Alli
This piñata looks great and easy enough to do, but I’m concerned if children will actually be able to whack it open with ask the packing tape…..?
Oxana
I keep looking through the number of tutorials and still don’t have an idea how to hang this huge thing filled with heavy candies so it doesn’t drop itself of basically fall apart under it’s own weight. So, how to make a hanger for this pinata?
Kendra
Your piñata is adorable and I just wanted to say THANK YOU for posting the template. I would have been adjusting for hours if it wasn’t for you.
Ashley
pinatas will give lots of fun in parties.
You have done a great job and your post is awesome.
I am very happy to see your post, i bought a pinata for my kids event from pinatas.com.
I definitely try it by my own for our next event.
Thank You,
Ashley.
Claire Missire
Thanks for this! I made one for my daughter’s 4th birthday. I winged the measurements etc and it still looks great! I spent 6 dollars on it and it looks AWESOME! I know that the littler kids will be able to break it open and I was able to make it just like she wanted it without spending a fortune. It took a while, but I just binge watched a show on Netflix after her bedtime and got it done. :)
Janell Wood
Hello – is the template download still available? When I clicked on the link, I got an error.
Amanda L Gunn
How do you fill this .. and do u do it before or after decorating?
Linh
hi, can you share the template again please :(
Beth
Hi there! Sorry for the delay in our response! The post has been updated to fix the broken template link. Thank you for bringing it to our attention!
Marie
Where did you get the 20 inch number template from?
Beth
Hi Marie! First you download the number template (you can see the link in the Materials section). You can bring it to a print shop like Staples or Kinkos or print at home using the tile option if you have a home printer. Hope this helps!