Thank you all for your overwhelming support since our launch! I have received a ton of questions about my mysterious nursery that helped inspire our blog. So here it is, “Modern Baby Blue”…
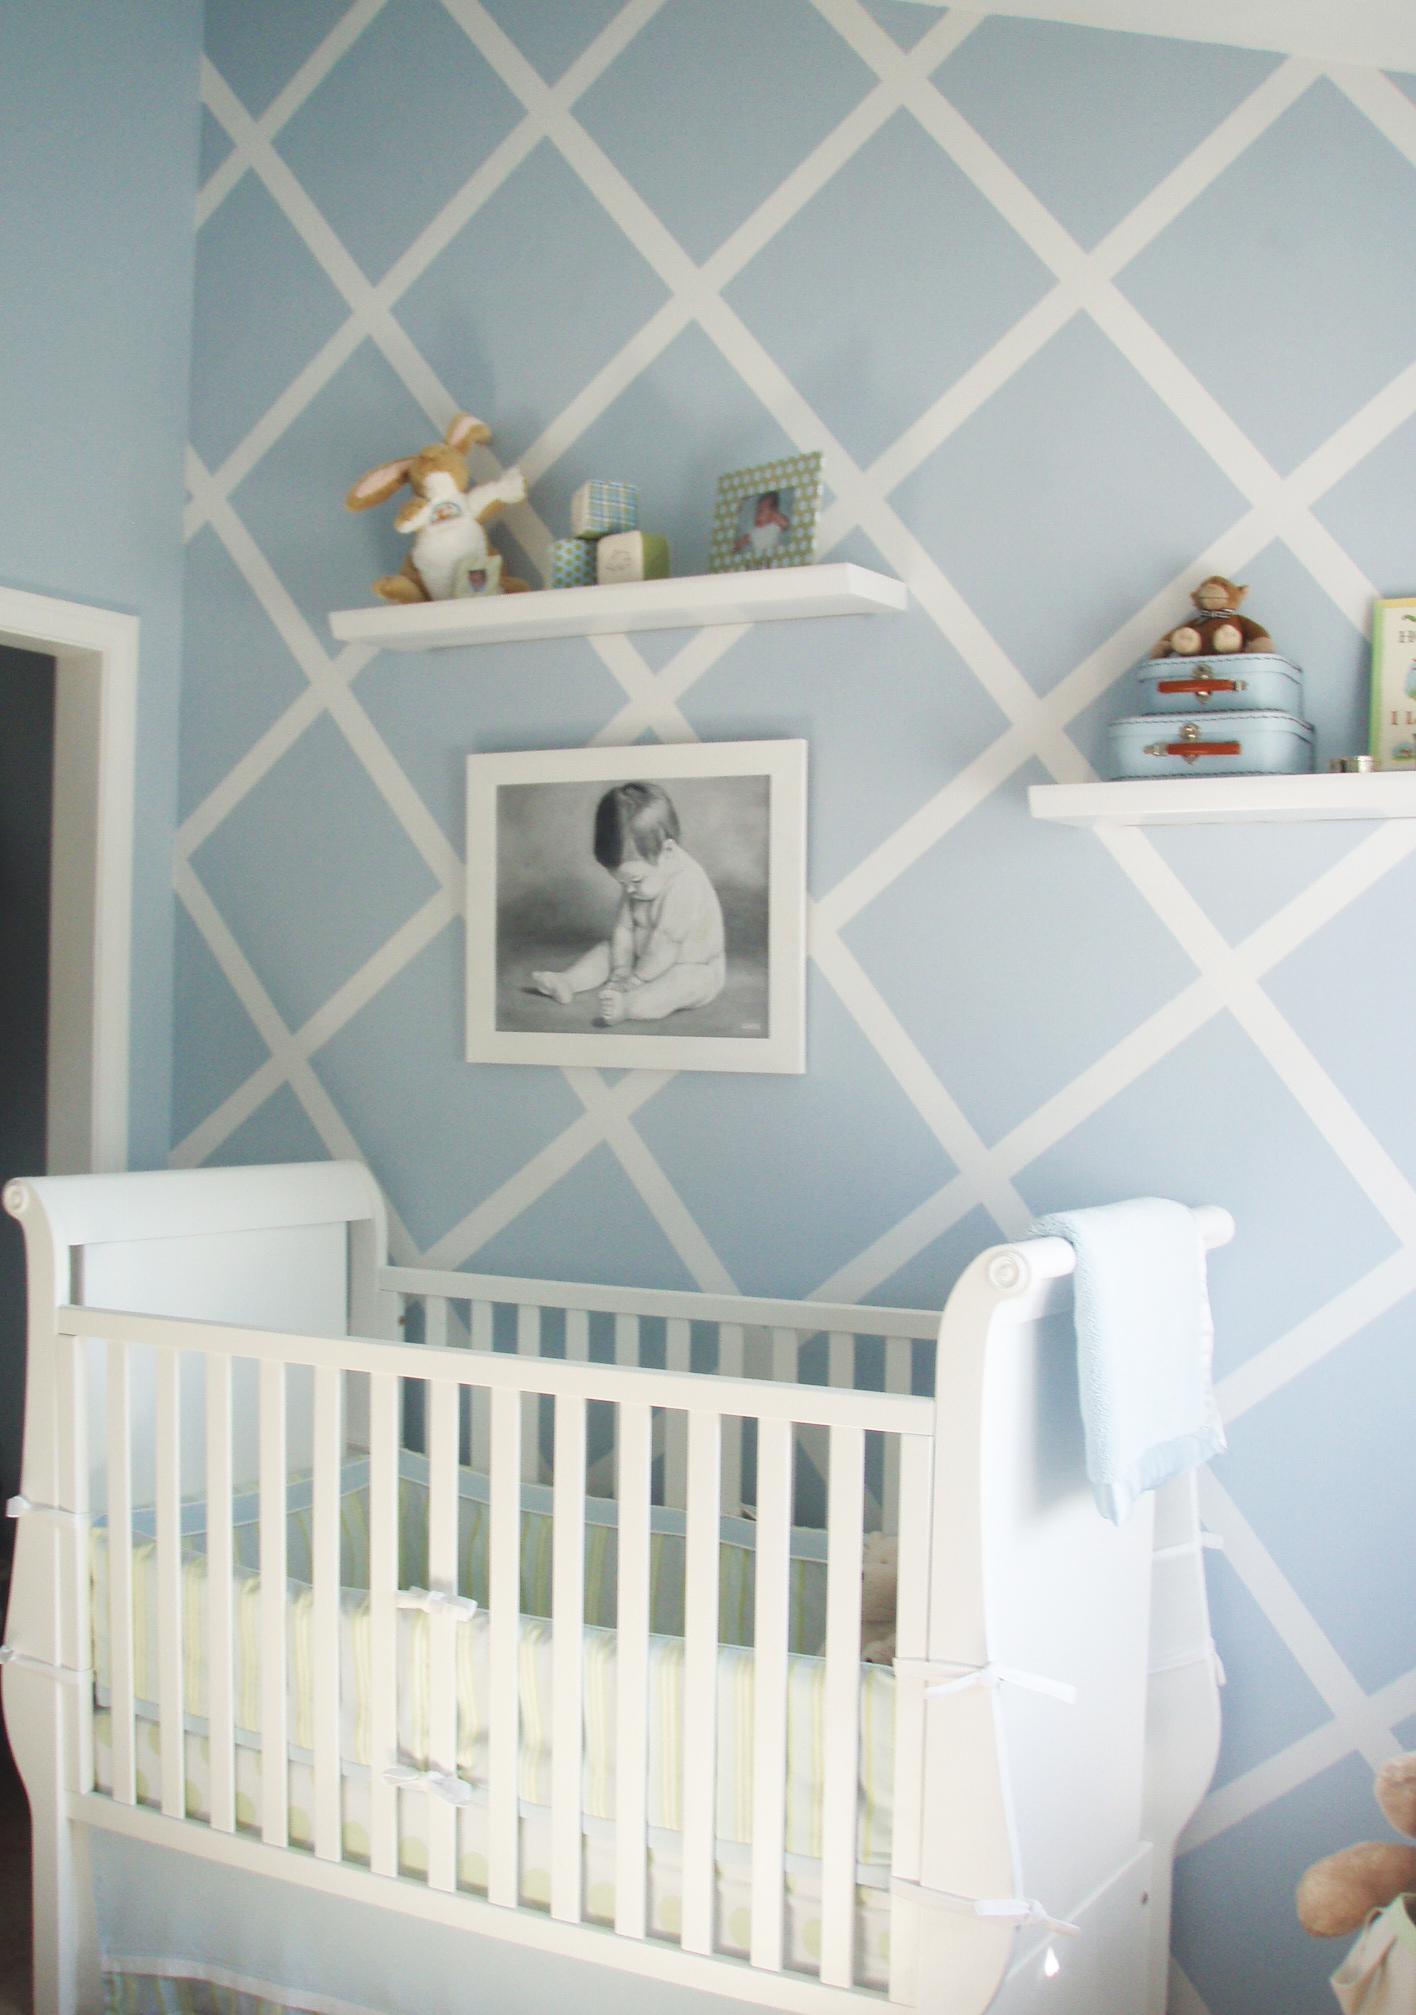
Hope I didn’t disappoint. It’s not exactly modern but rather an updated look for a powder blue, baby boy theme. The paint is my favorite blue, “Lake Placid” and the white is fool proof, “Decorators White”, from Benjamin Moore. You also can’t beat free shipping from Land of Nod for my son’s crib and dresser. The fluffy lamb skin rug was ordered direct from New Zeland’s Eco Wool, ideal for “tummy time”. (Note: the room isn’t even done just yet. Stay tuned as we are putting hardware floors, pendant lighting, base boards, new shade, etc.)

While it is our mission to inspire you, you have already inspired us to feature a “Project of the Week”. We understand that decorating is very personal. You can’t help but feel proud as a result of all the time and energy you put into your child’s room. Share these rooms, amazing finds and your DIY tips with us on our gallery. It’s also okay if the room isn’t just perfect yet. Ask us for advice and we’ll post our suggestions or ask our subscribers to respond with comments. We’re looking forward to it!





Comments
Little Apple Design LA
Hi all! This is in response to the many questions I’ve received about the paint…
“I actually designed the room on a whim while trying to temporarily paint my son’s room. It took us just one evening. The lines are 2 inches wide and the boxes are set 16 inches apart. We made it difficult on ourselves b/c we painted the blue first. The lattice design was an after thought. What we should have done is…
– Paint the wall white and let dry overnight
– Use standard blue painters tape (its already two inches wide) and run the tape from the top corner of the wall diagonally to the bottom corner.
– Do the same with the opposite corners so you have a large X on the wall.
– Work your way from the inside out by taping the diagonal lines 16 inches apart from one another (or 18 inches if you are measuring from the beginning edge of the painters tape like we did).
– Just trying the get the lines straight is the most difficult part. To get a straight line, we pulled the tape 10 inches or so at time before sticking it to the wall. We also used a light pencil to draw straight lines as a guide. Looking back, one of those snap chalk line thingys from a hardware store would have been super helpful.
– Make certain there are no air bubbles in the tape and that the edges are flush to the wall.
– Wait until dry and pull back the tape!
Hope my directions help. I do know that some type of semi-gloss exists that can be painted on the wall first to ensure the lines are clean and smooth. We didn’t have any handy at the time but the end result were crisp, clean lines.”
cecilia
Hi!!! i love your room !!!!!! …let me ask you something…is the wall with design the same color blue as the other walls??
thank you
Little Apple Design LA
Thanks Cecilia! Yes the Lake Placid Blue by Benjamin Moore was used on all the other walls.
emily
hi! loving the room – so darling. i’m going to copy! :) question: i have the same problem, in that i’ve already painted my daughter’s room a bright pink, so i’m going to have to do the lines the hard way. did you just mark your lines, and then “double” tape to create a line inside the tape lines? (i’m not describing this v well!). essentially you had to do 2 strips of tape for each line you created, correct? any tips?
thanks!
Little Apple Design LA
Hi Emily! I hope I responded to you. If not, sorry for the delay and the answer is yes. I marked my lines and then used two strips of tape. It’s a pain but make sure the tape is pressed really well against the wall so the paint doesn’t leak. Best of luck!
cecilia
hello again i am getting ready to reproduce your beautifull room…is there any way that i can e mail the room to my sister in Peru?
RKP
Hi,
I was wondering if you could tell me where you got the bedding from. I love it! The room is gorgeous.
Thanks!
Little Apple Design LA
Why thank you! It’s from Serena & Lily – “Blake”.
SANDRA FERREIRA
I wanted to thank you for this wonderfrul idea. My husband and I replicated it in our soon to be sons Nursery and it looks BEAUTIFUL. It was a lot of hard work but deifnitely worth it. It looks like a million bucks and we can’t wait to get the babies furniture and for our Son Thomas to see his room.
Thank you
Sandra
Little Apple Design LA
That’s great news Sandra! Hope you share it was us on our gallery! I can’t wait to see it.
NAP
My husband did this for our nursery and it came out perfect! We couldn’t do the whole “x” pattern because the wall was very wide so he had to do some extra measuring but it came out great. The paint is a beautiful soothing blue color. Thanks for the inspiration!!!!
NAP
http://www.flickr.com/photos/17843390@N02/4321981937/
Katie
The room is gorgeous! I’m going to use it as inspiration for my first son’s room, due in February. How many coats of paint did you use of the Lake Placid blue and Decorators white. Thank you.
nina
Hey was wondering where you got the picture frame thats hanging on the wall i love it!
Mona
where did you get your crib from? I love it! :D
Kristi
I just wanted to share – that I used your tutorial for your painted accent wall for a wall in my own nursery! The results were spectacular and we love it! Thanks for all of the hints and the great idea! I’ve attached a picture of the wall – furniture is still to be moved in.
Lauren
Super cute room for baby!
Decoracion
I love your blog, it’s really inspiring, thank you!
Estilos de decoración
I love this room! Is beautiful! Thanks for the pictures <3