Looking for that super cute, unique piece of perfection to finish off your room design but just can’t seem to find it? Well, maybe it’s time to start searching craigslist, garage sales or estate sales for furniture that can easily go from drab to fab in a few easy steps. After a handful of phone calls to sellers, I finally found a vintage triple dresser that was calling my name. It was in perfect condition, and I knew with a fresh coat of paint this piece would be awesome! What I was looking for…
1. Hardware that could be removed
2. Good surface condition (less sanding involved)
3. Well constructed (this one has dove-tailed drawers)
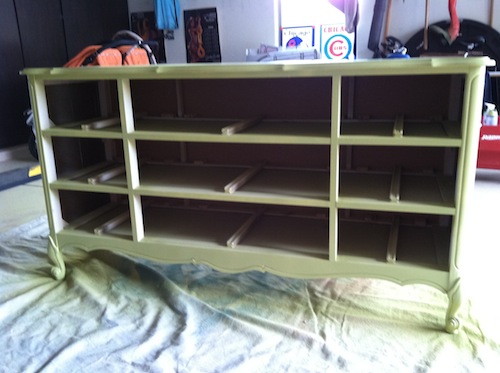
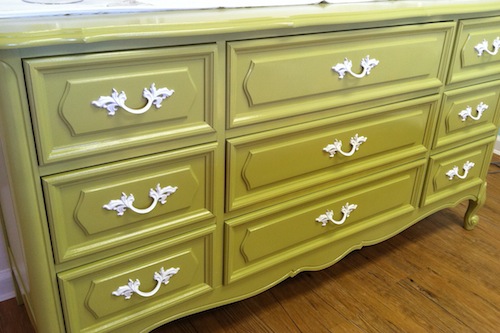
First, I removed the drawers from the body of the dresser, and then I removed the hardware. I used a white gloss spray paint for metal surfaces for the handles. I then primed, lightly sanded and re-primed the dresser body and drawers. Once that dried, I applied a first coat of spray paint (Valspar – Avocado Green). If you end up with any drips or uneven coverage, lightly sand with very fine grit sandpaper. Wipe off any dust before applying your next layer of paint. Repeat these steps until your piece is entirely covered. Once the final coat of paint was dry, I applied a layer of gloss polyureathane as a top coat to help protect the surface.
Here is the before…
The during…
The after!
Do you have a piece of furniture you’ve painted for your child’s room or any DIY tips that you want to share? We want to hear all about it!









Comments
Bethany S
We found this tragic piece of %*&^ in my grandma’s BARN, and completely revamped it to be our twins’ nursery changing table! it turned out SOOOOOO amazing! My husband is incredible.
http://www.sawdustandembryos.com/2011/05/nursery-changing-table.html
Cjko
I’ve redone two dressers, a small table and two rocking chairs for my nursery. I will have to post my nursery pictures soon.
Jen
We refinished a dresser for our nursery. We bought the dresser for $25 at a thrift store…already had the paint, but did splurge on the replacement knobs. Now it’s white with super pretty pink glass knobs….sooo cute and really cheap! It’s also real wood, which is always a plus!
Kerry
Did you get this off the Boston area Craigslist? Or, are you in the Boston area and saw this? I TOTALLY tried to get the exact same one to do almost the exact same thing! I love it! :) We got our dresser for the nursery off craigslist but it was in such great shape, I decided to forgo refinishing it and kept it as the original dark mohogany color. Once we get the last finishing touches, I’ll be sending in our nursery photos! Great job on this!
Pam
Bethany S,
Wow Bethany! You really transformed that beaten up dresser. The projection painting take some skill. Kudos to you and your hubby. Thanks for sharing!
Terri
I found a nice old vanity and transformed it into a pretty aqua piece for my twins room:
http://www.craftyworkinmommy.com/2012/01/vanity-makeover.html
Heidi
That is stunning! I want it! I also want to hear more about your new store and I can’t wait to stop by!
Coasting anon
One of these days I’ll upload pics of the whole room now that it is finished (some how having baby number two has left us with no spare time, go figure)…but here’s the link to the reverse stencil dresser I did for my son’s big-boy bedroom along with a complete step-by-step description: http://www.flor.com/blog/reverse-stencil-dresser/
Cjko
Coasting Anon, Your ship dresser looks amazing! What a great idea to use the decal as a stencil.
Gwen
How many cans of spray paint did you use for this project? Spray paint is quite expensive in my part of the world, and I have no idea how big a surface one can could solve for me.
Dayle
Hi…. great job on the dresser. I love it! I have a few pieces that need a “makeover”. I just posted a blog about a few projects I want to start and looking for tips and advice. feel free to check it out at http://www.kdwiensfamily.wordpress.com
thanks
Dayle
Melissa Moore
I just bought the EXACT same dresser! It is so lovely! Thanks for showing what you did with yours!