


Description
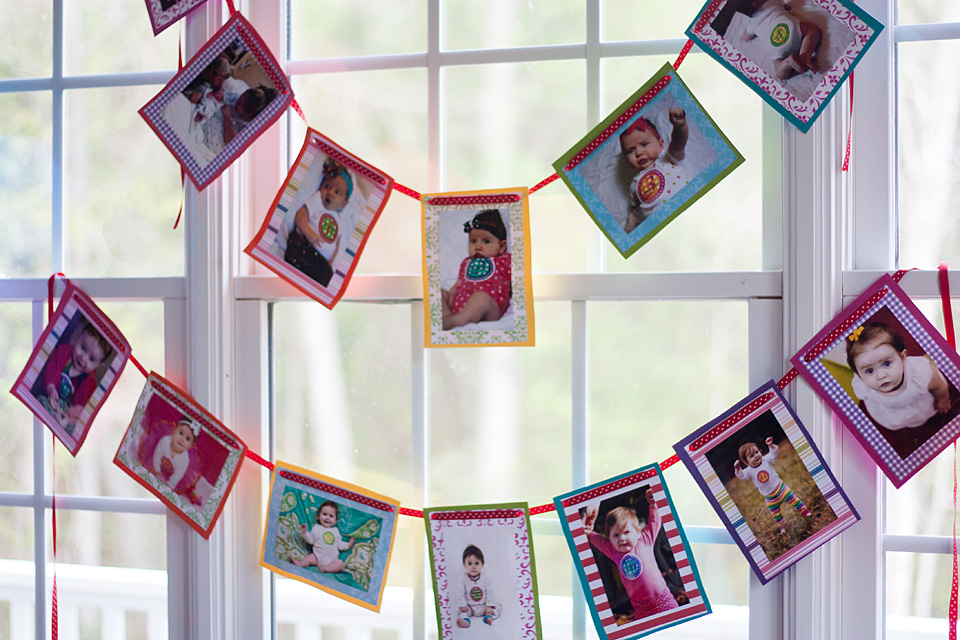
Rainbows, rainbows everywhere! I became a little obsessed with rainbows while planning my daughter Scout's very first birthday party!
Pinterest and Etsy have gorgeous stuff, but we're always on a budget, so I figured I'd try DIY. I don't sew, but I still wanted to throw a fun, colorful party -- and I wanted to feel like I put some blood, sweat, tears, and a whole lotta love into it! And I LOVE how it all turned out!
Design Inspiration
I made a board for the party on pinterest and pinned & re-pinned every idea I loved (I don't think it even started as a "rainbow-themed party" board, but that's what it quickly became!). Very quickly I narrowed down the projects, debating between buying or DIY... and because of our teeny party budget: DIY won out!
Project Details
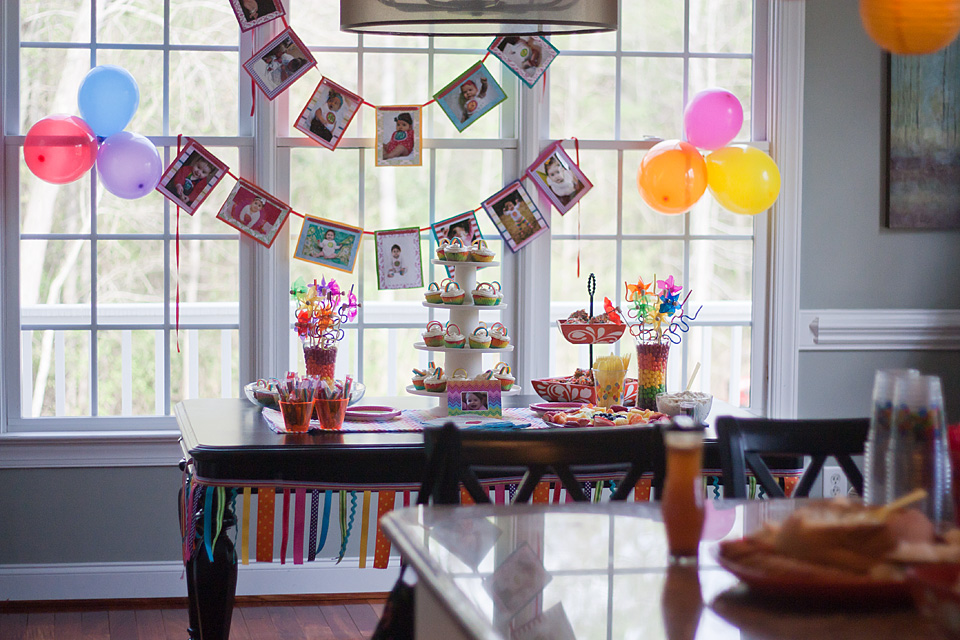
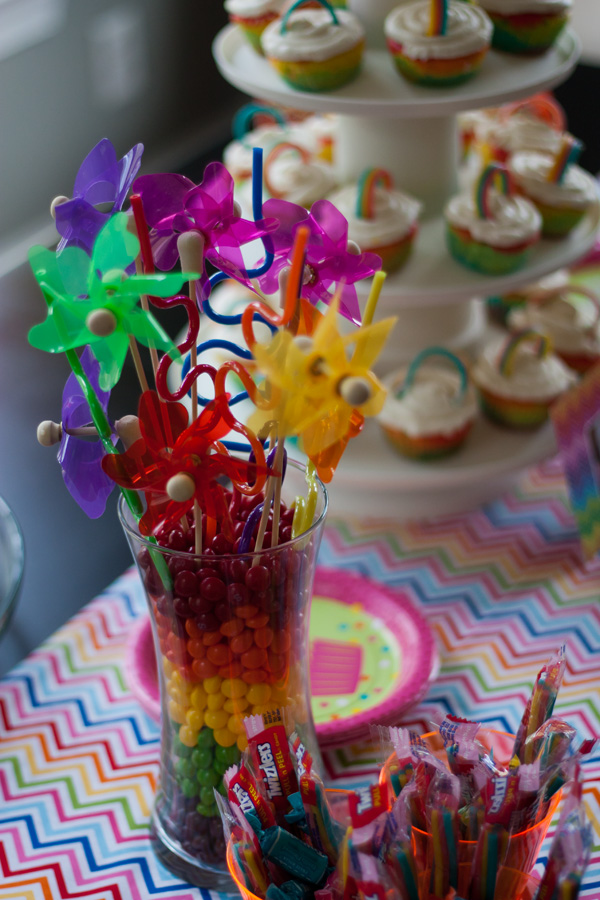
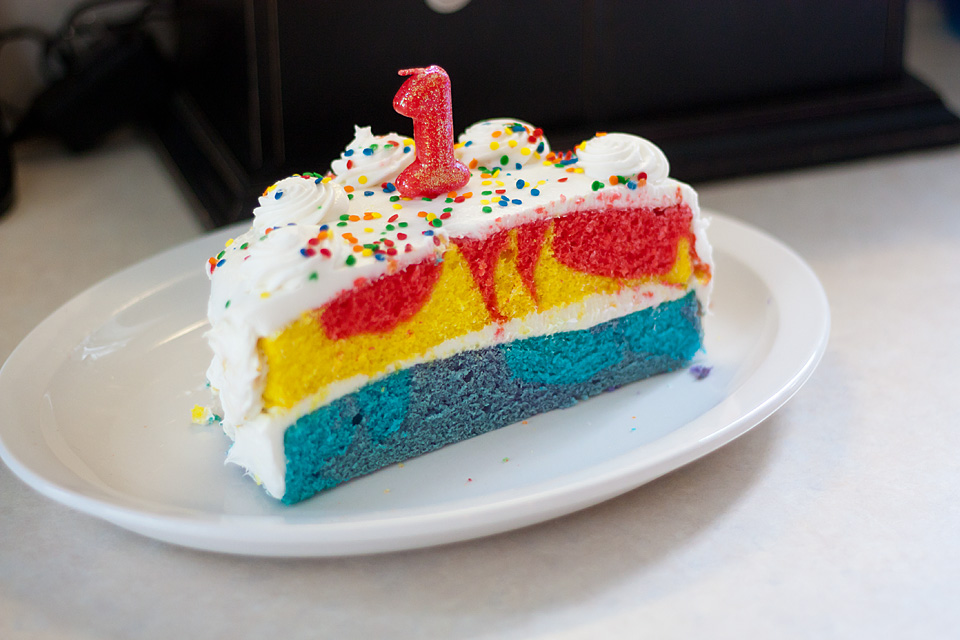
Rainbow cupcakes were inspired by this pin and made with love. Topped with homemade buttercream and we added 3 strands of Spring-colored rainbowy pull-n-peel twizzlers to the top of each tie-dyed cupcake similar to the ones at this pin.
Going along with the rainbow theme, Fruity Pebble Krispy Treats (inspired by this pin).
Rainbow ribbon skirt (like this pin, but super-sized): hot glued ribbon pieces to one long strip of rainbow ribbon. Also added ric-rac for extra fun! Taped to table (wish I had a less obvious way to secure it!).
I was going to put flowers in the Dollar Store vases, but instead decided on some 3/$1 rainbow pinwheels and dollar store twisty straws! Skittles (colors lovingly separated by Grandpa) added a sweet touch.
We also made a fruit rainbow (strawberries, cuties oranges, pineapple, honeydew, and blueberries), inspired by this pin and super yummy funfetti fruit dip using the recipe at this pin (seriously YUMMY)!
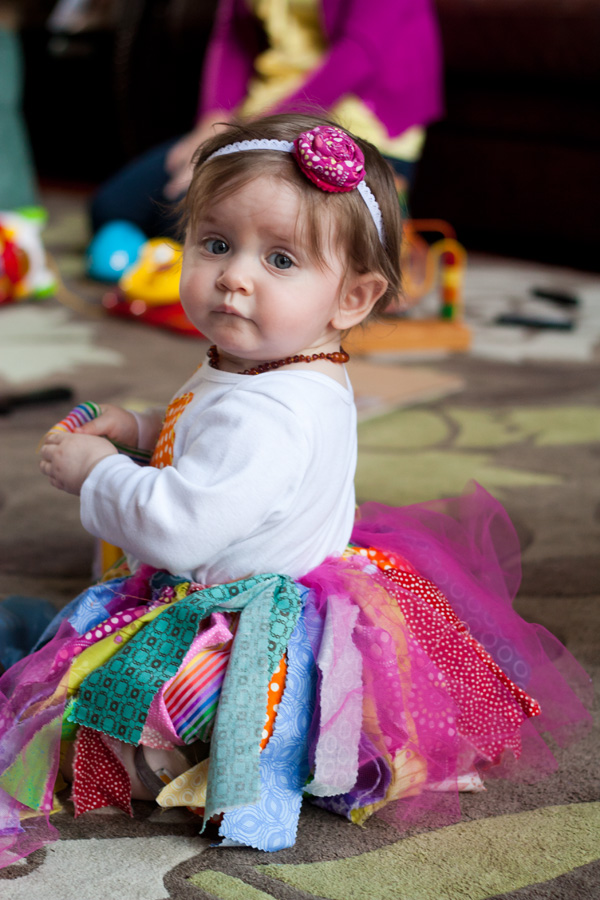
DIY no sew tutu (using instructions pinned here and here). It’s long on her, which means she can wear it again next year, and for playing dress-up after that (assuming my knots hold up!)
For the “1” onesie, I used iron-on sheets with fabric and first ironed the “1” to the heart, then the heart to the 1. Then I took embroidery floss in contrasting colors and stitched around them both. Since I was going through 2 layers of iron-on paper AND 2 layers of fabric PLUS onesie for the “1”, it took FOREVER (easily the longest of ANY of the birthday projects) and required needle-nose pliers to pull the needle through each way!
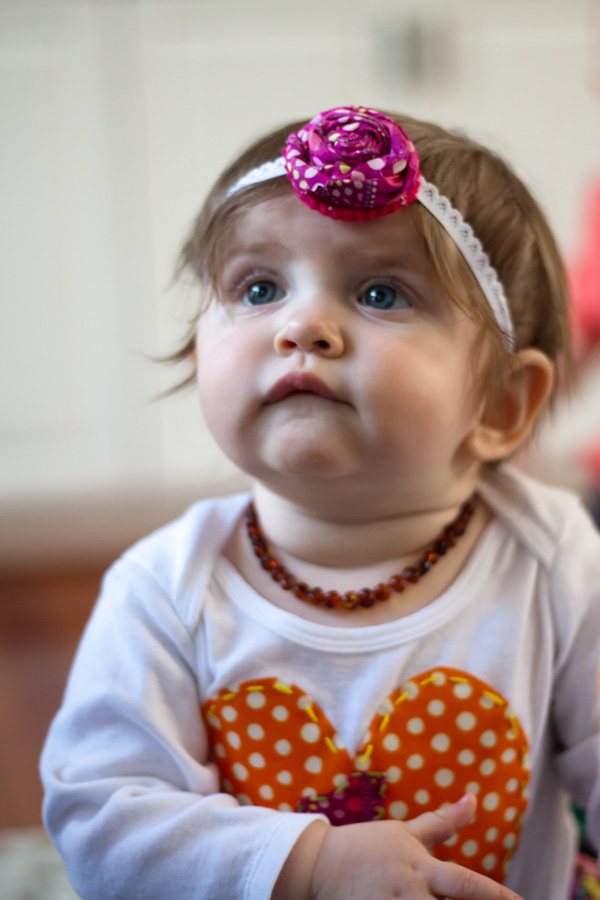
I followed this tutorial I found on pinterest to make a flower for a headband. I the hot-glued the flower to a piece of felt, and sandwiched some pretty elastic between that piece of felt and another on the other side of the elastic – secured with hot glue.
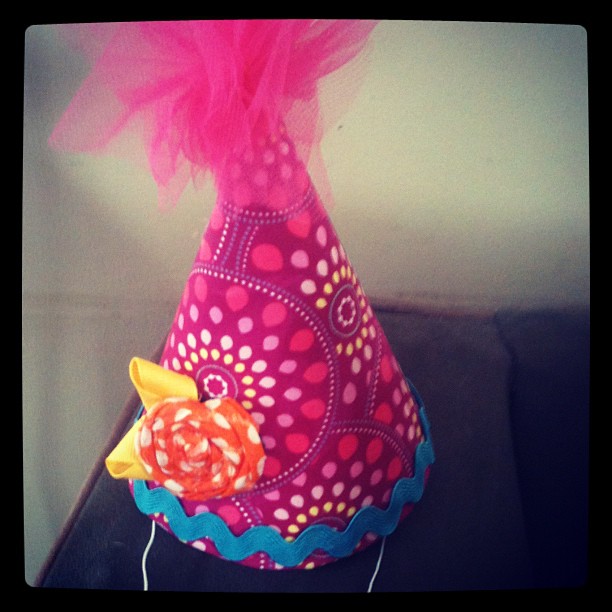
For the hat, I bought a set of cheap party hats for $1. I took one hat apart and traced it onto cardstock, used spray adhesive to attach fabric to one side of the card stock (the blank side, so a pattern wouldn’t show through), and then I used hot glue for the seam when putting it back together and attached a flower (from above) and some ric-rac after the spray adhesive dried. I followed this Martha Steward tutorial to make a tulle pom for the top, attached with hot glue.
Lastly I looped the elastic from the original cheap hat through buttons, and then hot glued the buttons into the inside of the hat – this secured it very well! I think it turned out super cute and I’m surprised she kept it on as long as she did!!
Favorite Items
I love the her whole outfit, but I especially love her tutu and all of the fun rainbow-colored fabrics!
The rainbow chevron-striped fabric underneath the table decor was my FAVE rainbow find… it's discontinued and I think I found the last yard around on etsy. To save it, we ironed creases on the edges and created a small table runner without sewing or cutting so that this full yard can be used for a dress for the birthday girl!
Advice
Try the DIY approach! Pinterest has tons of ideas, so pin everything you love, and then narrow down to a handful of projects to try!
Also, I started acting on the planning of the party about 6 weeks before and did one project each week (read: Saturday during naptime). So I never really spent more than an hour or two working on it, but by the big day, I had invested quite a few hours and had most of the decor done!
Gallery Roundup: Rainbow Parties - Project Nursery
Wednesday 12th of March 2014
[…] Rainbow 1st Birthday Party by lissa […]
Diane Mathias
Thursday 3rd of May 2012
Very lovely, colorful party! Love that photo of the rainbow cupcakes while you were making them.