Skip to Content

Shannon

Mom to Elena, wife to Paul, extreme virgo, project lover, wine drinker.

Blush Sophistication Big Girl Room

Never, EVER, did I think I would paint a room blush pink.  Yet, here we are and…I LOVE it!  Now, let’s get to the back story.
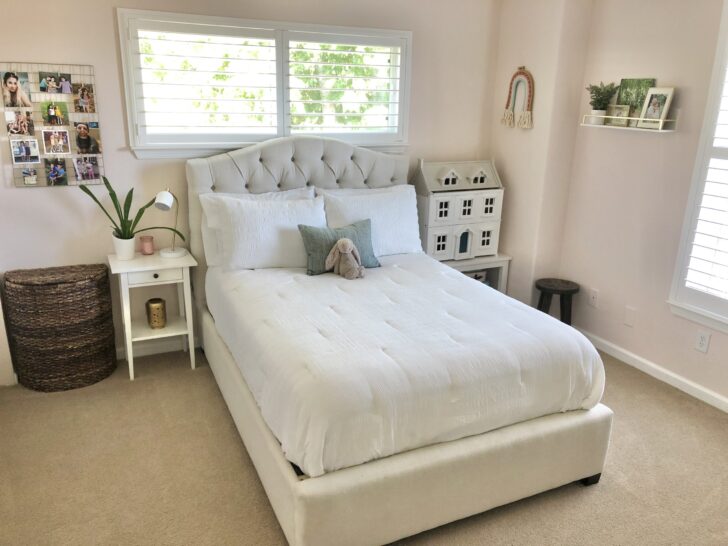
We moved into our beautiful, new (to us) home in March of 2020.  Yes, right at the start of the pandemic.  It was a tough time for our sweet girl, her whole world had been turned upside down in a matter of weeks.  Once we were settled, I knew I wanted to make her room special and something that she would love as she grows up (I’m not crying…).
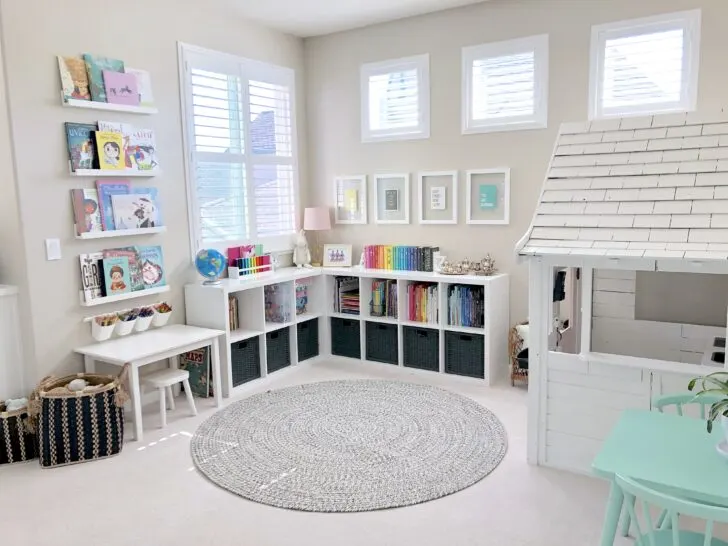
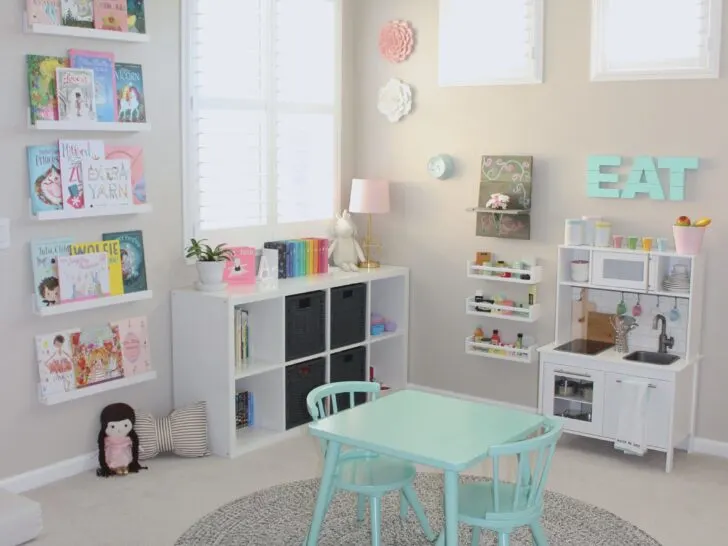
Her room at the new house has beautiful vaulted ceilings, two bright windows, and ample space to spread out.  She had spent her time distance learning in our dining room this past year, but I was ready to reclaim my space and give her some much needed privacy (cue seven year old attitude).  We were on a pretty tight budget as we are doing other projects around the house.  Thank goodness for Target!  We found the perfect desk, bookcases, and accessories.  Great quality, affordable and so, so cute!
Together, we chose the perfect blush pink, Head Over Heels by Benjamin Moore.  She squealed in delight as I painted all that luscious pinkness on the walls.  I have to be honest, it felt a little pink overload at first.  However, once we put everything back into the room and added those pops of turquoise…wow, I was a little jealous!  I painted the wooden storage bins to match the turquoise in the throw pillow.  They give that perfect pop of color in the book cases while still providing cute storage.
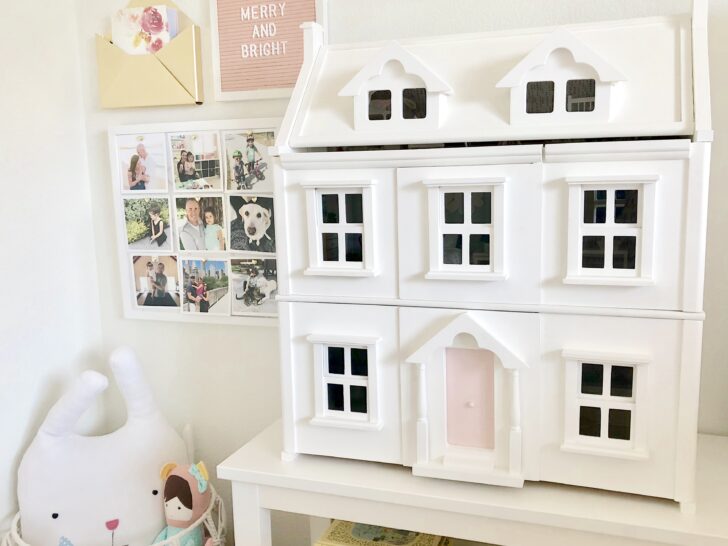
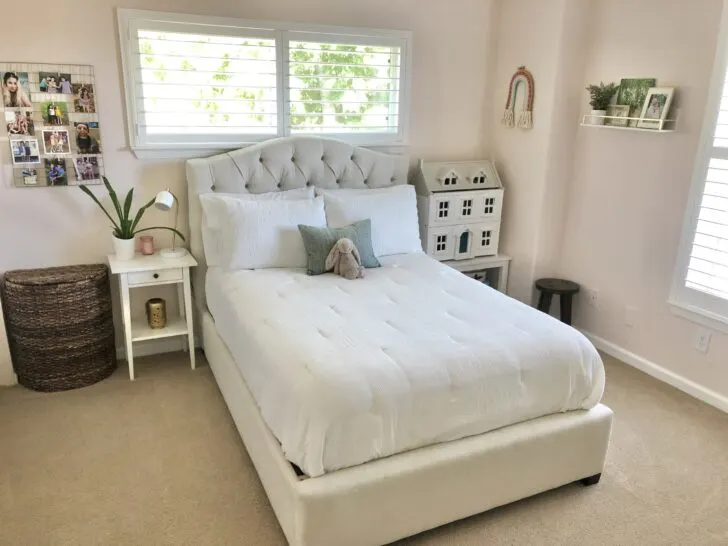
The dollhouse also received a little makeover.  Fresh paint, some new furniture and decor.  It’s a favorite amongst my daughters friends when they come over for a playdate.  And, let’s be honest, me too.
What I love about paint is how it transforms a space for not a lot of money.  It really allows you to be creative and bold.  My daughter and I had a great time creating her new space together and I know it’s something we will love for years to come.

A Reimagined Playroom

Remember that initial excitement of moving the playhouse into the playroom last year?  We would “cook” and pretend in there for hours.  Sadly, as with most new toys for our children, the novelty wore off.  LOL Surpise Dolls were taking over and the playhouse was all but forgotten.  I don’t know about you, but I can only play with those little plastic dolls for so long before I start to lose my mind.  I started thinking, how can I put the “fun” back into the playroom?  And here’s the real trick, without spending a dime doing it.  It hit me!  When I was a kid I loved to rearrange my furniture, toys…EVERYTHING really.  It’s so silly how something as simple as moving an object to a different location can give it life again and make it seem new.  I put on my “moving” clothes and got to work.  Everything in the room was kept the same or repurposed in some way.  I decided to create a Cafe space and add little menu’s in the frames I already had.  The Playhouse is no longer the focal point in the room, but as Brennan from Stepbrothers said, “It will give us so much extra space to do activities!”

Elena’s Officially Forever Dollhouse

I have always loved dollhouses and enjoyed playing in my Barbie house when I was a little girl.  Now that I have a little girl of my own, I wanted to create a dollhouse that she could keep forever.  I started small with the IKEA Flisat dollhouse two years ago when she was two and half years old and put it in her playroom.  It was a great little starter house!  The adorable Calico Critter Tuxedo Cat family moved in and hours of play were had.  While the IKEA house was great, I had my sights set on a dollhouse that was front opening, had windows, and one you could close the mess away.  The Plan Toys Victorian Dollhouse was at the top of my list and boy is it AMAZING!  I was waitlisted on Wayfair for it and it finally came up available (and on sale!) so I pulled the trigger and purchased it.  This house is much bigger than the IKEA, so of course some redecorating and new furniture purchases had to happen, right? (wink, wink)
The Plan Toys house comes in a natural wood with a clear coat sealant.  While I like that look, I knew I would want it to match her updated playhouse with a white exterior and pink door.  I got to work sanding, priming, sanding, painting, sanding, painting…I think you get the process.  It was definitely more labor intensive than I originally thought, and if I had to do it all over again I would buy an at home paint sprayer and save myself some time and mess.  But in the end it was so worth it!  The layout and space of this dollhouse was bigger, which meant I could add a bathroom, create a bigger kids space, and reconfigure the kitchen.  I got to work searching my favorite miniature stores for the Tuxedo Cat family’s new furniture.  Buying in miniature is so much fun, and way cheaper than redecorating your actual home.  I ran to Michaels Crafts in search of “wall paper” and found the cutest scrap book paper.  I applied the “wall paper” with a glue stick to the kitchen, bathroom, kids space, and living room.  I still have some finishing items I would like to add like light fixtures, a bathroom rug and change out some pillows, but I am loving how it has turned out.
I determined that the perfect place to put Elena’s new dollhouse was in her newly updated Officially Forever Big Girl bedroom.  Since my blog post about Elena’s bedroom, I have received many questions about the dollhouse.  I decided to create it’s own special blog post and give it the attention it deserves!  We have lots of fun using our imaginations and playing in the new dollhouse, it has been a great way to spend time together.

Officially Forever Big Girl Room

The time has come.  Our baby is not a baby anymore.  Our baby is not even a toddler anymore. Elena has turned four (I will try not to cry as I type this) and has blossomed into a little girl.  It all happened so fast!  I wish time would stop so I can soak up these last years of baby cheek sweetness.  But as we all know that’s not the way it goes.   Elena is becoming a young girl who has grown out of the nursery and is ready for a big girl room of her own.  I chose to design her room with a soft palette, that is light and bight with just a little sophistication that she can grow into over the years.
We have always loved the dress she wore on our “Officially Forever” day (her adoption finalization) when she was just eight months old.  It’s a beautiful blush pink tule skirt with  a sparkly gold sequin top and lined with pink velvet trim.   This dress is very special to our family, and the more I thought about it, the more her dress provided the design inspiration in her room.  Blush pink and gold make such a beautiful combination and I couldn’t wait to get started.
Now that I had the color scheme figured out I set to work on finding her big girl bed.  I wanted something with a fabric headboard in a neutral color that would fit a full size mattress.  The Eliza tufted bed at PBK had caught my eye some time ago but was out of our budget.  I would still check the website every so often with the hope it would be on sale, and one day with amazing luck it was 60% off!  What a deal!  We snatched that baby up fast!  Now that we had the bed secured it was time to find her bedding.  I fell in love with the Mali print bedding from RH Baby and Child.   It is such a beautiful color and adds the perfect amount of sophistication to her room.  I must admit, I’m a little jealous of her bedding.
I decided to nix the sunburst mirror from her nursery design and instead chose an eclectic array of wall art from Minted and Rifle Paper Co. to display above her dresser.  I went through several different combinations of art before deciding on the right grouping.  I love the way her gallery wall turned out, it adds the perfect pop of color and interest to the room.
When I designed Pretty in Pastels Playroom last year, I purchased the IKEA dollhouse bookshelf as a starter dollhouse for Elena.  It turned out great, but it wasn’t the dollhouse I had initially wanted for her (and let’s face it, for me too).  The Plan Toys Victorian dollhouse is truly a beauty and was finally back in stock.  I painted the entire exterior in BM Simply White with a sweet blush pink door and added scrap book paper as wall paper throughout the interior of the house.  Because the new dollhouse is so much larger, I needed to purchase some additional furniture, decor pieces, and add a bathroom.  Shopping for miniatures is so much fun and much cheaper than my own home!  Here (in no particular order) are the lovely miniature shops featured in Elena’s dollhouse: One Brown Bear, Calevie, November Oak Minis, Olive Rose, Izzy’s Wonders, Mostly Miniature, and My Tiny Nest Miniatures.  The Calico Critter Tuxedo Cat family had no problem moving into their new digs, and Elena is loving the new doll house.
The rest of the room came together little by little over time.  I gave the brass wall shelves from World Market a quick coat of white spray paint and placed her Papa’s elephants upon them.  The knobs on the IKEA  Hemnes dresser and nightstand were changed to ones discovered on clearance at almost 80% off from Rejuvenation.  Score! They add just the right amount of girly glitz to compliment the dress.  While I wasn’t planning on changing the mint wall color, it unfortunately made the bed fabric look yellow and dingy.  So out with the White Mint and in with the Alabaster.  The fresh white paint softened the room beautifully.  Elena loves that we have pictures displayed throughout her bedroom of our family including a special picture taken with her birthparents when she was just days old.
I started her big girl room transition almost seven months ago and it is now finally complete.  Throughout these four years I have learned not to rush the design process and to not be afraid to change something out if it’s not working in the space. Elena’s Officially Forever dress hangs with love and is the focus of her bedroom, which makes her room my favorite in the house.

Pretty in Pastels Playhouse

Have you seen those amazingly made over playhouses on your screen lately?  You know, the ones that are nicer than your own home?  So have I, but not in my own backyard.  We purchased the playhouse almost two years ago for our daughters second birthday.  After much love and (A LOT) of labor, the house was put together with no extra frills or details and was placed in our backyard.   We had a great time playing and letting our imaginations take over.  Now almost two years later, the playhouse no longer looked loved.  The elements had gotten the best of it and the house was being overrun by the awful W’s.  Wasps and wolf spiders (eek!).  The house was just begging for a make over, and after all, I do love a good project.
After thoroughly cleaning the house, I was able to persuade my husband to help take it apart and move it inside.  Thankfully, after taking some measurements, it would fit in the playroom and so we moved it in there.   Because of it’s size, I chose to keep the colors light and bright.  I started with a good primer and brushed painted the entire house.  I then went to my go to white paint, Benjamin Moore Simply White, (this is my trim, door, and cabinet color in my house) and gave the house three good coats.  I chose a pretty blush pink for the door and top window shutters and spray painted the phone, phone holder, and planter boxes in black.  The play kitchen and food shelves fit perfectly on the back wall with two additional shelves installed above the kitchen for storage.  Since the playroom can sometimes be a little dark, I opted to keep the window areas bare and not reinstall the plastic windows that came with the house.
To complete the space I moved the art desk and it’s crayons and pencils to the opposite wall and painted the roof on the dollhouse in the blush pink to match the playhouse.  Everything else in the playroom was able to stay the same (sources all listed here).  The project took a full five days to complete and we are all enjoying having it inside.  After a much needed makeover the playhouse is now loved again!

Pretty in Pastels Playroom

When I first designed Elena’s Preschool Inspired Playroom, I wanted the room to mimic her days at preschool and it did just that!  She loved playing in the different areas of her playroom, the cafe section being her favorite.  Fast forward one year and her needs are now very different.   She is really starting to play pretend and use her imagination so much more!  This meant weeding through everything to figure out what she still plays with and what could be donated.  Of course, I excitedly accepted the challenge of a playroom update.
I wanted to build off of the idea of the “focus areas” that were already in place, but mature it up a little bit by re-configuring the space and adding new elements.  I kept the Land of Nod bookshelves but added lots of new books (and donated TONS of old ones).  I also kept the IKEA bookshelves but updated the storage bins to a darker color.  I did purchase a new table and chairs from Amazon and a new play kitchen from IKEA simply because my daughter is taller and I wanted her to be able to grow with those pieces.  Moving the art easel downstairs freed up some space in the corner which allowed a great little desk and stool from IKEA to utilize the space.  I love that her artwork is still displayed and she now has her own little calendar to keep track of events.
The IKEA Duktig play kitchen and IKEA Flisat dollhouse are probably my favorite things in her playroom.  I scoured Pinterest for ideas on how to hack out the kitchen and found a great tutorial here.   The cute little dish sets are also from IKEA.  Yes, they are glass (eek!), but they have proven to stand up to some rough play.  The mounted little shelves that hold the adorable play food are IKEA Bekvam spice racks.  Another simple and great hack!  The adorable painted wood shelf was hand made by my husband’s best friend and fits perfectly in the new space.  Elena loves to cook and make cereal (of all things) in her new play kitchen.  She even leaves her dishes in the sink for me to clean up, how nice of her!
The dollhouse has been such a fun thing to do with her.  I painted the exterior and roof so that it would compliment the room.  Once painted and put together I got to work finding the cutest little dollhouse furniture and accessories.  Most of the items in the house came from here, here, and here.  I added my own little original canvas art in the living room.  I also added a little outdoor area with a cute little fence and BBQ area.  Note to self, Gorilla Glue is STRONG!  Her little Calico Critters family moved in and feels right at home!  My daughter sits and plays in her dollhouse for hours.
While I initially wanted everything to be from Pottery Barn Kids, it just simply wasn’t in the budget, and truthfully I’m so happy that I didn’t go that route.  This was my first real DIY project with sanding, painting, and building and I really enjoyed it!  Most everything that was purchased new was from IKEA, Target, and Amazon.  This little pastel playroom was so fun to put together and I’m hoping my daughter will love it for years to come.