We spotted the room Nancy designed for her future niece or nephew in our gallery and asked her if she wouldn’t mind sharing a little tutorial. Since the project was already completed, Nancy had to improvise a little to share with us. Thanks, Nancy!
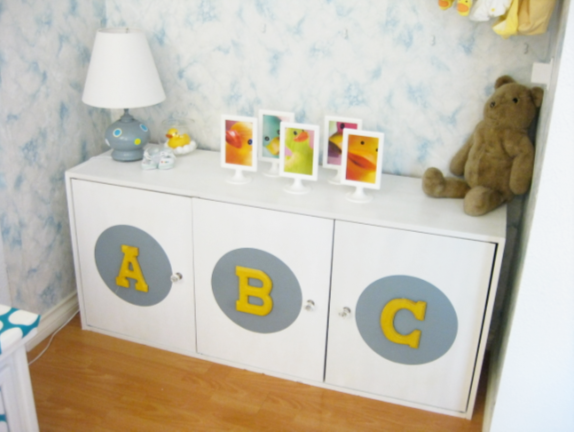
Over a decade ago, my mother bought a storage unit in the “As Is” section at Ikea. Three houses later, it was still sitting in the garage. As soon as I spotted it, I knew exactly what I wanted to do with it, and as luck would have it, it fit perfectly into the newly open closet of my sister and brother-in-law’s nursery. Sometimes my mom’s garage is better than a thrift shop!
First I removed the existing plastic handles, then I used wood filler to fill in the screws on the top of the unit, nicks on the edges and holes from the old handles. This was my first time working with wood filler, and it worked great! After the wood filler dried, I sanded the unit down and gave it a new coat of white paint—the paint I used already had primer added to it.
I replaced the old handles with crystal knobs that I picked up from Home Depot for $4.99 each. I knew I wanted a circle behind each letter I planned to place on the cabinet, but I wasn’t about to hand paint the circles. I did that once before…
I lucked out at a local variety store that had these plastic placemats. They were the perfect size, not to mention only $2 for a pack of four! I just had to trim the leaves to make it a perfect circle.
Next I used two coats of Rustoleum spray paint in Winter Gray on the placemats (I should have primed them first because the paint didn’t adhere well to the plastic). Once dry, I used 3M Spray Adhesive to adhere the circles to the center of the doors. I used to buy wooden letters from Michaels until I found them at The Dollar Giant! All they needed was a little sanding, and then they were ready to be spray painted yellow. I used velcro to adhere the letters to the grey circles so they can be interchangeable. You can go from A B C to 1 2 3 or even the baby’s initials!
There you have it—as easy as ABC! Total cost of this DIY project: ~$30!
Supplies: old cabinet, wood filler, sand paper, paint, new handles, placemats, spray adhesive, spray paint, wooden letters, velcro
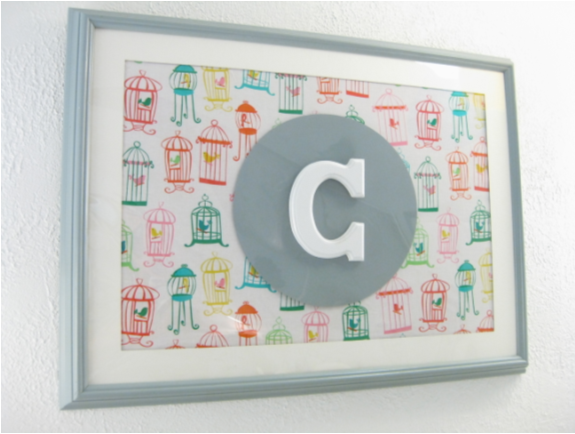
BONUS PROJECT: Since there was one placemat left, I used it in the same application for a monogram framed picture. I found the frame at the Salvation Army for $5 and spray painted it in the same gray. The birdcage pattern is left over fabric from cushions I made. The glass that came with the frame was damaged, so I just got some clear mylar at an art store and glued the letter on top of it for a 3-dimensional quality. The C is perfect as it reflects both mom and dad’s last name. Once the baby is born, I’ll change it to the baby’s initial.






Comments
Festive Party Girl - Angie
What a great idea to put velcro on the letters so you can change them to numbers and the baby’s initials. This is a great DIY project. Thanks for sharing!
Melisa
Thank you so much for sharing Nancy! We love your creativity in this room.
Pam
Thanks for ALL the great and creative tips Nancy.
Susie
I love those cabinets. What a great way to incorporate letters in your child’s room.
rose
Cool DIY project. I hope I have some cabinets lying around in my attic. Or that I had a mom with a garage full of items I could steal and refurbish.
Haley
Keep the DIY tutorials coming. I so so so love them!
Nancy
Thanks everyone for your comments!