I finally tried creating a freezer paper stenciled shirt, and it was so easy. I’m kicking myself for not trying it earlier. I’ve missed out on making so many cute onesies and tiny t-shirts!
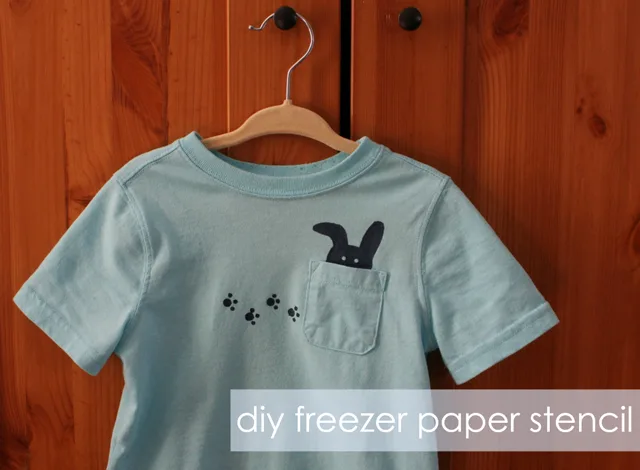
The cool thing about freezer paper is that it’s backed with plastic, which allows you to temporarily adhere it to fabric when you apply a hot, dry iron. It works great for stabilizing fabric for quilting and applique work, but it can also be used to create a fabric stencil.
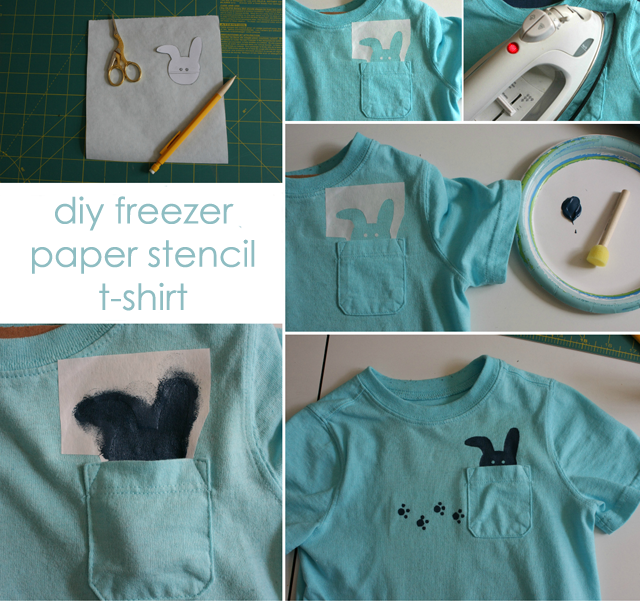
Here are the steps I used to create a freezer paper stenciled shirt for my son.
Materials: cotton t-shirt or onesie, freezer paper (I used Reynolds, found in the grocery store), small pointy scissors, iron, piece of cardboard, fabric paint, stencil brush, Q-tips
First decide on your design. I sketched out my design on a piece of paper, cut it out and then traced it onto the freezer paper.
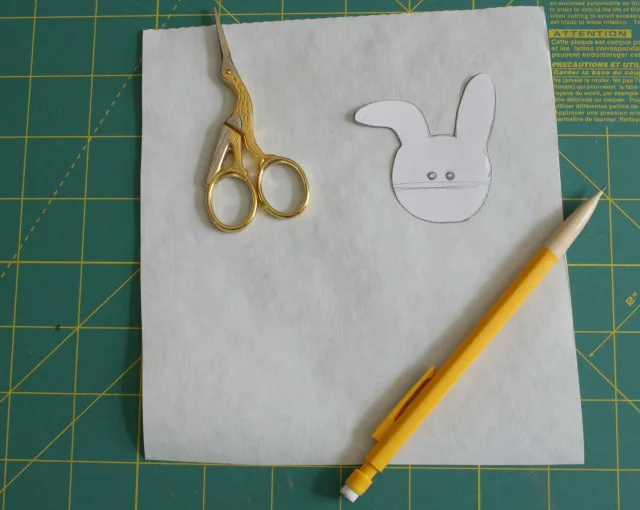
If you’re a more confident artist, you can draw directly on the freezer paper. You’ll want to place the freezer paper shiny side down onto your shirt, so keep that in mind when orienting your design (especially important if you use words as part of your design).
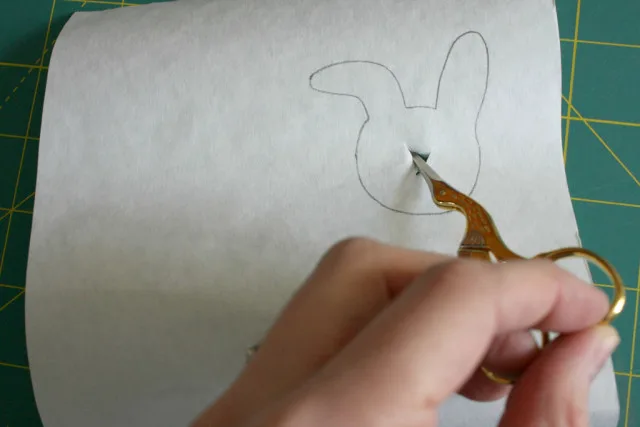
Cut out the stencil. I used sharp, pointy scissors to poke a hole in the center of my design, and then carefully cut around the outside. I imagine you could use an exact-o knife and cutting mat if you have a more intricate design.
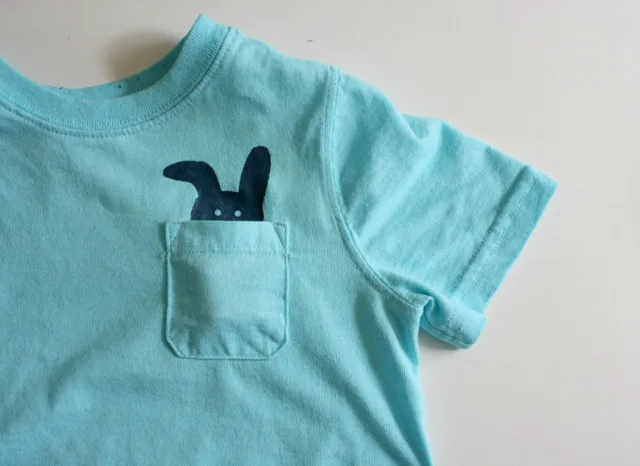
Place your stencil on your shirt (shiny side down); I used a hole punch to create the little circles of freezer paper for the bunny’s eyes. I decided it would be cute to have a bunny peeking out of the pocket since Easter is coming up soon, and my two-year-old loves a good joke. Granted, having the stencil inside the pocket does make things a little trickier. Using a hot, dry iron, adhere the stencil to the shirt, being especially careful that the inside edges are well adhered.
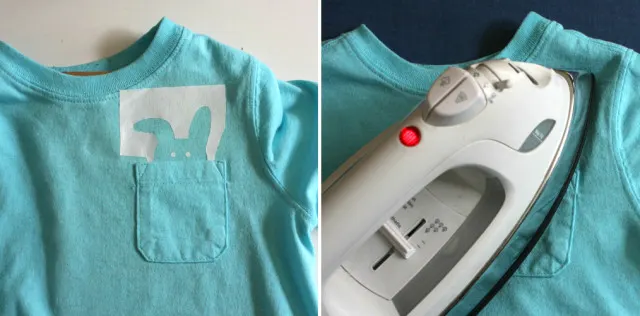
Insert a piece of cardboard inside your shirt to protect the back of the shirt from any paint soaking through. Follow the directions on your particular brand of fabric paint, and pounce the paint onto the shirt inside the stencil.
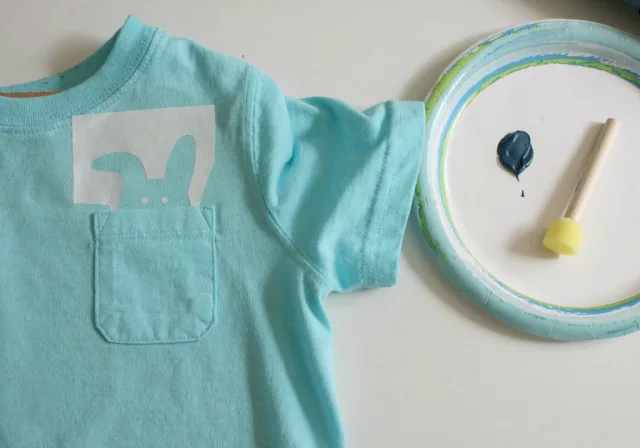
Just like any stencil, use an up and down motion rather than any sweeping motions to try to avoid any paint seeping under the stencil. The freezer paper works well, but with knit fabrics especially, there are lots of channels for the paint to find its way through. I found Q-tips worked well for getting into some of the smaller sections of my stencil. Don’t oversaturate the shirt with paint. Put on just a little at a time. The only spots I got fuzzy edges are areas where I had applied too much paint.
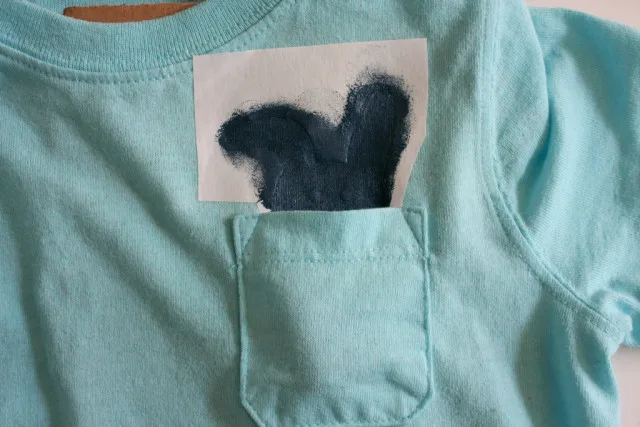
I pulled my stencil off just a few minutes after I’d finished.
I also added some footprints to the shirt. I used two different sized hole punches to create the tiny holes.
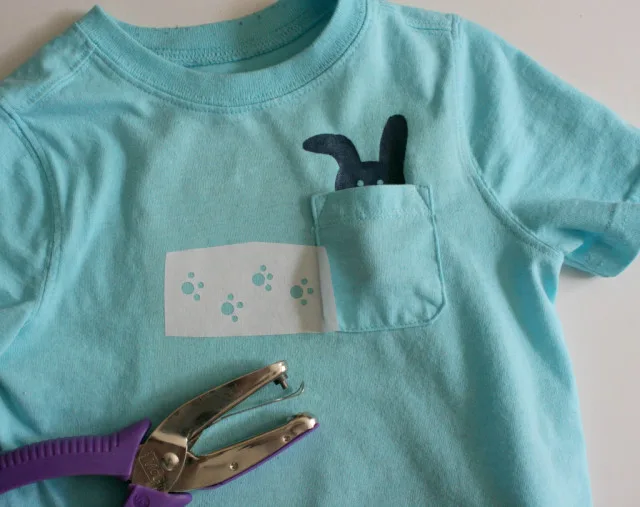
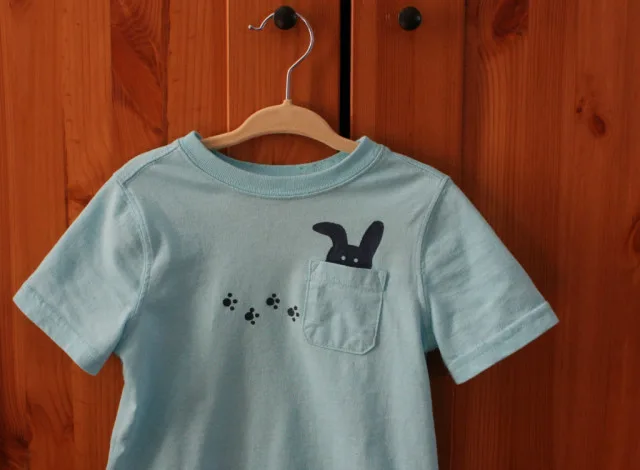
Follow the drying and washing instructions on your paint. Just think of all the fun personalized shirts you can make!

Try This Website
Wednesday 20th of July 2016
After you narrow down your options, it's strongly encouraged to order each of the t-shirts your self to make an informed final decision.
15 Cool Freezer Paper Stencil Designs | Guide Patterns
Saturday 2nd of July 2016
[…] Bunny Stenciled T-Shirt […]
Sally
Thursday 28th of April 2016
Hi! Can the stencil be reused if making multiple tshirts or does a new stencil need to be made for each?
Beth
Thursday 28th of April 2016
Hi Sally, I didn't try reusing the stencil, but I see a couple people online have had success. I would imagine the freezer paper will only adhere so many times. If you give it a try, take care with your iron since after the first application you will have paint on that side of the paper and it could transfer onto your iron. Good luck. Let us know how it goes!
Carissa
Saturday 13th of June 2015
I don't know whether it's just me or if everyone else encountering problems with your blog. It appears as if some of the text in your content are running off the screen. Can someone else please comment and let me know if this is happening to them too? This may be a problem with my internet browser because I've had this happen previously. Appreciate it
Beth
Monday 15th of June 2015
Hi Carissa, Can you send a screen shot of what you are seeing to editor@projectnursery.com? We have not heard this complaint before. Thank you!
Julie
Wednesday 26th of March 2014
Possibly the cutest freezer paper stenciled shirt ever. Love the way you included the pocket in the project!
Beth_PN
Tuesday 1st of April 2014
Thank you, Julie! Glad you like it!