Let’s talk studded wall letters. My clients often ask how they can include their baby’s name within the design of the nursery space. Wooden wall letters and monograms are great traditional options. Personally, I pull a lot of inspiration from fashion, pop culture and music trends. So blast the Ramones, mess up your hair, and let’s get punk! Metal studs are a classic symbol of the punk aesthetic. Right now studs are a huge trend in fashion, and they’re even trickling into home decor! Being an early adopter of new trends, I wanted to play with this edgy material and mix it in for our littlest punk rockers out there.
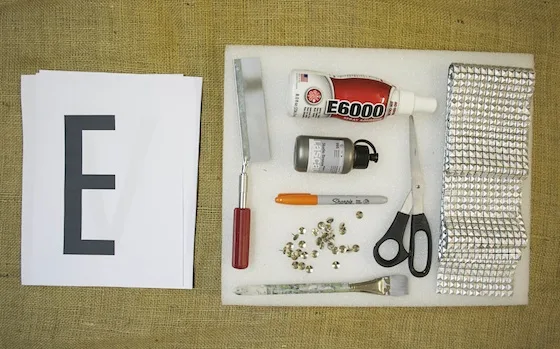
I headed to my local art supply store to pick up some silver paint and then to NYC’s garment district to buy some studs. I bought mine by the yard at Joyce Trimming. I also tried out the new fantastic E6000 glue spray, which is odor free—so punk yet no funk. You’ll also need Styrofoam (I rescued mine from the recycle bin, but you can also find it at a craft store), paper, scissors, pen or marker, paint, paintbrush and something to cut the Styrofoam with.
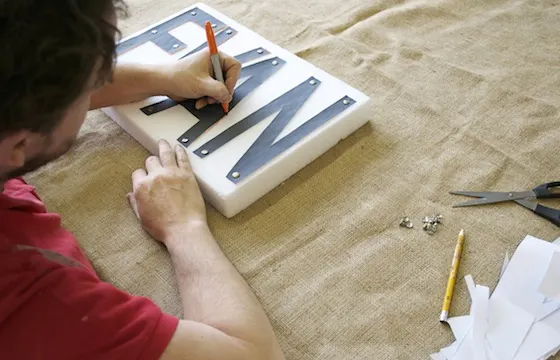
First I printed out the letters of the name in the size I wanted. After cutting the paper letters, I secured them to the styrofoam with thumbtacks to make it easier to trace with my sharpie.
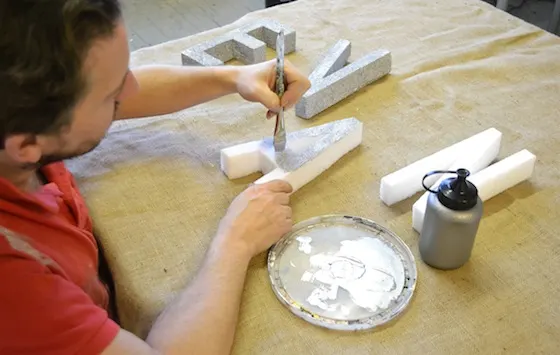
I then cut out the letters using a crafter’s mini saw (a good serrated knife also works). I carefully cut out each letter, keeping the blade at a ninety degree angle to the face of the letters. I wanted them to be as clean and “blocky” as possible. Looking at these pictures now, I’m realizing I totally should have had a mohawk for this post.
Next you’ll want to paint the letters. I used one of my personal paints Lascaux Studio Bronze paint in aluminum. This stuff is DA BOMB! It’s super opaque, goes on like butter and looks like liquid metal. It is a little more expensive but worth every penny. Painting the letters silver before applying the studs helps mask mistakes.
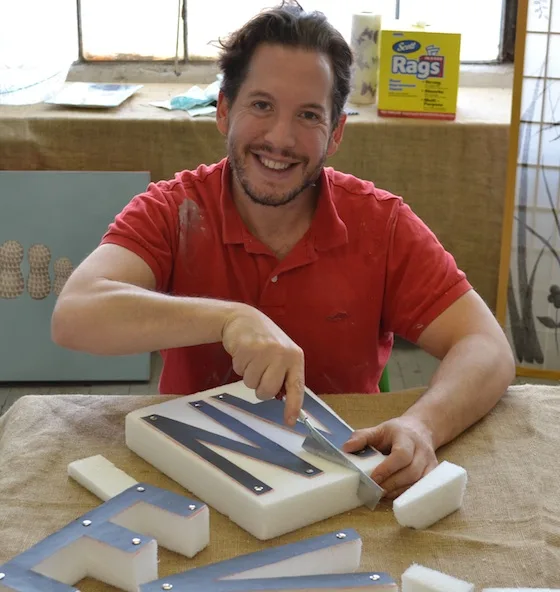
Now, it’s time to get studly. I chose studs that came in 4″ rolls, which I could cut easily. I cut all the shapes out first, piecing them together on the styrofoam before gluing. When you’ve pieced everything together, set the studs to the side and spray the letters with E6000 glue. Wait until it is tacky, and then place the strips of studs to the letters in the appropriate places.
I glued down one side at a time, letting each side dry in between. For angled letters like the A, V or N, I layered the studs on top of each other, creating a smart looking seam where necessary.
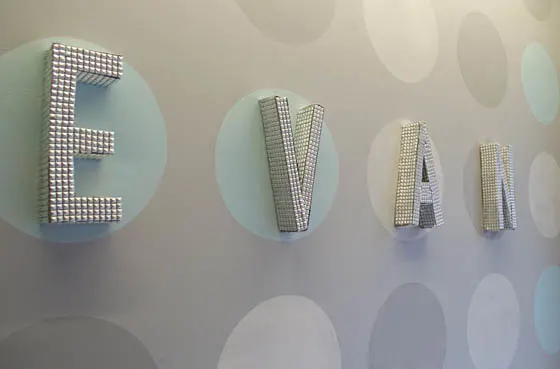
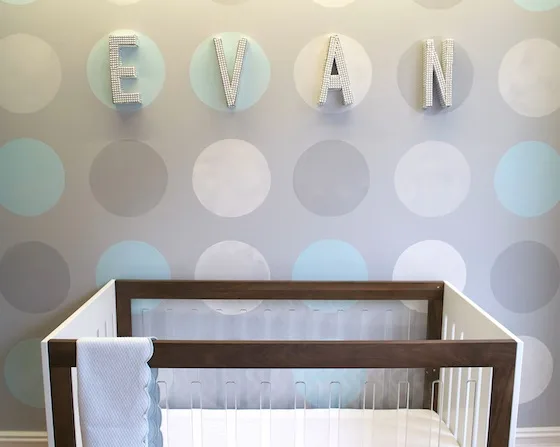
The finished project is very sharp looking with a clean industrial feel—perfectly punk for your little Sid, Nancy…or, in this case, Evan. Special thanks to Petit Pram, in Cedarhurst NY, who graciously let me shoot the finished project in their showroom. Rock on.


Craft: 21 DIY Styrofoam Letters – CrochetingHearts.org
Tuesday 25th of February 2020
[…] Styrofoam Wall Letters […]
25 DIY Styrofoam Letters Craft Ideas
Monday 10th of June 2019
[…] Styrofoam Studded Wall Letters: DIY […]
21 DIY Styrofoam Letters | Guide Patterns
Tuesday 22nd of March 2016
[…] Styrofoam Wall Letters […]
Jessy Drastic
Tuesday 15th of December 2015
Love this idea..! The studded trim is cheap on Joyce Trimming's website, only $12 / yard. Thanks for posting this.!
@HintMama
Thursday 30th of January 2014
Beautiful letters. I wish I had come across this idea (and wish I was more crafty) before I spent a ton of money on letters for my daughter's nursery. More on that (and an easy DIY letter idea for the non-crafty) here: http://hintmama.com/2014/01/30/todays-hint-diy-budget-friendly-nursery-wall-letters/