A playful superhero cape for a child has been on my “DIY To-Do List,” so recently, when I was invited to dinner at a friend’s house who happens to have a little boy and girl, I thought what a perfect gift to bring along—his and her superhero capes! I personalized them with each of their initials. Just remember, when little ones are playing with their cape, they should be closely supervised because of the ribbon ties.

All you need is some fabric, a few craft supplies, a bit of creativity and you are ready to go!
Here are the steps to make your own:
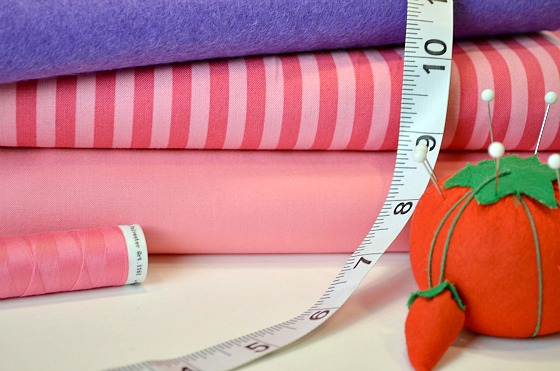
Materials:
1/2 yard to 3/4 of a yard of fabric, depending on the size cape you will make
Felt (complementary color)
Steam-A-Seam
Ribbon – approximately 1 1/2 yards, depending on the size of your cape and how long you want your mask ties
Regular scissors and pinking shears
Tape measure
All-purpose sewing thread
Sewing machine & sewing needle
Frixion pen or fabric marking tool
Cape Emblem and Mask template
*Use a 1/4″ – 1/2″ seam allowance (the distance from your seam to the edge of your fabric)
Step 1: Determine the size of your cape by measuring your child from behind, shoulder to shoulder. Take this measurement and add 6” – 8” depending on how wide you want your cape. Measure from the nape of the neck to where you want the bottom of your cape to hit and add 2 1/2”; this will be the length of your cape. For example, my friend’s daughter is about 15” shoulder to shoulder, so I made my cape 22” wide; the length measurement was about 36”, so I cut my cape to be about 38” long.
Step 2: Cut your fabric based on the measurements from Step 1.
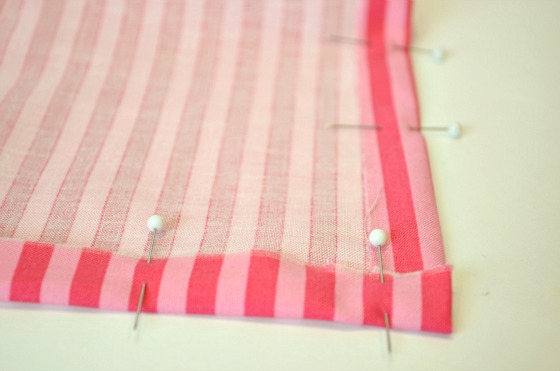
Step 3: Prepare the cape by turning up the hem and the sides towards the wrong side of the fabric about 1/2”. I like to iron the folds in place first, pin and then sew down. This will give your cape nice finished edges.

Step 4: At the top of the cape, fold over the fabric about 1 1/2”; this is the encasing that holds the ribbon, which will be used to tie the cape. Pin and sew down the bottom edge of the fold to create a tunnel.


Step 5: Now prepare the personalized cape “logo” for the cape, as well as the mask. Print and cut out the template (provided above) for both. Pin down on the fabric or felt you have chosen to use and cut out. You can use the emblem shape I have provided or design a custom shape. I chose to use a giant initial as my logo. I drew my initial, but here are some free alphabet stencils you can download and print to use—just make sure to size appropriately. I cut out the initial using pinking shears, giving it a unique edge.
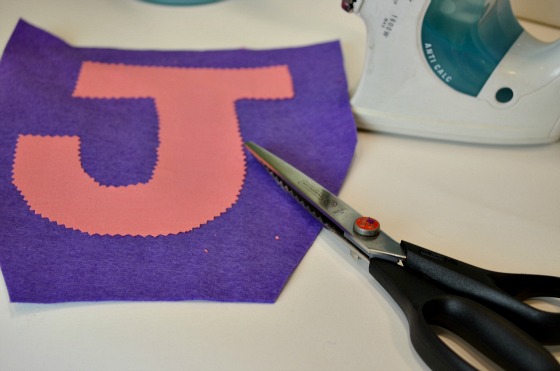


For both the emblem and initial, I used an iron-on fabric adhesive called Steam-A-Seam. You iron it on the wrong side of your fabric or felt, trace and cut out your shape and then peel off the backing. Put it on the cape where you want it and iron in place. To secure it more and add a decorative touch, I sewed both in place using a zig-zag stitch along the edges. I would suggest placing your logo about 3″ – 4″ from the top.

Step 6: Using a safety pin, thread your ribbon through the “tunnel” you created at the top of your cape. Pull it through leaving about 6” on each end to tie (if you want to tie a bow, leave more ribbon hanging). I suggest sewing the two holes closed after you have your ribbon where you want it, so that it won’t come out.
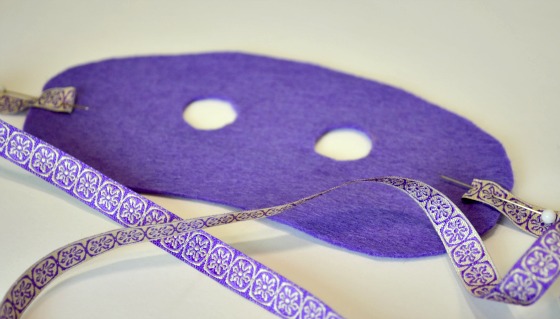
Now onto the mask.
Step 7: After you have cut out the mask shape, take the remaining ribbon and cut it into two pieces. Sew one piece at each side in the center; these will be your mask ties. Make them as long as you like. You can also sew an elastic to the mask if you prefer.

Now you’re all done!

Some tips:
If you do not have a sewing machine, you can use a hand sewing needle and thread to sew up the sides, hem and create the encasing, and then use fabric glue to create the emblem and logo and attach the ribbons to the mask.
Opt for fleece as a “no-sew” option—fleece does not need to be hemmed, and you can then either cut a hole at the top corners and tie a ribbon through each or you can attach some sticky velcro instead for the closure.
8 CAPAS DE SUPER-HERÓI FÁCEIS DIY – Boas ideias para sua casa e cozinha
Tuesday 9th of February 2021
[…] Viveiro criou este deslumbrante capa de super-herói e tutorial de máscara. Esta capa caseira usa uma fita para manter a gravata segura, então esta é provavelmente a melhor […]
Jacquiline Bertny
Friday 22nd of March 2013
This is cool. Maybe next time it will be a tutorial for a DIY princess costume? :D
Stella
Monday 1st of April 2013
Or maybe a batman and spiderman costume? Haha
Andrea Lowe
Tuesday 26th of March 2013
Haha, *hint* *hint*