Most store-stocked window panels come in a pretty standard 84″ length. This would be great if the header height of my windows were at exactly 7 feet, but mine happen to be 8 feet. The cost of custom window treatments wouldn’t exactly be budget-friendly. Even if you do have a header of 7 feet, I would still recommend not hanging your panels at the exact height of the window. I prefer to hang my treatments 6″ above the header or 6″ below ceiling height. I feel visually this helps to extend the room vertically. When panels are hung at window height, it tends to chop up the vertical lines of the room, making the room feel a little more closed in.
So…I found the perfect pre-made panels for Bennett’s nursery at Home Depot by Martha Stewart for $14.99 each! The problem? The store only stocks the standard 84″ length. Longer lengths are available online, but that meant waiting. Oh, what is a DIY girl to do? Well, I had to find a way to make them work; the fabric and colors were just too perfect to pass up. So off I went to JoAnn’s to scout out some fabric options to extend my panels. I love to mix patterns and already had an idea of what I was looking for. I also wanted to use this opportunity to bring another color into the room to tie it all together. The color scheme we ended up with for the nursery is a soft pewter, butter yellow and sea glass.
 From Left to Right: Behr Paints –
#1 Dolphin Fin, #2 Banana Cream, #3 Tide Pools
Here is a close-up of the panel fabric, and to complement it, I found a super sweet white dot, buttery yellow fabric that would work perfectly in the room.
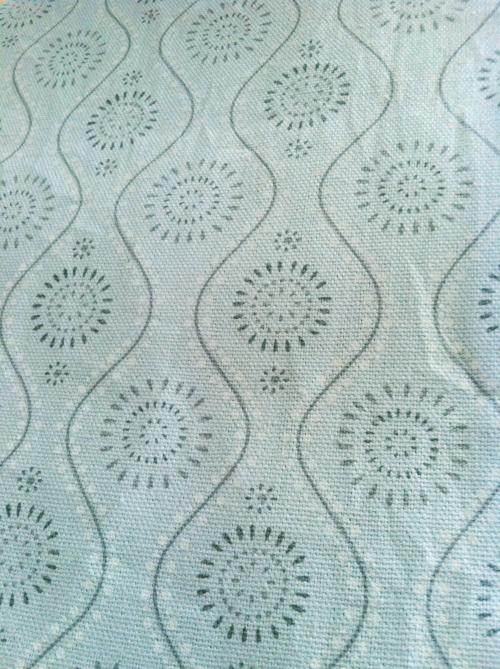
Now, quilting fabric (which my selection is) typically comes in 45″ width, and home upholstery fabric comes 54″ wide. This is something to keep in mind because the way the fabric comes off the bolt can affect how your pattern lays out. I needed to purchase the length to accommodate the width of the panels. In the end, I needed two pieces that measured 56″ W x 20″ H, so a total of two yards was needed.
Now this entire project can be done with a no-sew technique using heat bond tape, but I opted to do a little simple sewing. I created a 1.5″ hem on each extension with both sides turned in two times at 1.5″. Once the panel blocks were sewn and ironed, I attached them to the finished edge of my pre-made panels. It’s best to wait to hang the curtain rod until you are done with the hemming process; that way you can make height adjustments as needed.

Total Project Time: 1 hour per panel
Materials: (2) pre-made window panels @$14.99 ea., 2 yards of fabric on sale @3.99/yard
Total Project Cost: $18.98 per panel, which still came in at less than purchasing the next length up
Skill Level: Beginner (NOTE: I am not an experienced sewer, so this project is super easy even for a beginner. I thought the most challenging part was getting the measurements correct)

Ever tackled your own window treatments? Share with us your time-saving tips; we’d love to hear!
Clone of 15 Nursery Window Treatment Ideas - Your House Needs This
Monday 31st of January 2022
[…] perfect for unusually long windows, but it’s also a creative way to work with a two-color theme. In this article, Rebecca Propes describes how she added on to existing curtains to make beautiful and long […]
15 Nursery Window Treatment Ideas - Your House Needs This
Tuesday 25th of January 2022
[…] perfect for unusually long windows, but it’s also a creative way to work with a two-color theme. In this article, Rebecca Propes describes how she added on to existing curtains to make beautiful and long […]
Chelsea
Saturday 19th of September 2015
love this idea! What fabric material did you buy from JoAnns? Does it have to be the same as the panels you bought?
Briana
Tuesday 11th of November 2014
Yes I would love to know the name or color of the fabric please!
Leah Smith
Saturday 16th of August 2014
Hey there, Do you happen to remember the name of the curtain or the color? Love the entire room!