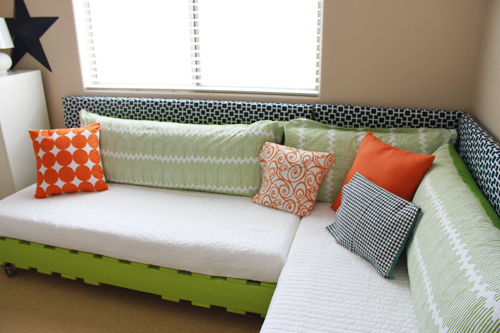
First off…thank you so much for all of the wonderful feedback regarding the bed tutorial. Today I will share with you part two of the DIY projects that are taking place in my boys’ room.
Not only did I want to add a designer decorative touch to the new room, but I also wanted to keep grubby little hands and feet off my walls! So the solution? Headboards that wrapped the entire length of both beds.
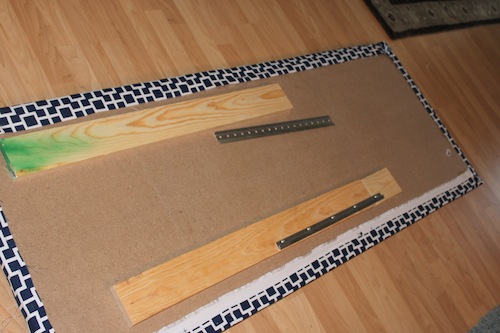
I opted for pressboard for the backing of the headboards; at my Home Depot, it was available in 24″ H x 48″ L sheets. My finished length needed to be 64″ on one side and 92″ on the other side, so I did have to piece them together using 1″ x 4″ boards attached to the pressboard with 1″ screws for support to achieve the desired length.
This is how it was layered from bottom to top: fabric, batting, 1″ foam, pressboard (I used the pressboard as my template). No math skills here—just wingin’ it!

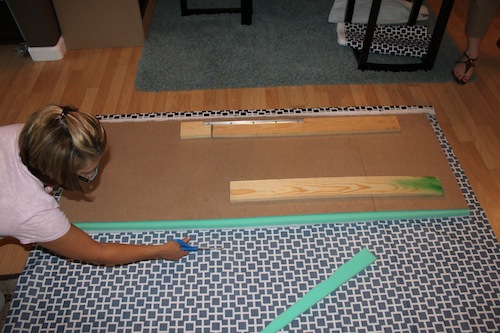
I used the graphics in my fabric to line everything up, then I used a staple gun to secure the fabric to the pressboard.

I secured french cleats, found at Home Depot, to the 1″ x 4″ to attach to the wall. What is a french cleat? Glad you asked; follow this link to see one of my favorite ways to mount heavier items to a wall. Oh, and did I mention each panel is removable? Oh, yes!
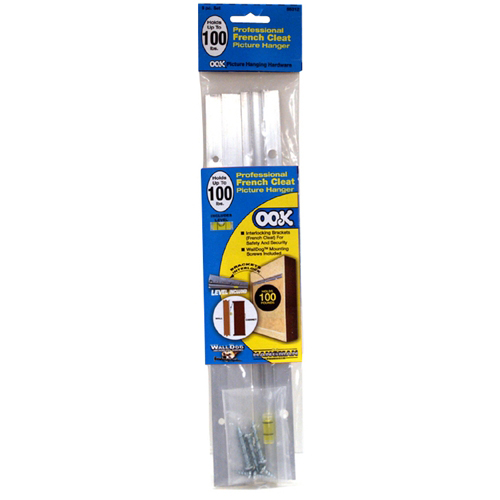
One half of the french cleat attaches to the panel, and the other part secures to the wall; then they just interlock together. Super quick, totally secure and easily removed from the wall.
TIP: If you aren’t going into a stud, I recommend using drywall anchors.
Due to the length of the panels I needed, it was easiest to make and install the headboard in three pieces. Have a great DIY project? Let us know by commenting on this post.


Materials Needed:
Pressboard 24″ H and cut to desired length
1″ Thick Foam (the foam I used was 24″ H x desired length)
Polyester Batting
Fabric (yardage based on length of panels)
Staple Gun
French Cleats (1 per panel)
Drywall Anchors
1″ Wood Screws
Level
Scissors
Perfect Toddler Headboard Ideas Designs | House of Headboard Inspirations
Monday 4th of September 2017
[…] diy make a headboard for your childs bed Toddler Headboard Ideas Size: 500 X 333 | Source: projectnursery.com […]
Awesome Styrofoam Headboard Ideas Inspirations | House of Headboard Inspirations
Monday 7th of August 2017
[…] diy make a headboard for your childs bed Styrofoam Headboard Ideas Size: 500 X 333 | Source: projectnursery.com […]
Toddler Boys Room DIY Budget Makeover - Petite Party Studio
Wednesday 23rd of September 2015
[…] DIY Budget Makeover. We originally featured the pallet bed DIY on Project Nursery, Part 1 and Part 2 and it has also been seen on HGTV, People.com and all over Pinterest. So we thought it was about […]
seragam batik
Monday 14th of September 2015
I'm curious to find out what blog system you have been using? I'm experiencing some small security issues with my latest website and I'd like to find something more risk-free. Do you have any solutions?
DIY Headboards - Project Junior
Monday 20th of October 2014
[…] above! A lot of parents are trying their hand at DIY headboards because, as Rebecca shared in her DIY headboard tutorial, it can be a pretty simple project depending on how ambitious your design […]